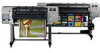
HP Designjet L25500 HP Designjet L25500 Printer Series - 42" and 60"
HP Designjet L25500 Manual
 |
View all HP Designjet L25500 manuals
Add to My Manuals
Save this manual to your list of manuals |
HP Designjet L25500 manual content summary:
- HP Designjet L25500 | HP Designjet L25500 Printer Series - 42" and 60" - Page 1
HP Designjet L25500 EN 42" and 60"-in printer Assembly Instructions DE Montageanleitung für 42-Zoll- und 60-Zoll-Drucker IT Stampante da 42" e da 60" Istruzioni per l'installazione RU 42 60 42" ve 60"yazıcı içi Montaj Yönergeleri 42" και 60 © 2009 Hewlett-Packard Company Large Format Division - HP Designjet L25500 | HP Designjet L25500 Printer Series - 42" and 60" - Page 2
Remove the packaging 1 2 3 Entfernen der Verpackung Rimozione dalla scatola di imballaggio Paketi açma 5' x2 3 m 10 ft Cut the straps, open the box and remove the top cover and the box from the printer. Carefully cut the straps around the boxes. Make sure that the boxes don't fall - HP Designjet L25500 | HP Designjet L25500 Printer Series - 42" and 60" - Page 3
4 x2 Remove the boxes shown. Nehmen Sie die gezeigten Kartons herunter. Rimuovere le scatole mostrate Gösterilen kutuları alın Assemble the stand Zusammenbauen des Standfußes Assemblaggio del piedistallo Sehpayı monte etme 20' x2 5 6 Open the box that contains the stand. Remove the two - HP Designjet L25500 | HP Designjet L25500 Printer Series - 42" and 60" - Page 4
7 8 9 10 x4 Locate the bag of screws and the screwdriver provided. Notice that the screwdriver is slightly magnetic. Because spare screws are supplied, some screws will remain unused after assembly of the printer. Nehmen Sie den Beutel mit den Schrauben und den Schraubendreher aus dem Karton. - HP Designjet L25500 | HP Designjet L25500 Printer Series - 42" and 60" - Page 5
11 x2 12 13 x4 14 x2 Use two screws on the outside of the left leg to attach the left leg to the cross-brace. Befestigen Sie das linke Standbein an der Außenseite mit zwei Schrauben an der Querverstrebung. Utilizzando due viti sul lato esterno del piede stabilizzatore sinistro, fissare il - HP Designjet L25500 | HP Designjet L25500 Printer Series - 42" and 60" - Page 6
15 16 17 18 x4 x4 Use four screws to attach the cross-bar to the legs. Befestigen Sie die Querverstrebung mit vier Schrauben an den Standbeinen. Utilizzando quattro viti, fissare il sostegno ai piedi stabilizzatori. Destek gergi çubuğunu bacaklara sabitlemek için dört vidayı kullanın. - HP Designjet L25500 | HP Designjet L25500 Printer Series - 42" and 60" - Page 7
den linken Abstandhalter an der Oberseite des linken Standbeins. Er muss hörbar einrasten. Collegare il distanziatore sinistro del piedistallo alla parte superiore del piede stabilizzatore sinistro. Scatterà in posizione. 7 Sehpanın sol ara desteğini sol bacağın üstüne takın. "Tıklama" sesiyle - HP Designjet L25500 | HP Designjet L25500 Printer Series - 42" and 60" - Page 8
Collegare il distanziatore destro del piedistallo alla parte superiore del piede stabilizzatore destro. Sehpanın Attach the printhead cleaning container holders. Do not install the printhead cleaning container yet temizleme kabını takmayın. Attach the printer engine to the stand Aufsetzen des - HP Designjet L25500 | HP Designjet L25500 Printer Series - 42" and 60" - Page 9
pieces from the top (60-inch printer only) and two pieces from the side as shown. Entfernen Sie wie gezeigt die zwei oberen (nur 60-Zoll-Drucker) und die zwei seitlichen Verpackungsstücke. Rimuovere due supporti di imballaggio dalla parte superiore (solo stampante da 60") e due supporti dai lati - HP Designjet L25500 | HP Designjet L25500 Printer Series - 42" and 60" - Page 10
olduğundan emin olun. x4 Rotate the printer onto the Take-up Reelbox and the supplies box. HP recommends four people to complete this task. Kippen cui è presente il materiale antiscivolo non toccano il pavimento. 10 Yazıcının arkası yedek kutu ile sarf malzemeleri kutusuna dayanmış, kaymay - HP Designjet L25500 | HP Designjet L25500 Printer Series - 42" and 60" - Page 11
Yazıcıyı dik konuma getirmeden önce yatağını üzerinden alın. x4 Use the hand holds at the rear of the printer engine to carefully lift the printer to its upright position. HP recommends four people to complete this task. Heben Sie den Drucker unter Zuhilfenahme der Haltegriffe an der Rückseite - HP Designjet L25500 | HP Designjet L25500 Printer Series - 42" and 60" - Page 12
38 Assemble the take-up reel x1 Installieren der Aufwickelvorrichtung Installazione del rullo di tensione Makarayı takma 39 40 Screw the printer tube to the stand. Befestigen Sie die Druckerleitung mit einer Schraube am Standfuß. Collegare il tubo della stampante al piedistallo. - HP Designjet L25500 | HP Designjet L25500 Printer Series - 42" and 60" - Page 13
41 x2 42 43 x2 44 Insert two screws into the two forward holes. Leave sufficient space between the screw heads and the leg to the take-up reel motor to the parallel port at the rear of the printer. Schließen Sie das Parallelkabel des Motors der Aufwickelvorrichtung an den Parallelanschluss auf - HP Designjet L25500 | HP Designjet L25500 Printer Series - 42" and 60" - Page 14
screws into the two forward holes. Leave sufficient space between the screw heads and the leg to attach the left side of the take-up reel und ziehen Sie dann alle Schrauben fest. Utilizzare una vite per fissare la parte posteriore del lato sinistro, quindi stringere le tre viti. 14 Bir vidayı - HP Designjet L25500 | HP Designjet L25500 Printer Series - 42" and 60" - Page 15
x1 Use four screws to attach the take-up reel loading table supports. Befestigen Sie mit vier Schrauben die Halterungen für den ladetisch der kleme tablası desteklerini takın. IMPORTANT Move the printer to its final location. Once the TUR sensor is installed, the wheel is locked. WICHTIG - HP Designjet L25500 | HP Designjet L25500 Printer Series - 42" and 60" - Page 16
Ende des Kabels an der Sensoreinheit auf dem rechten Standfuß an. Collegare il cavo del sensore alla parte posteriore del motore del rullo di tensione. Collegare il cavo del sensore al sensore posto sul piedino destro. Algılayıcı kablosunu makara motorunun arkasına takın. Algılayıcı kablosunu - HP Designjet L25500 | HP Designjet L25500 Printer Series - 42" and 60" - Page 17
60 Attach the take-up reel loading table by inserting the left side of the loading table into the left support, and then inserting the right side of the loading table into the right support stand attaches to the printer. Schieben Sie das contains the take-up reel spindle. Nehmen Sie die mittlere - HP Designjet L25500 | HP Designjet L25500 Printer Series - 42" and 60" - Page 18
Siyah renkli yuvanın plastik somununu gevşetin Slide the black hub onto the spindle up to one of the two marks. The mark furthest outside is for rolls of 60". The mark furthest inside is for rolls of less than 60". Schieben Sie den schwarzen Anschlag bis zu einer der beiden Markierungen auf - HP Designjet L25500 | HP Designjet L25500 Printer Series - 42" and 60" - Page 19
am blauen Anschlag. Allentare il dado di plastica sul mozzo blu Mavi renkli yuvanın plastik somununu gevşetin Slide the blue hub onto the spindle. Tighten the plastic nut on the blue hub. Schieben Sie den blauen Anschlag auf die Spindel. Ziehen Sie die Rändelmutter am blauen Anschlag fest - HP Designjet L25500 | HP Designjet L25500 Printer Series - 42" and 60" - Page 20
the take-up reel spindle into the printer by pushing firmly on each end of the spindle. Setzen Sie die iterek yazıcıya takın. See the User´s Guide for information about how to use the take sull'utilizzo del rullo di tensione, consultare il Manuale dell'utente. Makaranın nasıl kullanılacağı - HP Designjet L25500 | HP Designjet L25500 Printer Series - 42" and 60" - Page 21
Pass the Gigabit Ethernet cable through the hook at the rear of the printer. Führen Sie das Gigabit Ethernet-Kabel durch den Haltehaken an der Fare passare il cavo Gigabit Ethernet attraverso il gancio sulla parte posteriore della stampante. Gigabit Ethernet Gigabit Ethernet kablosunu yazıcının - HP Designjet L25500 | HP Designjet L25500 Printer Series - 42" and 60" - Page 22
76 Einsetzen der Tintenbehälter Installazione delle cartucce di inchiostro Mürekkep malzemelerini takma 77 78 45'' x1 Ink cartridges not supplied with the printer. Der Drucker wird ohne Tintenbehälter geliefert. Le cartucce di inchiostro non vengono fornite con la stampante - HP Designjet L25500 | HP Designjet L25500 Printer Series - 42" and 60" - Page 23
message may appear asking you to upgrade the firmware. If so, upgrade the firmware, following the instructions from the Maintenance and troubleshooting guide. Wenn gemeldet wird, dass die Firmware ink cartridge drawer, gently pull down on the blue handle, and then slide out the ink cartridge drawer - HP Designjet L25500 | HP Designjet L25500 Printer Series - 42" and 60" - Page 24
Push the ink cartridge drawer back into the printer until the drawer locks into position. The printer "beeps" when the cartridge is correctly zaman yazıcı "bip" sesi çıkartır. Follow the same instructions to insert the other five ink cartridges. Press the OK button. Setzen Sie die fünf - HP Designjet L25500 | HP Designjet L25500 Printer Series - 42" and 60" - Page 25
the front panel of your printer, you must follow steps 86 the printhead carriage. Entfernen Sie die Styroporstücke oben auf dem Druckkopfwagen. Rimuovere il polistirolo dalla parte Before removing the setup printheads, look at each printhead and verify that each printhead contains ink. Überprüfen - HP Designjet L25500 | HP Designjet L25500 Printer Series - 42" and 60" - Page 26
all with ink 37. Wait until this message appears on the front panel. Warten Sie, bis diese Bedienfeldmeldung angezeigt wird. Attendere che questo messaggio venga visualizzato sul pannello frontale Bu mesaj ön panelde görünene kadar bekleyin. Pull open the printhead cleaning cartridge door - HP Designjet L25500 | HP Designjet L25500 Printer Series - 42" and 60" - Page 27
Tintentrichter. Aprire la finestra e individuare l'alloggiamento dell'imbuto dell'inchiostro. Kapağı açın ve mürekkep hunisinin yuvasını bulun. Insert the ink funnel into position. Setzen Sie den Tintentrichter ein. Inserire l'imbuto dell'inchiostro in posizione Mürekkep hunisini yerine tak - HP Designjet L25500 | HP Designjet L25500 Printer Series - 42" and 60" - Page 28
99 100 101 102 Insert the printhead cleaning container at the rear of the printer and confirm in the front panel the installation of the PH cleaning kit. Setzen Sie hinten am Drucker den Abfalltintenbehälter ein, und bestätigen Sie am Bedienfeld das Installieren des DK-Wartungskits. Inserire il - HP Designjet L25500 | HP Designjet L25500 Printer Series - 42" and 60" - Page 29
protettivi dalla nuova testina. Yeni yazıcı kafasındaki iki koruyucu kapağı çıkartın. Lower all of the printheads vertically into their correct positions. The printer "beeps" when each printhead is correctly inserted. Setzen Sie alle Druckköpfe gerade in ihre Position im Wagen ein. Der - HP Designjet L25500 | HP Designjet L25500 Printer Series - 42" and 60" - Page 30
reseat the printheads. If the problem persists, refer to the Maintenance and troubleshooting guide. Wenn il problema persiste, consultare il Manuale di manutenzione e risoluzione dei problemi kılavuzuna başvurun. Reinsert Close the carriage assembly cover. Schließen Sie die Wagenabdeckung - HP Designjet L25500 | HP Designjet L25500 Printer Series - 42" and 60" - Page 31
di stampa Alt tabakayı yükleme Wait until the Ready for substrate message appears on the front panel. Warten Sie, bis auf dem milini çözmek için makara mili kilitleme kolunu kaldırın Remove the spindle from the printer. Nehmen Sie die Spindel aus dem Drucker. Rimuovere il mandrino - HP Designjet L25500 | HP Designjet L25500 Printer Series - 42" and 60" - Page 32
tavola di caricamento. Takmak istediğiniz alt tabakanın rulosunu yükleme tablasının üzerine dayanın. The right hub of the spindle has two positions: one for rolls of the printer's maximum width, and another for narrower rolls. Der rechte Anschlag der Spindel verfügt über zwei Positionen. Die - HP Designjet L25500 | HP Designjet L25500 Printer Series - 42" and 60" - Page 33
arasında hiç boşluk olmamalıdır), sonra yuvayı kilitleyin. With the blue hub on the left, lift the loading table to ease the spindle into the printer. Klappen Sie den Ladetisch nach oben, damit Sie die Spindel leichter einsetzen können. Der blaue Anschlag muss sich auf der linken Seite befinden - HP Designjet L25500 | HP Designjet L25500 Printer Series - 42" and 60" - Page 34
ıcıya yüklediğiniz alt tabaka rulosunun serisini seçin, ardından OK (Tamam) düğmesine basın. 20'' The printer automatically performs substrate advance calibration and printhead alignment. Please do not stop those processes to ensure successful PH alignment. Der Drucker führt automatisch eine - HP Designjet L25500 | HP Designjet L25500 Printer Series - 42" and 60" - Page 35
problems when loading Falls Probleme beim Laden auftreten In caso di problemi di caricamento Yüklerken sorun çıkması durumunda 15' x1 1 2 3 Use the hubs to wind the excess substrate onto the spindle ve eğikliği kaldırın. Retry The printer feeds out substrate, raise the - HP Designjet L25500 | HP Designjet L25500 Printer Series - 42" and 60" - Page 36
4 5 6 Align the substrate with the edge of the roll. Richten Sie das Druckmaterial mit der Rollenkante aus. Allineare il supporto di stampa al bordo del rotolo. Alt tabakayı rulonun kenarıyla hizalayın Lower the substrate-adjustment lever. Drücken Sie den Druckmaterial-Ausrichtungshebel nach - HP Designjet L25500 | HP Designjet L25500 Printer Series - 42" and 60" - Page 37
ve yazıcı kapısını kapatın. Seçeneği belirleyin: P NOT all with ink (Tümünde mürekkep yok). P NOT all with ink 3 Check that all setup printheads have ink, if not then repeat step 1. If a system error appears, contact support. Überprüfen Sie, ob alle Druckköpfe Tinte enthalten. Falls nicht - HP Designjet L25500 | HP Designjet L25500 Printer Series - 42" and 60" - Page 38
The only warranties for HP products and services are set forth in the express warranty statements accompanying such products and services. Nothing herein should be construed as constituting an additional warranty. HP shall not be liable for technical or editorial errors or omissions contained herein
-
 1
1 -
 2
2 -
 3
3 -
 4
4 -
 5
5 -
 6
6 -
 7
7 -
8
-
9
-
10
-
11
-
12
-
13
-
14
-
15
-
16
-
17
-
18
-
19
-
20
-
21
-
22
-
23
-
24
-
25
-
26
-
27
-
28
-
29
-
30
-
31
-
32
-
33
-
34
-
35
-
36
-
37
-
38
 |
 |

1
HP Designjet L25500
42
"
and 60
"
-in printer
Assembly Instructions
Montageanleitung für
42-Zoll- und 60-Zoll-Drucker
Stampante da 42
"
e da 60
"
Istruzioni per l’installazione
42-дюймовый и 60-
дюймовый принтер.
Инструкции по сборке
42
"
ve 60
"
yazıcı içi
Montaj Yönergeleri
Οδηγίες συναρμολόγησης
εκτυπωτή 42
"
και
60
"
ιντσών
© 2009 Hewlett-Packard Company
Large Format Division
Camí de Can Graells 1-21 · 08174
Sant Cugat del Vallès
Barcelona · Spain
All rights reserved
Printed in XXXXXXX · Gedruckt XXXXXX · Stampato in XXXXX
Отпечатано в XXXXXXX · Basım yeri XXXXXX · Εκτυπώθηκε στην XXXXX
The space required for assembly
is 3 m (10 feet) in front and 1 m
(3.5 feet) at the sides and rear.
Für den Zusammenbau ist vor dem
Drucker ein Freiraum von 3 m,
an den Seiten und hinter dem
Drucker ein Freiraum von 1 m
erforderlich.
Per l’installazione, è necessario lasciare davanti alla
stampante uno spazio di 3 m e ai lati e sul retro della
stampante uno spazio di 1 m.
Перед сборкой освободите перед принтером
пространство не менее 3 м (10 футов), а по бокам
и сзади – по 1 м (3,5 фута).
Montaj için gereken alan ön tarafta 3 m (10 fit), yanlarda
ve arka tarafta 1 m (3,5 fit).
Για τη συναρμολόγηση απαιτείται χώρος 3 m (10 πόδια)
μπροστά και 1m (3,5 πόδια) στο πλάι και πίσω.
4 people are required to perform certain tasks.
Für bestimmte Tätigkeiten werden 4 Personen
benötigt.
Per determinate operazioni, sono necessarie 4 persone.
Для выполнения некоторых действий понадобится
четыре человека.
Bazı işlerin yapılabilmesi için 4 kişi gereklidir.
Για την εκτέλεση ορισμένων εργασιών απαιτούνται 4 άτομα.
Time required for assembly of the printer
is approximately 160 minutes.
Der Zusammenbau des Druckers dauert ca.
160 Minuten.
L’installazione della stampante richiede circa 160 minuti.
Сборка принтера занимает в среднем 160 минут.
Yazıcının montajı için gereken süre yaklaşık 160 dakikadır.
Ο χρόνος που απαιτείται για τη συναρμολόγηση του εκτυπωτή
είναι περίπου 160 λεπτά.
Please read these instructions carefully.
These assembly instructions explain how to assemble the printer.
Notice that the icons used in this document are also located on the printer packaging. The icons help you locate
the parts needed at each stage of the assembly. Because spare screws are supplied, some screws will remain
unused after assembly of the printer.
Lesen Sie diese Anleitung sorgfältig durch.
Dieses Dokument enthält Anleitungen für den Zusammenbau des Druckers.
Die im Dokument verwendeten Symbole befinden sich auch auf der Verpackung des Druckers. Die Symbole
erleichtern das Auffinden der Komponenten, die in den verschiedenen Montagephasen benötigt werden.
Zum Lieferumfang gehören Ersatzschrauben, sodass nach dem Zusammenbau einige Schrauben übrig bleiben.
Leggere attentamente queste istruzioni.
Queste istruzioni descrivono le procedure per l’installazione della
stampante. Le icone utilizzate in questo documento sono disponibili anche sulla confezione della stampante.
Le icone consentono di individuare le parti necessarie durante i vari passaggi dell’installazione. Poiché vengono
fornite viti di riserva, alcune viti potrebbero risultare inutilizzate dopo l’installazione della stampante.
Внимательно прочтите эти инструкции.
В инструкциях по сборке объясняется, как собрать принтер.
Обратите внимание, что значки, используемые в данном документе, изображены также и на упаковке
принтера. Эти значки помогут находить нужные детали на каждом шаге сборки. После сборки могут
остаться входящие в комплект поставки запасные винты.
Lütfen bu yönergeleri dikkatlice okuyun.
Bu montaj yönergelerinde yazıcının nasıl kurulacağı anlatılmaktadır.
Bu belgede kullanılan simgelerin yazıcının ambalajında da bulunduğuna dikkat edin. Simgeler montajın her
aşamasında parçaların yerini bulmada size yardımcı olur. Yedek vidalar da verildiğinden, yazıcının montajından
sonra bazı vidalar kullanılmadan kalır.
Διαβάστε προσεκτικά αυτές τις οδηγίες.
Αυτές οι οδηγίες συναρμολόγησης περιγράφουν τον τρόπο
συναρμολόγησης του εκτυπωτή. Λάβετε υπόψη ότι τα εικονίδια που χρησιμοποιούνται σε αυτό το έγγραφο
υπάρχουν επίσης στη συσκευασία του εκτυπωτή. Τα εικονίδια θα σας βοηθούν να εντοπίσετε τα εξαρτήματα
που είναι απαραίτητα σε κάθε στάδιο της συναρμολόγησης. Ορισμένες βίδες δεν θα χρησιμοποιηθούν κατά
τη συναρμολόγηση του εκτυπωτή, καθώς παρέχονται ως εφεδρικές.
1
. Printer engine / Druckwerk / Motore della stampante / Устройство печати /
Yazıcı sistemi / Μηχανισμός εκτυπωτή
2. Stand / Standfuß / Piedistallo /
Основание / Sehpa / Βάση
3. Take-up Reel / Aufwickelvorrichtung
/ Rullo di tensione / Приемный узел
/ Makara / Καρούλι τύλιξης
4. Take-up Reel / Aufwickelvorrichtung
/ Rullo di tensione /
Приемный узел / Makara /
Καρούλι τύλιξης
5. Supplies / Verbrauchsmaterial /
Materiali di consumo / Расходные
материалы / Sarf malzemeleri kutusu /
Αναλώσιμα
EN
IT
RU
DE
2.5h
To be filled by the supplyer
Vom Lieferanten auszufüllen
Da compilarsi a cura del fornitore
Заполняется поставщиком
Tedarikçi tarafından doldurulacak
Συμπληρώνεται από τον προμηθευτή
1 m
3.5 ft
1 m
3.5 ft
3 m
10 ft