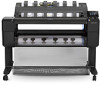
HP Designjet T1500 HP Designjet T920 and T1500 ePrinter Series - Assembly Inst
HP Designjet T1500 Manual
 |
View all HP Designjet T1500 manuals
Add to My Manuals
Save this manual to your list of manuals |
HP Designjet T1500 manual content summary:
- HP Designjet T1500 | HP Designjet T920 and T1500 ePrinter Series - Assembly Inst - Page 1
HP Designjet T920 and T1500 ePrinter Series Assembly Instructions FR HP Designjet T920 et T1500 Série ePrinter Instructions d'assemblage DE HP Designjet T920 und T1500 ePrinter Serie Anleitung zum Zusammenbau IT Stampanti HP Designjet serie T920 e T1500 Istruzioni per l'installazione ES ePrinter HP - HP Designjet T1500 | HP Designjet T920 and T1500 ePrinter Series - Assembly Inst - Page 2
EN Open the box FR Ouvrez la boîte DE Öffnen der Verpackung IT Aprire la scatola ES Abra la caja PT Abra a caixa NL Open de doos 10' x2 1 2 3 EN Remove the components tray. x2 Remove the stacker arm and the two packing pieces. Take the stacker arm out of its plastic bag. Remove the 4 carton - HP Designjet T1500 | HP Designjet T920 and T1500 ePrinter Series - Assembly Inst - Page 3
4 5 6 7 180° x2 x2 EN Slide the box forward on the pallet to create a space. Carefully roll the box 180° onto the floor. Remove the wooden pallet. FR Faites coulisser la boîte en avant sur la palette pour créer un - HP Designjet T1500 | HP Designjet T920 and T1500 ePrinter Series - Assembly Inst - Page 4
la bustina essiccante. Extraiga la bolsa desecante. Remova o saco dissecante. Verwijder het zakje met droogmiddel. EN Assemble the stand FR Assemblage du support DE Zusammenbauen des Stand- fußes IT Assemblaggio del piedistallo ES Montaje del soporte PT Monte a base NL De voet in elkaar zetten 20 - HP Designjet T1500 | HP Designjet T920 and T1500 ePrinter Series - Assembly Inst - Page 5
11 12 13 14 5 EN Locate the stand pieces: 1. Left leg / 2. Covers / 3. Basket Assembly / 4. Right leg / 5. Crossbar / 6. Screwdriver FR Localisez les pièces du socle : 1. Montant gauche / 2. Couvertures / 3. Assemblage du panier / 4. Montant droit / 5. Barre transversale / 6. Tournevis DE - HP Designjet T1500 | HP Designjet T920 and T1500 ePrinter Series - Assembly Inst - Page 6
du montant droit avec les 5 vis, mais sans les visser complètement. Serrez complètement les 10 vis : gauches et droites. Tournez le support de 180° pour le placer en position verticale. DE Befestigen Sie den Querstange mit 5 Schrauben am rechten Standbein, ziehen Sie die Schrauben noch nicht - HP Designjet T1500 | HP Designjet T920 and T1500 ePrinter Series - Assembly Inst - Page 7
et le cercle en place. Important : Veillez à ne pas coincer le sac en plastique entre le support et l'imprimante. 20 2+2 Fix the stand assembly to the printer body with 2 screws each side. Fixez le support à l'imprimante avec 2 vis de chaque côté. 21 Check the 4 wheels are locked. Vérifiez que les - HP Designjet T1500 | HP Designjet T920 and T1500 ePrinter Series - Assembly Inst - Page 8
PT Gire a impressora em 90°. NL Draai de printer 90°. 23 24 x2 90° x2 Rotate the printer 90° into the upright position. Remove the orange tapes impressora em 90° para que fique na posição vertical. Draai de printer 90° in rechtopstaande positie. Retire las cintas de color naranja y desbloquee - HP Designjet T1500 | HP Designjet T920 and T1500 ePrinter Series - Assembly Inst - Page 9
25 26 27 28 EN Remove the box. FR Retirez la boîte. DE Entfernen Sie die Abdeckung. IT Rimuovere il contenitore. ES Extraiga la caja. PT Remova a caixa. NL Verwijder de kap. x2 Remove the 2 end caps. Retirez les 2 embouts de protection. Entfernen Sie die zwei Endkappen. Rimuovere i 2 fermi - HP Designjet T1500 | HP Designjet T920 and T1500 ePrinter Series - Assembly Inst - Page 10
29 30 EN Remove the screws from the stacker. FR Retirez les vis du chargeur. DE Entfernen Sie die Schrauben vom Stapler. IT Rimuovere le viti dell'impilatore. ES Retire los tornillos de la apiladora. PT Remova os parafusos do empilhador. NL Verwijder de schroeven uit de stapelaar. Unfold the - HP Designjet T1500 | HP Designjet T920 and T1500 ePrinter Series - Assembly Inst - Page 11
33 34 35 36 EN Open the printer cover (1) and remove the carton piece (2). FR Ouvrez le capot de l'imprimante (1) et retirez le papier cartonné (2). IMPORTANT: in the following step you must remove - HP Designjet T1500 | HP Designjet T920 and T1500 ePrinter Series - Assembly Inst - Page 12
the feet until they click into place. Remove the tape, and feed the basket through to the front of the printer. Placez les bras du panier dans les montants jusqu'à ce qu'ils s'enclenchent. Retirez le ruban adhésif et klikken. Verwijder de tape en rol de mand uit door de voorkant van de printer. - HP Designjet T1500 | HP Designjet T920 and T1500 ePrinter Series - Assembly Inst - Page 13
lugar. Bevestig de mand op zijn plaats. Make sure the basket is open; this indicates the amount of distance required at the back of the printer from a wall or object. Assurez-vous que le panier est ouvert ; ceci indique la distance nécessaire à l'arrière de l'imprimante à un mur ou à un objet - HP Designjet T1500 | HP Designjet T920 and T1500 ePrinter Series - Assembly Inst - Page 14
FR Configuration de l'imprimante DE Einrichten des Druckers IT Installazione della stampante ES Configuración de la impresora PT Instalar a impressora NL De printer opstellen 40' x2 IMPORTANT: Attach the cables into the gutter: route the cables to the side that you wish to attach the power - HP Designjet T1500 | HP Designjet T920 and T1500 ePrinter Series - Assembly Inst - Page 15
to the basket. IMPORTANT: Connect the LAN and power cable. Switch the printer on at the back only. Lock the wheels. Select your language on the touch screen, and confirm it. The front panel will ask you to install the ink cartridges. FR Remarque : Assurez-vous que les câbles ne pendent pas afin - HP Designjet T1500 | HP Designjet T920 and T1500 ePrinter Series - Assembly Inst - Page 16
: black, gray, and matte black on the left, cyan, magenta, and yellow on the right. A beep is heard when the cartridges are inserted correctly. Close the ink cartridge covers (left and right). Insérez les cartouches d'encre : noir, gris et noir mat sur la gauche, cyan, magenta et jaune sur - HP Designjet T1500 | HP Designjet T920 and T1500 ePrinter Series - Assembly Inst - Page 17
55 56 57 58 EN The printer will now prepare the ink system for use. When the process finishes a ventana. Quando solicitado, abra a janela. Open het venster wanneer hierom wordt gevraagd. Lift up the printhead cover handle. Pull the blue handle up as far as it will go. Soulevez la poignée du - HP Designjet T1500 | HP Designjet T920 and T1500 ePrinter Series - Assembly Inst - Page 18
printkopklep door de hendel naar beneden te plaatsen. Neem de printkop uit de doos en verwijder de bescherming. Plaats de printkop. Check the printhead is correctly alligned. Note: do not insert the nozzles yet. Vérifiez que la tête d'impression est correctement alignée. Remarque : n'insérez pas - HP Designjet T1500 | HP Designjet T920 and T1500 ePrinter Series - Assembly Inst - Page 19
63 64 65 66 EN Lift the printhead cover handle. Push the handle down to clip the cover to the bar. Pull the handle down to close the cover. Push down to close - HP Designjet T1500 | HP Designjet T920 and T1500 ePrinter Series - Assembly Inst - Page 20
67 68 EN Load the paper FR Chargement du papier DE Laden von Papier IT Caricamento totdat dit proces is voltooid voordat u doorgaat. 5' x2 69 Push the latch, and open the upper front roll cover. Poussez le loquet, puis ouvrez le capot du rouleau avant supérieur. Drücken Sie auf die - HP Designjet T1500 | HP Designjet T920 and T1500 ePrinter Series - Assembly Inst - Page 21
en verwijder vervolgens de oranje tape en het stuk karton. Ontgrendel (1) en verwijder de blauwe hub (2). Load the paper (1), replace, and lock the blue hub (2). Replace the spindle. Chargez le papier (1), remplacez et verrouillez le concentrateur bleu (2). Remplacez la bobine. Legen Sie das - HP Designjet T1500 | HP Designjet T920 and T1500 ePrinter Series - Assembly Inst - Page 22
Laad het papier in de printer. Roll the paper in. Faites avancer le papier à l'intérieur. Rollen Sie das Papier auf. Arrotolandola verso l'interno. Enrolle el papel. Role o papel para inseri-lo. Rol het papier erin. T1500 only: follow steps 69 - 76 for the 2nd roll. T1500 uniquement : suivez les - HP Designjet T1500 | HP Designjet T920 and T1500 ePrinter Series - Assembly Inst - Page 23
78 79 EN When the roll/rolls are loaded, the printer will align the printheads. This process involves printing, and needs the paper to have a straight leading edge. Note: printhead alignment requires paper at least 24in (61cm) wide. Roll paper is recommended. At the end of the process, a print - HP Designjet T1500 | HP Designjet T920 and T1500 ePrinter Series - Assembly Inst - Page 24
een PDF of een ander afdrukklaar bestand bij te voegen aan een e-mail en vervolgens dit te verzenden naar uw de speciale adres voor ePrinter. Om het afdrukken te starten per e-mail moet u het e-mail adres van de ePrinter hebben. 3 - Automatische firmware-update. HP Designjet ePrint & Share - HP Designjet T1500 | HP Designjet T920 and T1500 ePrinter Series - Assembly Inst - Page 25
De verbindingswizard zal nu starten en u stap voor stap begeleiden om uw printer met het internet te verbinden. Klik op Doorgaan en volg de stappen terminée, cliquez sur ´OK´. Ihre Internetverbindung und die Verbindung mit HP Designjet ePrint & Share wird nun überprüft. Klicken Sie nach Abschluss des - HP Designjet T1500 | HP Designjet T920 and T1500 ePrinter Series - Assembly Inst - Page 26
de atualização do firmware será exibida, clique em "Verificar". Het firmwareupdate -scherm wordt nu weergegeven. Klik op 'Controleer'. A final confirmation screen appears, telling you that you have completed the process, click ´Done´. Please, complete the setup of HP Designjet ePrint & Share on - HP Designjet T1500 | HP Designjet T920 and T1500 ePrinter Series - Assembly Inst - Page 27
to Internet. On the DVD you will find: Software installation (drivers with HP Designjet ePrint & Share, HP Utility) / Documentation / Support For latest information please visit: http://www.hp.com/go/T920/support or http://www.hp.com/go/T1500/ Installez le logiciel du produit à partir du DVD fourni - HP Designjet T1500 | HP Designjet T920 and T1500 ePrinter Series - Assembly Inst - Page 28
compte sur le HP ePrint Center : http://www.hp.com/go/eprintcenter). For mobile printing: download the HP Designjet ePrint & Share App by accessing the iTunes App store (for iOS), or 'Google Play' (for Android). Log in to HP Designjet ePrint DE & Share, and follow the instructions on your mobile - HP Designjet T1500 | HP Designjet T920 and T1500 ePrinter Series - Assembly Inst - Page 29
is subject to change without notice. The only warranties for HP products and services are set forth in the express warranty statements accompanying such products and services. Nothing herein should be construed as constituting an additional warranty. HP shall not be liable for technical or editorial
-
 1
1 -
 2
2 -
 3
3 -
 4
4 -
 5
5 -
 6
6 -
 7
7 -
8
-
9
-
10
-
11
-
12
-
13
-
14
-
15
-
16
-
17
-
18
-
19
-
20
-
21
-
22
-
23
-
24
-
25
-
26
-
27
-
28
-
29
 |
 |

1
© 2013 Hewlett-Packard Company
Large Format Division
Camí de Can Graells 1-21 · 08174
Sant Cugat del Vallès
Barcelona · Spain
All rights reserved
Printed in XXX
HP Designjet T920 and T1500
ePrinter Series
Assembly Instructions
HP Designjet T920 et T1500
Série ePrinter
Instructions d’assemblage
HP Designjet T920 und T1500
ePrinter Serie
Anleitung zum Zusammenbau
Stampanti HP Designjet
serie T920 e T1500
Istruzioni per l’installazione
ePrinter HP Designjet
series T920 y T1500
Instrucciones de montaje
Séries HP Designjet T920 e T1500
ePrinter
Instruções de montagem
HP Designjet T920 en -T1500
ePrinter-serie
Instructies voor het opstellen
EN: Please read these instructions carefully.
These assembly instructions explain how to assemble
the printer. Because spare screws are supplied, some screws may remain unused after assembly of
the printer.
FR: Veuillez lire attentivement ces instructions.
Ces instructions d’assemblage expliquent comment
assembler l’imprimante.
Des vis de rechange étant fournies, certaines vis pourront rester inutilisées après l’assemblage de
l’imprimante.
DE:Lesen Sie diese Anleitungen sorgfältig durch.
Dieses Dokument enthält Anleitungen für den
Zusammenbau des Druckers.
Zum Lieferumfang gehören Ersatzschrauben, sodass nach dem Zusammenbau einige Schrauben übrig
bleiben.
IT: Leggere attentamente queste istruzioni.
Queste istruzioni descrivono la procedura d’installazione
della stampante.
Poiché vengono fornite viti di riserva, alcune potrebbero risultare inutilizzate dopo l’installazione della
stampante.
ES: Lea atentamente estas instrucciones.
Estas instrucciones de montaje explican cómo se monta la
impresora.
Como también se incluyen tornillos de repuesto, después de montar la impresora pueden quedar
algunos sin utilizar.
PT: Leia as instruções com atenção.
Essas instruções de montagem explicam como montar a
impressora.
Como são fornecidos parafusos sobressalentes, alguns podem permanecer sem uso depois da
montagem da impressora.
NL: Lees deze instructies aandachtig door.
In deze assemblage-instructies wordt beschreven hoe de
printer wordt gemonteerd.
Omdat er reserveschroeven zijn geleverd, kunnen er na assemblage van de printer enkele ongebruikte
schroeven overblijven.
EN:
The size of the crate is 1502mm X 759mm X 775mm. The space
required for assembly is 2.5m (8.5 feet) in front. /
FR :
La taille de
l’emballage est 1502mm X 759mm X 775mm. L’espace requis pour
l’ensemble est 2,5 mètres (8,5 pieds) à l’avant. /
DE:
Größe der
Verpackungskiste: 1502 mm x 759 mm x 775 mm. Der erforderliche
Raum für den Zusammenbau beträgt 2,5 m zur Vorderseite hin. /
IT:
Le dimensioni della
cassa sono 1502 mm X 759 mm X 775 mm. Lo spazio necessario per il montaggio è 2,5
m sul lato anteriore. /
ES:
Las dimensiones de la caja son: 1502 mm X 759 mm X 775
mm. Espacio: El espacio necesario para el montaje es de 2,5 m por la parte delantera.
/
PT:
O tamanho da caixa é de 1502 mm X 759 mm X 775 mm. O space: O espaço
necessário para a montagem é de 2,5 m (8,5 pés) à frente. /
NL:
Het formaat van de
kist is 1502mm X 759mm X 775mm. De ruimte vereist voor de montage 2,5 m aan de
voorzijde.
EN:
2 people are required to perform certain tasks. /
FR :
L’exécution de certaines
tâches nécessite la présence de 2 personnes. /
DE:
Für bestimmte Tätigkeiten werden
2 Personen benötigt. /
IT:
Per determinate operazioni, sono necessarie 2 persone. / ES:
Algunas tareas se deben realizar entre 2 personas. /
PT:
São necessárias 2 pessoas para
a realização de determinadas tarefas. /
NL:
Voor bepaalde taken zijn 2 personen nodig.
100’
EN:
Time required for assembly of the printer is approximately
100 minutes . /
FR :
Le temps requis pour l’assemblage de l’imprimante est d’environ
100 minutes. /
DE:
Der Zusammenbau des Druckers dauert etwa 100 Minuten. /
IT:
L’installazione della stampante richiede circa 100 minuti. /
ES:
El tiempo de montaje
de la impresora es aproximadamente de 100 minutos. /
PT:
O tempo necessário para
a montagem da impressora é de aproximadamente 100 minutos. /
NL:
De vereiste tijd
voor assemblage van de printer is ongeveer 100 minuten.
EN:
Tools required: Screwdriver (included). /
FR :
Outils nécessaires : Tournevis (fourni). /
DE:
Erforderliches Werkzeug: Schraubendreher (enthalten). /
IT:
Strumenti neces-
sari: cacciavite (incluso). /
ES:
Herramientas requeridas: Destornillador (incluido). /
PT:
Ferramentas necessárias: Chave de fenda (incluída). /
NL:
Benodigd gereedschap:
Schroevendraaier (inbegrepen).
2.5m
8.5ft
NL
PT
ES
IT
DE
FR
EN
EN:
Crate contents
1. Documentation: Assembly
Instructions, Introductory info, CD
2. Stacker accessory
3. Printer
4. Basket
5. Stand accessory pieces
6. Printhead
7. Ink cartridges
8. Power cords
Note: roll and LAN cable not
included.
FR:
Contenu de l’emballage
1. Documentation : Instructions
d’assemblage, Informations de
base, CD
2. Accessoire du chargeur
3. Imprimante
4. Panier
5. Accessoires du support
6. Tête d’impression
7. Cartouches d’encre
8. Cordons d’alimentation
Remarque : Rouleau et câble LAN
non inclus.
DE:
Inhalt der Kiste
1. Dokumentation: Anleitung zum
Anleitungen, Einführende
Informationen, CD
2. Staplerzubehör
3. Drucker
4. Ablage
5. Standfuß-Zubehörteile
6. Druckkopf
7. Tintenpatronen
8. Netzkabel
Hinweis: Rolle und LAN-Kabel sind
nicht im Lieferumfang enthalten.
IT:
Contenuto della scatola
1. Documentazione: Istruzioni
per l’installazione, Informazioni
introduttive, CD
2. Impilatore
3. Stampante
4. Raccoglitore
5. Componenti accessori
piedistallo
6. Testina di stampa
7. Cartucce di inchiostro
8. Cavi di alimentazione
Nota: rotolo e cavo LAN non inclusi.
ES:
Contenido de la caja
1. Documentación: Módulo
Instrucciones, Información
preliminar, CD
2. Accesorio de la apiladora
3. Impresora
4. Cesta
5. Piezas del accesorio del
soporte
6. Cabezal de impresión
7. Cartuchos de tinta
8. Cables de alimentación
Nota: el rollo y el cable LAN no
están incluidos.
PT:
Conteúdo da caixa
1. Documentação: Montagem
Instruções, Informações de
introdução, CD
2. Acessório de empilhamento
3. Impressora
4. Cesto
5. Peças acessórias da base
6. Cabeçote de impressão
7. Cartuchos de tinta
8. Cabos de força
Nota: os cabos de rolo e LAN
não estão incluídos.
NL:
Inhoud van de kist
1. Documentatie: module
Instructies, inleidende
informatie, cd
2. Stapelaaraccessoire
3. Printer
4. Mand
5. Delen van
staanderaccessoire
6. Printkop
7. Inktpatronen
8. Netsnoeren
Let op: rol en LAN-kabel niet
meegeleverd.