HP Deskjet 450 HP Deskjet 450 mobile printer - (English) User Guide - Page 25
To print from a Windows application, Infrared printing, Setup, Properties, Print, Start, Settings - windows 8
 |
UPC - 844844844303
View all HP Deskjet 450 manuals
Add to My Manuals
Save this manual to your list of manuals |
Page 25 highlights
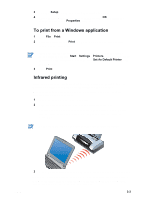
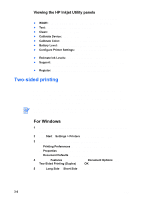
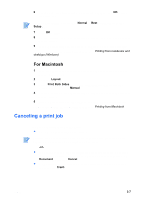
3 Click the Setup tab and select the print settings you want. 4 Once you have made the necessary changes, click OK to activate the change and close the Properties dialog box. To print from a Windows application 1 Click File > Print. 2 Select the printer in the Print dialog box, and make any other desired changes to the print settings. If you primarily use the HP Deskjet 450 printer, you can make it your default printer by clicking Start > Settings > Printers. In the Printers folder, right-click on the printer icon, and then click Set As Default Printer in the pop-up menu. 3 Click Print. Infrared printing If you use a notebook computer equipped with infrared technology, you can establish a wireless connection with the printer to send a print job. Please refer to your notebook's user documentation for how to configure infrared settings and connections. 1 Locate the infrared lens on the notebook. 2 Align the notebook infrared lens with the printer infrared lens. Position your notebook so that its infrared lens is within 3 feet (1 meter) from the printer and within a 30-degree total angle from the printer's infrared lens. Make sure there are no obstacles between the device and printer. ENWW 3 Follow the instructions supplied with your notebook to send the job to print. During the information transfer process, the notebook projects a solid infrared beam to the printer and the infrared LED turns green. When the information transfer is complete, the beam and LED turn off. 3-3
-
 1
1 -
2
-
3
-
4
-
5
-
6
-
7
-
8
-
9
-
10
-
11
-
12
-
13
-
14
-
15
-
16
-
17
-
18
-
19
-
 20
20 -
 21
21 -
 22
22 -
 23
23 -
 24
24 -
 25
25 -
 26
26 -
 27
27 -
 28
28 -
 29
29 -
 30
30 -
31
-
32
-
33
-
34
-
35
-
36
-
37
-
38
-
39
-
40
-
41
-
42
-
43
-
44
-
45
-
46
-
47
-
48
-
49
-
50
-
51
-
52
-
53
-
54
-
55
-
56
-
57
-
58
-
59
-
60
-
61
-
62
-
63
-
64
-
65
-
66
-
67
-
68
-
69
-
70
-
71
-
72
-
73
-
74
-
75
-
76
-
77
-
78
-
79
-
80
-
81
-
82
-
83
-
84
-
85
-
86
 |
 |
