HP Deskjet 640/642c (English) Windows Connect * Users Guide - Page 45
Printing Transparencies, Setup, HP Premium Inkjet Transparency Film, HP Premium Inkjet
 |
View all HP Deskjet 640/642c manuals
Add to My Manuals
Save this manual to your list of manuals |
Page 45 highlights
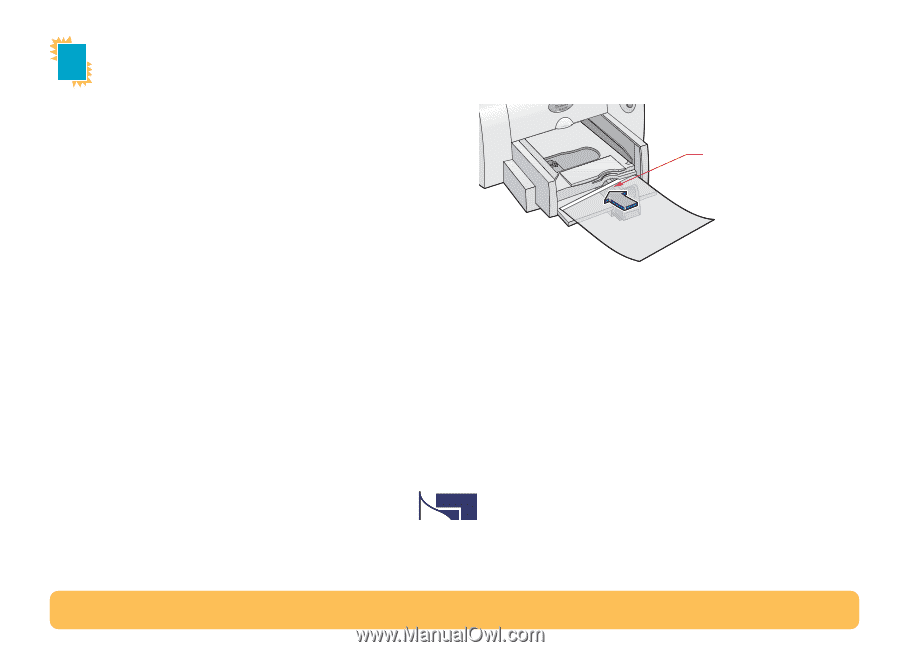
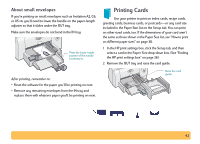
Printing Transparencies For best results, use HP Premium Inkjet Rapid-Dry Transparencies or transparencies specifically designed for inkjet printers, for your overhead presentations. 1 In the HP print settings box, click the Setup tab, then select HP Premium Inkjet Transparency Film, HP Premium Inkjet Rapid-Dry Transparency, or Other Transparency Films as the Paper Type. (See "Finding the HP print settings box" on page 26.) 2 Make sure Best is selected as the Print Quality. It isn't absolutely necessary to use the Best Print Quality, but it'll give you the best results. If you're in a hurry, use Normal Print Quality. 3 If you plan to make notes on your transparencies during your presentation, click the Features tab, then select Mirror Image. 4 Put up to 25 sheets of transparencies in your printer with the rough side down and the adhesive strip forward. (You can peel off the adhesive strip after printing.) Adhesive strip forward; tape side up 5 Slide in the paper adjusters, just as you would for plain paper. 6 Print the transparency. 7 Be patient. Because the printer uses more ink, lays the colors down more slowly, and allows for a longer drying time between sheets, transparencies take awhile to print. After printing, remember to: • Remove any remaining transparencies from the IN tray and replace them with whatever paper you'll be printing on next. • Reset the software for the paper you'll be printing on next. 45
-
 1
1 -
2
-
3
-
4
-
5
-
6
-
7
-
8
-
9
-
10
-
11
-
12
-
13
-
14
-
15
-
16
-
17
-
18
-
19
-
20
-
21
-
22
-
23
-
24
-
25
-
26
-
27
-
28
-
29
-
30
-
31
-
32
-
33
-
34
-
35
-
36
-
37
-
38
-
39
-
 40
40 -
 41
41 -
 42
42 -
 43
43 -
 44
44 -
 45
45 -
 46
46 -
 47
47 -
 48
48 -
 49
49 -
 50
50 -
51
-
52
-
53
-
54
-
55
-
56
-
57
-
58
-
59
-
60
-
61
-
62
-
63
-
64
-
65
-
66
-
67
-
68
-
69
-
70
 |
 |