HP E427 User Guide - Page 12
Using the Capture Menu, Shooting Modes
 |
UPC - 882780503250
View all HP E427 manuals
Add to My Manuals
Save this manual to your list of manuals |
Page 12 highlights
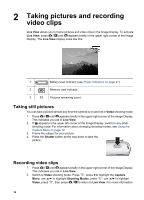
Chapter 2 Using the Capture Menu The Capture Menu allows you to adjust camera settings that affect the characteristics of the images and video clips you capture. 1. While in Live View or Playback, press , then use to highlight . 2. Use to highlight a menu option, then press to display the menu option's sub-menu. 3. Use to highlight a setting, then press . 4. Press to exit the Capture Menu. Except as noted, Capture Menu settings remain in effect until they are changed or until they return to their default settings when you turn off the camera. Shooting Modes-For selecting a shooting mode. ● Auto Mode (Default)-For taking good shots quickly, when you do not have time to select a special shooting mode. ● Self-Timer-For capturing images after a 10-second delay (see Using the Self-Timer mode on page 13). ● Landscape-For scenes with deep perspective, such as mountain scenes. ● Portrait-For pictures that have one or more people as their primary subject. ● Action-For capturing sporting events, moving cars, or any scene where you want to stop the action. ● Sunset-For capturing outdoor scenes at sunset. ● Video-For recording video clips (see Recording video clips on page 10). Flash Setting-For selecting a flash setting. ● Auto Flash (Default)-The camera uses the flash if necessary. ● Red-Eye-The camera uses the flash with red-eye reduction, if necessary, to minimize the possibility of human eyes appearing red in the final image. For information about red-eye, see Flash Setting-Red-Eye on page 14. ● Flash On-The camera always uses flash. If the light is behind your subject, use this setting to increase the light on the front of your subject. ● Flash Off-The camera does not use flash. Use this setting to capture poorly lit subjects beyond the flash range or to capture scenes with the existing light. ● Night-The camera uses the flash with red-eye reduction, if necessary, to illuminate objects in the foreground, then continues to expose as if the flash had not been used, to gather the light in the background. Image Quality-Sets resolution and compression for images. The greater the number, the higher the resolution. ● 6MP Best-For enlarging or printing images greater than 28 x 36 cm (11 by 14 in). ● Normal (6MP) (Default)-For printing images up to 28 x 36 cm (11 by 14 in). ● 4MP-For printing images up to 20 x 25 cm (8 by 10 in). 12
-
 1
1 -
2
-
3
-
4
-
5
-
6
-
 7
7 -
 8
8 -
 9
9 -
 10
10 -
 11
11 -
 12
12 -
 13
13 -
 14
14 -
 15
15 -
 16
16 -
 17
17 -
18
-
19
-
20
-
21
-
22
-
23
-
24
-
25
-
26
-
27
-
28
-
29
-
30
-
31
-
32
 |
 |
