HP KN844UA#ABA InterVideo Home Theater Quick Start Guide - Page 33
Inserting the Drive, Locating the Drive and Assigning a, Drive Letter
 |
View all HP KN844UA#ABA manuals
Add to My Manuals
Save this manual to your list of manuals |
Page 33 highlights
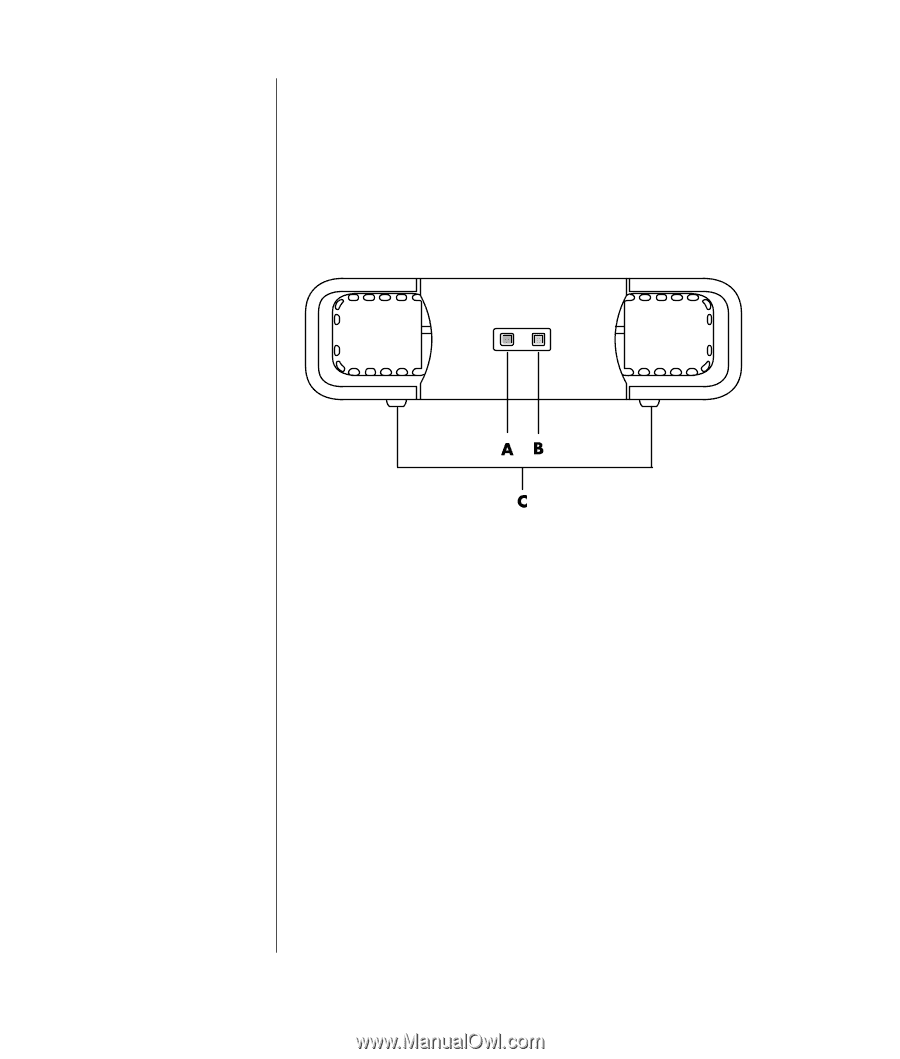
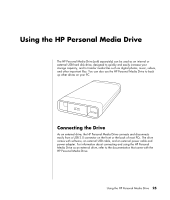
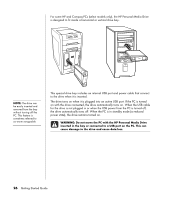
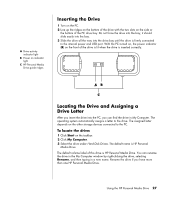
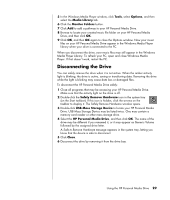
A Drive activity indicator light B Power on indicator light C HP Personal Media Drive guide ridges Inserting the Drive 1 Turn on the PC. 2 Line up the ridges on the bottom of the drive with the two slots on the side or the bottom of the PC drive bay. Do not force the drive into the bay; it should slide easily into the bay. 3 Slide the drive all the way into the drive bay until the drive is firmly connected to the internal power and USB port. With the PC turned on, the power indicator (B) on the front of the drive is lit when the drive is inserted correctly. Locating the Drive and Assigning a Drive Letter After you insert the drive into the PC, you can find the drive in My Computer. The operating system automatically assigns a letter to the drive. The assigned letter depends on the other storage devices connected to the PC. To locate the drive: 1 Click Start on the taskbar. 2 Click My Computer. 3 Select the drive under Hard Disk Drives. The default name is HP Personal Media Drive. The default volume label of this drive is HP Personal Media Drive. You can rename the drive in the My Computer window by right-clicking the drive, selecting Rename, and then typing in a new name. Rename the drive if you have more than one HP Personal Media Drive. Using the HP Personal Media Drive 27
-
 1
1 -
2
-
3
-
4
-
5
-
6
-
7
-
8
-
9
-
10
-
11
-
12
-
13
-
14
-
15
-
16
-
17
-
18
-
19
-
20
-
21
-
22
-
23
-
24
-
25
-
26
-
27
-
 28
28 -
 29
29 -
 30
30 -
 31
31 -
 32
32 -
 33
33 -
 34
34 -
 35
35 -
 36
36 -
 37
37 -
 38
38 -
39
-
40
-
41
-
42
-
43
-
44
-
45
-
46
-
47
-
48
-
49
-
50
-
51
-
52
-
53
-
54
-
55
-
56
-
57
-
58
-
59
-
60
-
61
-
62
-
63
-
64
-
65
-
66
-
67
-
68
-
69
-
70
-
71
-
72
-
73
-
74
-
75
-
76
-
77
-
78
-
79
-
80
-
81
-
82
-
83
-
84
-
85
-
86
-
87
-
88
-
89
-
90
-
91
-
92
-
93
-
94
-
95
-
96
-
97
-
98
-
99
-
100
 |
 |