HP L1730 User's Guide L1530 and L1730 Flat Panel Monitors
HP L1730 - 17" LCD Monitor Manual
 |
View all HP L1730 manuals
Add to My Manuals
Save this manual to your list of manuals |
HP L1730 manual content summary:
- HP L1730 | User's Guide L1530 and L1730 Flat Panel Monitors - Page 1
User's Guide L1530 and L1730 Flat Panel Monitors Document Part Number: 335576-B21 July 2003 This guide provides information on setting up the monitor, installing drivers, using the on-screen display menu, troubleshooting and technical specifications. - HP L1730 | User's Guide L1530 and L1730 Flat Panel Monitors - Page 2
purpose, and is subject to change without notice. The warranties for HP products are set forth in the express limited warranty statements accompanying such equipment or loss of information. User's Guide L1530 and L1730 Flat Panel Monitors First Edition (July 2003) Document Part Number: 335576-B21 - HP L1730 | User's Guide L1530 and L1730 Flat Panel Monitors - Page 3
3-9 4 Operating the Monitor Installing the Information Files 4-1 Front Panel Components 4-2 Adjusting Monitor Settings 4-3 Using the On-Screen Display 4-4 Adjusting Screen Quality 4-7 Optimizing Analog Conversion 4-7 Identifying Monitor Conditions 4-8 Sleep Timer Mode 4-9 User's Guide iii - HP L1730 | User's Guide L1530 and L1730 Flat Panel Monitors - Page 4
Troubleshooting Solving Common Problems A-1 Using the Worldwide Web A-3 Preparing to call Technical Support A-3 B Technical Specifications C-4 EPA Energy Star Compliance C-4 Power Cord Set Requirements C-4 Recycling Information C-5 D LCD Monitor Quality and Pixel Policy iv User's Guide - HP L1730 | User's Guide L1530 and L1730 Flat Panel Monitors - Page 5
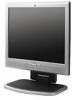
1 Product Features The Flat Panel Display has an active matrix, thin-film transistor (TFT), liquid crystal display (LCD). The monitor features include: L1530 Model 15-inch (38.1 cm) viewable area display. 1024 x 768 resolution, plus full-screen support for lower resolutions. Wide viewing angle to - HP L1730 | User's Guide L1530 and L1730 Flat Panel Monitors - Page 6
on the front panel. Compliant with the following regulated specifications: EPA ENERGY STAR Europeam Union CD Directives Swedish MPR II 1990 Swedish TCO Display Requirements L1730 Model 17-inch (43.18 cm) viewable area display. 1280 x 1024 native resolution, plus full-screen support for lower - HP L1730 | User's Guide L1530 and L1730 Flat Panel Monitors - Page 7
Product Features Compliant with the following regulated specifications: EPA ENERGY STAR Europeam Union CD Directives Swedish MPR II 1990 Swedish TCO Display Requirements User's Guide 1-3 - HP L1730 | User's Guide L1530 and L1730 Flat Panel Monitors - Page 8
Important Safety Information A power cord is included with your monitor. If another cord is used, use only a power source and connection appropriate for this monitor. For information on the correct power cord set to use with your monitor, refer to the "Power Cord Set Requirements" section in - HP L1730 | User's Guide L1530 and L1730 Flat Panel Monitors - Page 9
the plug firmly and pulling it from the outlet. Never disconnect the monitor by pulling the cord. Turn your monitor off when not in use. You can substantially increase the life expectancy of your monitor by using a screen saver program and turning off the monitor when not in use. 2-2 User's Guide - HP L1730 | User's Guide L1530 and L1730 Flat Panel Monitors - Page 10
the screen. Slots and openings in the cabinet are provided for ventilation. These openings must not be locked or covered. Never push object of any kind into cabinet slots or other openings. Do not drop your monitor or place it on an unstable surface. Do not allow anything to rest on the power cord - HP L1730 | User's Guide L1530 and L1730 Flat Panel Monitors - Page 11
alcohol. CAUTION: Do not use benzene, thinner, ammonia, or any volatile substance to clean the monitor screen or cabinet. These chemicals may damage the monitor. Never use water to clean an LCD screen. Shipping the Monitor Keep the original packing box in a storage area. You may need it later if you - HP L1730 | User's Guide L1530 and L1730 Flat Panel Monitors - Page 12
3 Setting Up the Monitor To set up the monitor, ensure that the power is turned off to the monitor, computer system, and other attached devices, then follow the steps below. Connecting the Monitor The monitor has two video signal connectors on the rear panel: one analog (VGA) and one digital (DVI - HP L1730 | User's Guide L1530 and L1730 Flat Panel Monitors - Page 13
into a grounded (earthed) electrical outlet that is easily accessible at all times. Disconnect power from the monitor by unplugging the power cord from the electrical outlet. Do not place anything on power cords or cables. Arrange them so that no one may accidentally step on or trip on them. Do not - HP L1730 | User's Guide L1530 and L1730 Flat Panel Monitors - Page 14
saver application or turn off the monitor when it is not in use for a prolonged period of time. Image retention is a condition that may occur on all LCD screens. 5. If your monitor includes a PC Comm Station, refer to the documentation included with the accessory for instructions on attaching it - HP L1730 | User's Guide L1530 and L1730 Flat Panel Monitors - Page 15
sides of the monitor screen and gently but firmly tilt the top of the screen foward or backward as needed for your comfort. CAUTION: The maximum forward tilt is 5 degrees. The maximum backward tilt is 25 degrees for operation and 90 degrees for packing only. Tilting the Monitor 3-4 User's Guide - HP L1730 | User's Guide L1530 and L1730 Flat Panel Monitors - Page 16
position to either a landscape or portrait position. To rotate the display, you will need to install the Pivot software, which is contained on the CD-ROM included with your monitor. When the CD menu launches, select "Install Pivot Software" and follow the on-screen instructions. User's Guide 3-5 - HP L1730 | User's Guide L1530 and L1730 Flat Panel Monitors - Page 17
Setting Up the Monitor 1. Tilt the lower part of the monitor upwards. 2. Rotate the monitor clockwise until the monitor controls are on the left side. 3. Firmly push the lower part of the monitor downwards to secure it to the new position. Rotating the Monitor Screen 3-6 User's Guide - HP L1730 | User's Guide L1530 and L1730 Flat Panel Monitors - Page 18
and warning statements below before beginning the procedure. CAUTION: Before beginning to disassemble the monitor, be sure the monitor is turned off and the power and signal cables are both disconnected. If your monitor has a connected audio cable, disconnect it. WARNING: Do not remove the base from - HP L1730 | User's Guide L1530 and L1730 Flat Panel Monitors - Page 19
Monitor 2. Remove the four screws as shown in the following illustration. Removing the Monitor Base CAUTION: Ensure that the bottom of the monitor base is positioned over a table or desktop before removing the base from the monitor. 3. Remove the monitor base from the monitor. 3-8 User's Guide - HP L1730 | User's Guide L1530 and L1730 Flat Panel Monitors - Page 20
spaced 75 or 100mm apart and are compliant with the Video Electronics Standards Association (VESA) standard for mounting flat panel displays. 2. Mount the monitor to a swing arm or other mounting fixture by following the instructions included with the mounting fixture to be used. User's Guide 3-9 - HP L1730 | User's Guide L1530 and L1730 Flat Panel Monitors - Page 21
and provides specifications used by most operating systems to install support software for certain hardware devices. The .INF file ensures monitor compatibility and optimization with your computer's graphics adapter. INF files are also downloadable by clicking: http:www.hp.com/go/support and - HP L1730 | User's Guide L1530 and L1730 Flat Panel Monitors - Page 22
Operating the Monitor Front Panel Components L1530 and L1730 Monitor Components No. Control 1 Speakers 2 Menu button 3 (Minus button) 4 Volume Control Function Audio feature for music, alarms, etc. (multimedia models only) Launches the On-Screen Display (OSD) menu and selects functions. • When - HP L1730 | User's Guide L1530 and L1730 Flat Panel Monitors - Page 23
On-Screen Display (OSD) to adjust the screen image based on your viewing preferences. To access the OSD, do the following: 1. If the monitor is not already on, press the Power switch to turn on the monitor. 2. To access the OSD Menu, press the Menu button on the monitor's front panel. User's Guide - HP L1730 | User's Guide L1530 and L1730 Flat Panel Monitors - Page 24
settings and exit the menu. Using the On-Screen Display There are two On-Screen Display menus available; one for basic adjustments, and one for advanced adjustments. To access the Basic OSD Menu, press the menu button on the monitor's front panel. Basic OSD Menu Levels Menu Level 1 Brightness - HP L1730 | User's Guide L1530 and L1730 Flat Panel Monitors - Page 25
button again, or select Advanced Menu from the Basic OSD Menu. After selecting the Advanced Menu from the Basic Menu, the Advanced Menu remains the default OSD on subsequent powerups of the monitor Clock Phase Adjustment Scale Y Cancel Save and Return 9300 K sRGB-6500 K Y User's Guide 4-5 - HP L1730 | User's Guide L1530 and L1730 Flat Panel Monitors - Page 26
Monitor Advanced OSD Menu Levels (Continued) Level 1 Level 2 Level 3 Factory Reset Custom Color Custom Color Adjustment Cancel Save and Return Language Deutsch English N Espanol Francais Italiano Simplified Chinese Japanese Cancel Save and Return Management Power User's Guide - HP L1730 | User's Guide L1530 and L1730 Flat Panel Monitors - Page 27
manually activate the Auto-Adjustment function. For more precise adjustments, run the Auto-Adjust software on the CD, and use the Clock and Phase controls of the monitor to fine-tune the image. Optimizing Analog Conversion This monitor contains advanced circuitry that allows the flat panel screen - HP L1730 | User's Guide L1530 and L1730 Flat Panel Monitors - Page 28
than the monitor supports. For 15" monitors, set the resolution and refresh rate to 1024 x 768 at 60 Hz. For 17" monitors, set the resolution and refresh rate to 1280 x 1024 at 60 Hz. Restart your computer for the new settings take effect. Going to Sleep- Indicates the screen display is entering - HP L1730 | User's Guide L1530 and L1730 Flat Panel Monitors - Page 29
power on and off at the same time every day. This also extends the life of the backlight bulbs in the monitor. The Sleep Timer has five settings: Set Current Time Set Sleep Time Set On Time Timer: On/Off Sleep Now To set the timer: 1.Press the Menu button on the monitor front panel - HP L1730 | User's Guide L1530 and L1730 Flat Panel Monitors - Page 30
. Repeat steps 6 through 9 to set On Time. 13. Set the Timer mode to On to activate the Sleep Timer settings. The fifth selection, Sleep Now, turns the monitor backlights off immediately and stays in sleep mode until the next On Time activates or a monitor button is pressed. 4-10 User's Guide - HP L1730 | User's Guide L1530 and L1730 Flat Panel Monitors - Page 31
A Troubleshooting Solving Common Problems The following table lists possible problems, the possible cause of each problem, and the recommended solutions. Problem Screen is blank. Possible Cause Solution Power cord is disconnected. Connect the power cord. Power switch is turned off. Turn on - HP L1730 | User's Guide L1530 and L1730 Flat Panel Monitors - Page 32
Troubleshooting Problem Possible Cause Solution Image appears blurred, Brightness and contrast are Press the Minus button on the indistinct, or too dark. too low. monitor front panel to auto- adjust the screen. If that doesn't work, press the Menu button to open the Basic OSD Menu, and - HP L1730 | User's Guide L1530 and L1730 Flat Panel Monitors - Page 33
monitor Monitor model number (on front and back panel) Serial number for the monitor (on back panel) Purchase date on invoice Conditions under which the problem occurred Error messages received Hardware configuration (found on Windows Control Panel) Hardware and software you are using User's Guide - HP L1730 | User's Guide L1530 and L1730 Flat Panel Monitors - Page 34
B Technical Specifications L1530 Model 15-inch Flat Panel Monitor Display 15.0 in. 38.1 cm Type TFT LCD Viewable Image Size 15.0-inch diagonal 38.1 cm Maximum Weight 9.9 lb. 4.5 kg (unpacked) (Unpacked) Dimensions 41to 95o F --4 to 140o F 5 to 35o C --20 to +60o C User's Guide B-1 - HP L1730 | User's Guide L1530 and L1730 Flat Panel Monitors - Page 35
Specifications 15-inch Flat Panel Monitor (Continued) Relative Humidity 20 to 80% Altitude: Operating 0 to 12,000 ft. 0 to 3657.6 m Non-operating 0 to 40,000 ft. 0 to 12192 m Power Source 100 -- 240 VAC, 50 - 60 Hz Power 65 mm Monitor cabinet is provided with a slot allowing the use of - HP L1730 | User's Guide L1530 and L1730 Flat Panel Monitors - Page 36
Technical Specifications L1730 Model 17-inch Flat Panel Monitor Display Type Viewable Image Temperature Relative Humidity Altitude: Operating Non-operating Power Source 17.0 in. TFT LCD 17.0-inch diagonal 15.43 lb. 43.18 cm 43 ft. 0 to 12192 m 100 - 240 VAC, 50 - 60 Hz User's Guide B-3 - HP L1730 | User's Guide L1530 and L1730 Flat Panel Monitors - Page 37
Technical Specifications L1730 Model 17-inch Flat Panel Monitor (Continued) Power Consumption Input Terminal Tilt Stand Maximum If this occurs, you may need to readjust the parameters of the monitor screen by using the on-screen display. Your changes can be made to any or all of these modes and - HP L1730 | User's Guide L1530 and L1730 Flat Panel Monitors - Page 38
backlight turns off, and the Power light turns amber. When the monitor is in the reduced power state, the monitor utilizes less than 2 watts of power. There is a brief warm up period before the monitor returns to its normal operating mode. Refer to your computer manual for instructions on setting - HP L1730 | User's Guide L1530 and L1730 Flat Panel Monitors - Page 39
Notice This equipment has been tested and found to comply with installed and used in accordance with the instructions, may cause harmful interference to radio communications radio or television reception, which can be determined by turning the equipment off and on, the user is encouraged Guide C-1 - HP L1730 | User's Guide L1530 and L1730 Flat Panel Monitors - Page 40
, Texas 77269-2000 Or, call (281) 514-3333 To identify this product, refer to the Part, Series, or Model number found on the product. C-2 User's Guide - HP L1730 | User's Guide L1530 and L1730 Flat Panel Monitors - Page 41
international standards): EN55022 (CISPR 22) - Electromagnetic Interference EN55024 (IEC61000-4-2,3,4,5,6,8,11) - Electromagnetic Immunity EN61000-3-2 (IEC61000-3-2) - Power Line Harmonics EN61000-3-3 (IEC61000-3-3) - Power Line Flicker EN60950 (IEC950) - Product Safety Japanese Notice User - HP L1730 | User's Guide L1530 and L1730 Flat Panel Monitors - Page 42
meets the Energy Star guidelines for energy efficiency. Specific details on using the Energy Saving features can be found in the energy saver or power management section of the computer manual. Power Cord Set Requirements The monitor power supply is provided with Automatic Line Switching (ALS - HP L1730 | User's Guide L1530 and L1730 Flat Panel Monitors - Page 43
must be a minimum of 0.75 mm² or 18AWG, and the length of the cord must be between 6 feet (1.8 m) and 12 feet (3.6 m). If you have questions about the type of power cord to use, contact your HP authorized service provider. A power cord should be routed so that it is not likely to be walked on or - HP L1730 | User's Guide L1530 and L1730 Flat Panel Monitors - Page 44
D LCD Monitor Quality and Pixel Policy The TFT monitor uses high-precision technology, manufactured according to HP standards, to guarantee trouble-free performance. Nevertheless, the display may have cosmetic imperfections that appear as small bright or dark spots. This is common to all LCD - HP L1730 | User's Guide L1530 and L1730 Flat Panel Monitors - Page 45
LCD Monitor Quality and Pixel Policy To locate defective pixels, the monitor should be viewed under normal operating conditions, in normal operating mode at a supported resolution and refresh rate, from a distance of approximately 50 cm (16 in.). HP expects that, over time, the industry will
-
 1
1 -
 2
2 -
 3
3 -
 4
4 -
 5
5 -
 6
6 -
 7
7 -
8
-
9
-
10
-
11
-
12
-
13
-
14
-
15
-
16
-
17
-
18
-
19
-
20
-
21
-
22
-
23
-
24
-
25
-
26
-
27
-
28
-
29
-
30
-
31
-
32
-
33
-
34
-
35
-
36
-
37
-
38
-
39
-
40
-
41
-
42
-
43
-
44
-
45
 |
 |

User’s Guide
L1530 and L1730 Flat Panel Monitors
Document Part Number: 335576-B21
July 2003
This guide provides information on setting up the monitor,
installing drivers, using the on-screen display menu,
troubleshooting and technical specifications.