HP L1940T HP Display Assistant User Guide - Page 11
Position, White Point, Reset, Enter Preset name, Wizard Mode Adjustment Sequence - connections
 |
UPC - 882780252936
View all HP L1940T manuals
Add to My Manuals
Save this manual to your list of manuals |
Page 11 highlights
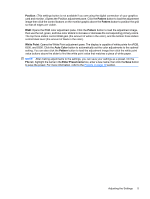
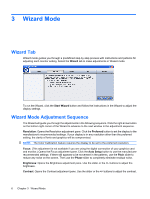
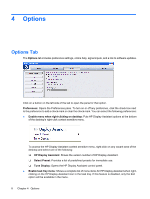
Position: (This adjustment is not available if you are using the digital connection of your graphics card and monitor.) Opens the Position adjustment pane. Click the control buttons on the monitor graphic to position the grid so that all edges are visible. White Point: Opens the White Point adjustment pane. Click the Reset button then select a white point value (sRGB, 6500, or 9300). Use a white point value that makes the display match a piece of white paper. NOTE: Once the adjustment process is complete, The File tab will be displayed where you can save the settings as a preset. Highlight the name in the Enter Preset name box, enter a new name, then click the Save button to save the preset. For more information, refer to the Presets on page 10 section. Wizard Mode Adjustment Sequence 7
-
 1
1 -
2
-
3
-
4
-
5
-
 6
6 -
 7
7 -
 8
8 -
 9
9 -
 10
10 -
 11
11 -
 12
12 -
 13
13 -
 14
14 -
 15
15 -
 16
16 -
17
-
18
-
19
-
20
-
21
-
22
-
23
-
24
 |
 |
