HP LaserJet Enterprise MFP M636 3x550 Tray with Stand Installation Guide - Page 7
macOS, Windows® 8.0 and 8.1, and Windows 10, Windows® 7, macOS, Windows® 8.0 et 8.1, et Windows 10,
 |
View all HP LaserJet Enterprise MFP M636 manuals
Add to My Manuals
Save this manual to your list of manuals |
Page 7 highlights
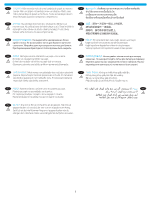
18 EN If you are attaching the accessory before installing the printer software, this procedure is not necessary. If you are attaching the accessory after installing the printer software, perform the following steps: macOS: The list of installed options should automatically update during the first print job after installing the accessory. Windows® 8.0 and 8.1, and Windows 10 1. Right-click on the bottom-left corner of the screen, or left click the Start button for newer versions of Windows 10. 2. Select Control Panel. Under Hardware and Sound, select View devices and printers. 3. Right-click the name of the printer, and then select Printer Properties. 4. Click the Device Settings tab. 5. Select Update Now. Or, in the drop-down menu next to Automatic Configuration, select Update Now. NOTE: Newer HP PCL-6 V4 drivers do not support Update Now. For these drivers, stop and restart the print spooler. Open a search box. In the search box, type services, and then press the Enter key. Right-click Print Spooler in the list of services, select Stop, and then right-click and select Start. Or, simply shut down and restart the computer. Windows® 7 1. Make sure the printer is turned on and connected to the computer or a network. 2. Open the Windows® Start menu, and then click Devices and Printers. 3. Right-click the name of the printer, and then select Printer Properties. 4. Click the Device Settings tab. 5. Select Update Now. Or, in the drop-down menu next to Automatic Configuration, select Update Now. FR Si vous fixez l'accessoire avant l'installation du logiciel de l'imprimante, cette procédure n'est pas nécessaire. Si vous connectez l'accessoire après l'installation du logiciel de l'imprimante, effectuez les étapes suivantes : macOS : une fois l'accessoire mis en place, la liste des options installées doit se mettre à jour automatiquement lors de la première tâche d'impression. Windows® 8.0 et 8.1, et Windows 10 1. Cliquez-droit sur le coin inférieur gauche de l'écran ou cliquez-gauche sur le bouton Démarrer pour des versions plus récentes de Windows 10. 2. Sélectionnez Panneau de configuration. Sous Matériel et audio, sélectionnez Afficher les périphériques et imprimantes. 3. Cliquez avec le bouton droit de la souris sur le nom de l'imprimante, puis sélectionnez Propriétés de l'imprimante. 4. Cliquez sur l'onglet Paramètres du périphérique. 5. Sélectionnez Mettre à jour maintenant. Ou, dans le menu déroulant, en regard de Configuration automatique, sélectionnez Mettre à jour maintenant. REMARQUE : Les pilotes HP PCL.6 V4 plus récents ne prennent pas en charge la fonction Mettre à jour maintenant. Pour ces pilotes, arrêtez et redémarrez le spouleur d'impression. Ouvrez un champ de recherche. Dans le champ de recherche, saisissez les services, puis cliquez sur le touche Entrée. Effectuez un clic droit sur Spouleur d'impression dans la liste des services, sélectionnez Arrêter, puis sélectionnez Démarrer. après avoir effectué un clic droit. Sinon, il vous suffit d'arrêter et de redémarrer l'ordinateur. Windows® 7 1. 1. Assurez-vous que l'imprimante est sous tension et qu'elle est connectée à votre ordinateur ou à un réseau. 2. Ouvrez le menu Démarrer de Windows®, puis cliquez sur Périphériques et imprimantes. 3. Cliquez avec le bouton droit de la souris sur le nom de l'imprimante, puis sélectionnez Propriétés de l'imprimante. 4. Cliquez sur l'onglet Paramètres du périphérique. 5. Sélectionnez Mettre à jour maintenant. Ou, dans le menu déroulant, en regard de Configuration automatique, sélectionnez Mettre à jour maintenant. DE Sollten Sie das Zubehör vor Installation der Druckersoftware anschließen, sind diese Schritte nicht notwendig. Sollten Sie das Zubehör nach Installation der Druckersoftware anschließen, führen Sie folgende Schritte durch: macOS: Die Liste mit den installierten Optionen wird während des Druckvorgangs des ersten Jobs nach der Installation des Zubehörs automatisch aktualisiert. Windows® 8.0 und 8.1 und Windows 10 1. Klicken Sie mit der rechten Maustaste in die untere linke Ecke des Bildschirms oder klicken Sie mit der linken Maustaste auf die Schaltfläche Start bei neueren Windows 10-Versionen. 2. Wählen Sie Systemsteuerung. Wählen Sie unter Hardware und Sound die Option Geräte und Drucker anzeigen aus. 3. Klicken Sie mit der rechten Maustaste auf den Namen des Druckers und wählen Sie dann Druckereigenschaften. 4. Klicken Sie auf die Registerkarte Geräteeinstellungen. 5. Wählen Sie Jetzt aktualisieren oder wählen Sie im Dropdown-Menü neben Automatische Konfiguration die Option Jetzt aktualisieren. HINWEIS: Neuere HP PCL-6 V4-Treiber unterstützen nicht Jetzt aktualisieren. Beenden und starten Sie den Drucker-Spooler für diese Treiber neu. Öffnen Sie ein Suchfeld. Geben Sie im Suchfeld Dienste ein und klicken Sie auf die Taste Eingabe. Klicken Sie mit der rechten Maustaste auf Druckwarteschlange in der Liste der Dienste, wählen Sie Anhalten und klicken Sie anschließend auf die rechte Maustaste und wählen Start. Alternativ können Sie den Computer herunterfahren und ihn erneut starten. Windows® 7 1. Stellen Sie sicher, dass der Drucker eingeschaltet ist und mit dem Computer oder einem Netzwerk verbunden ist. 2. Öffnen Sie das Start-Menü von Windows® und klicken Sie dann auf Geräte und Drucker. 3. Klicken Sie mit der rechten Maustaste auf den Namen des Druckers und wählen Sie dann Druckereigenschaften. 4. Klicken Sie auf die Registerkarte Geräteeinstellungen. 5. Wählen Sie Jetzt aktualisieren oder wählen Sie im Dropdown-Menü neben Automatische Konfiguration die Option Jetzt aktualisieren. 7
-
 1
1 -
 2
2 -
 3
3 -
 4
4 -
 5
5 -
 6
6 -
 7
7 -
 8
8 -
 9
9 -
 10
10 -
 11
11 -
 12
12 -
13
-
14
-
15
-
16
-
17
-
18
-
19
-
20
 |
 |
