HP Media Center m7200 HP Media Center PC Software Guide - Page 91
Archiving files using Media Center, Working with Image Files, Creating an image file
 |
View all HP Media Center m7200 manuals
Add to My Manuals
Save this manual to your list of manuals |
Page 91 highlights
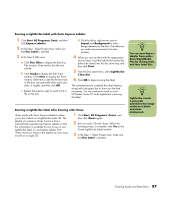
Archiving files using Media Center To archive your hard disk drive files: 1 Press the Media Center Start button on the remote control, or, with your mouse, click Start on the taskbar, and then click Media Center. 2 Select More Programs. 3 Select Media Archive. 4 Select the drive where your files are located by selecting (+) or (-). 5 Select the type of files to archive, by placing a check next to Music, Pictures, Video, and Recorded TV. 6 Select the drive where you want to archive your files by selecting (+) or (-). 7 Select Archive. Follow any onscreen instructions. n Your DVD Writer or CD Writer drive will not copy commercially available DVD movies. Most commercial DVDs are encoded to prevent unauthorized duplication. Working with Image Files The Sonic recording programs can convert all the files from a CD or DVD into a single image file (.iso), or a series of Global-Image files (.gi), (none exceeding 2 GB). You can use the image file to reproduce the original disc. Image files are typically used when you need to make multiple copies of the same disc. Creating an image file To make an image file using Sonic DigitalMedia Plus: 1 Open the Sonic DigitalMedia Plus program by clicking Start, All Programs, Sonic, and then DigitalMedia Home. 2 Click Copy, select .iso or .gif (if prompted for file type), and then click Save Image. 3 Insert the CD or DVD from which you want to make a image file. 4 Click Browse to select the location where the image file will be created. 5 Click the Save Image icon to create the image file. Burning from an image file The image file remains on your hard disk drive until you delete it. Since an image file is typically large, it is recommended that you delete it if you do not intend to burn additional discs. Creating Audio and Data Discs 85
-
 1
1 -
2
-
3
-
4
-
5
-
6
-
7
-
8
-
9
-
10
-
11
-
12
-
13
-
14
-
15
-
16
-
17
-
18
-
19
-
20
-
21
-
22
-
23
-
24
-
25
-
26
-
27
-
28
-
29
-
30
-
31
-
32
-
33
-
34
-
35
-
36
-
37
-
38
-
39
-
40
-
41
-
42
-
43
-
44
-
45
-
46
-
47
-
48
-
49
-
50
-
51
-
52
-
53
-
54
-
55
-
56
-
57
-
58
-
59
-
60
-
61
-
62
-
63
-
64
-
65
-
66
-
67
-
68
-
69
-
70
-
71
-
72
-
73
-
74
-
75
-
76
-
77
-
78
-
79
-
80
-
81
-
82
-
83
-
84
-
85
-
 86
86 -
 87
87 -
 88
88 -
 89
89 -
 90
90 -
 91
91 -
 92
92 -
 93
93 -
 94
94 -
 95
95 -
 96
96 -
97
-
98
-
99
-
100
-
101
-
102
-
103
-
104
-
105
-
106
-
107
-
108
-
109
-
110
-
111
-
112
-
113
-
114
-
115
-
116
-
117
-
118
-
119
-
120
-
121
-
122
-
123
-
124
-
125
-
126
-
127
-
128
-
129
-
130
-
131
-
132
-
133
-
134
-
135
-
136
-
137
-
138
 |
 |
