HP Nc8430 Drives - Page 16
Removing an optical disc (with power)
 |
UPC - 882780828223
View all HP Nc8430 manuals
Add to My Manuals
Save this manual to your list of manuals |
Page 16 highlights
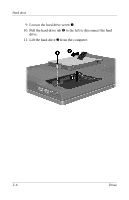
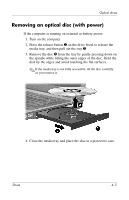
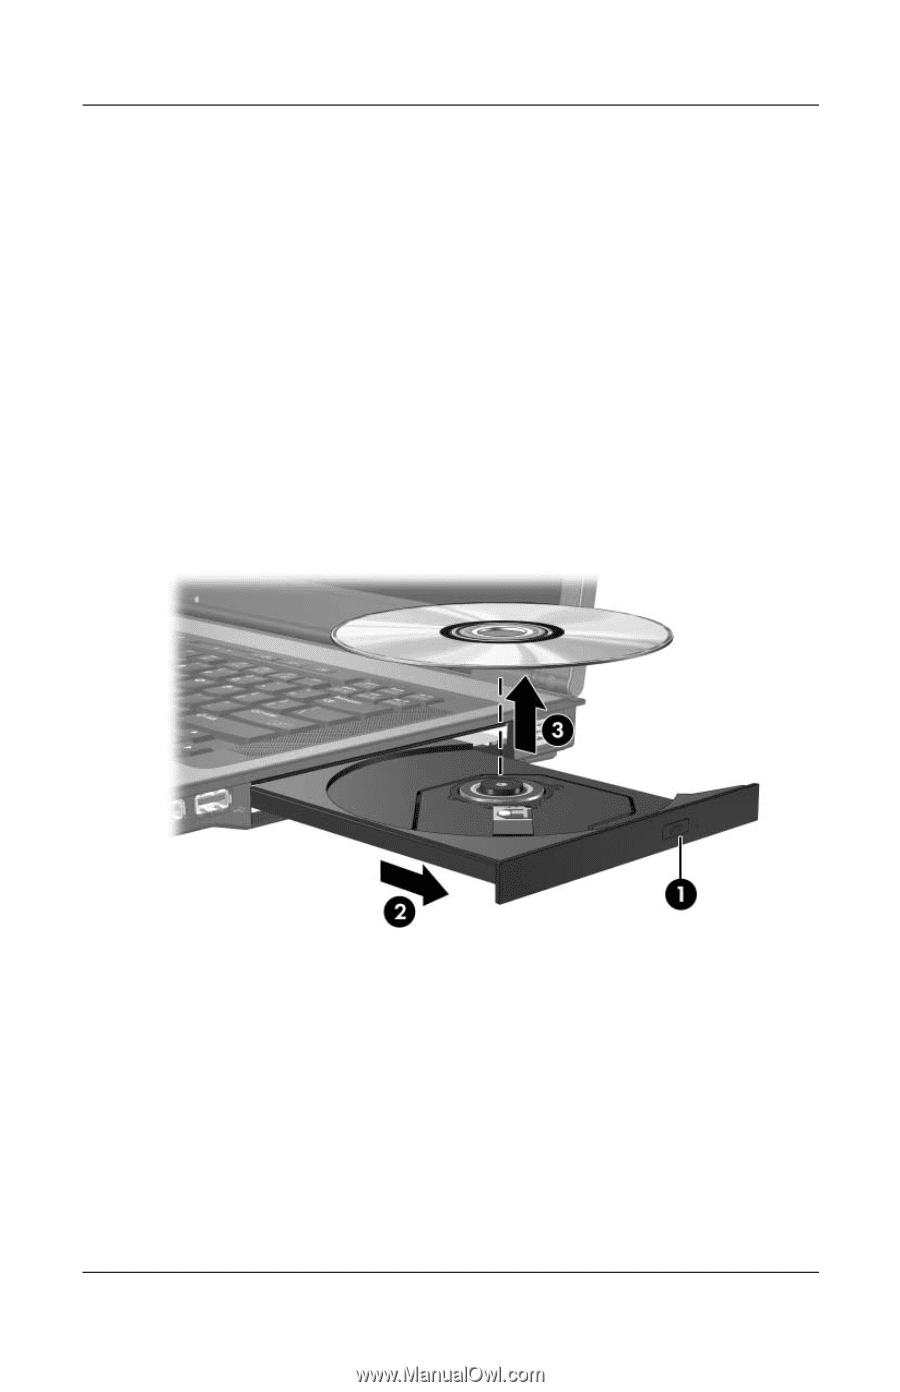
Optical drives Removing an optical disc (with power) If the computer is running on external or battery power: 1. Turn on the computer. 2. Press the release button 1 on the drive bezel to release the media tray, and then pull out the tray 2. 3. Remove the disc 3 from the tray by gently pressing down on the spindle while lifting the outer edges of the disc. Hold the disk by the edges and avoid touching the flat surfaces. ✎ If the media tray is not fully accessible, tilt the disc carefully as you remove it. 4. Close the media tray and place the disc in a protective case. Drives 4-3
-
 1
1 -
2
-
3
-
4
-
5
-
6
-
7
-
8
-
9
-
10
-
 11
11 -
 12
12 -
 13
13 -
 14
14 -
 15
15 -
 16
16 -
 17
17 -
 18
18 -
 19
19 -
 20
20 -
 21
21 -
22
 |
 |
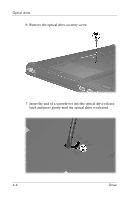
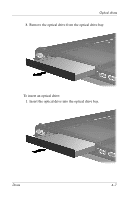
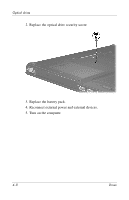
Optical drives
Drives
4–3
Removing an optical disc (with power)
If the computer is running on external or battery power:
1. Turn on the computer.
2. Press the release button
1
on the drive bezel to release the
media tray, and then pull out the tray
2
.
3. Remove the disc
3
from the tray by gently pressing down on
the spindle while lifting the outer edges of the disc. Hold the
disk by the edges and avoid touching the flat surfaces.
✎
If the media tray is not fully accessible, tilt the disc carefully
as you remove it.
4. Close the media tray and place the disc in a protective case.