HP Neoware e140 Neoware Thin Clients with Microsoft® Windows® - Page 53
Exporting Displayed Data, The Neoware Firewall Configuration Utility saves the display data
 |
View all HP Neoware e140 manuals
Add to My Manuals
Save this manual to your list of manuals |
Page 53 highlights
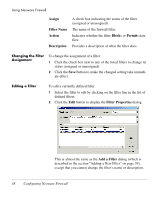
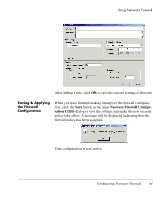
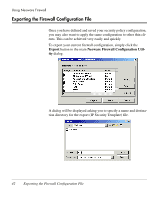
Exporting Displayed Data Using Neoware Firewall Clicking Save will create an executable batch file which you can send to other thin clients, either manually or by using Neoware's ezRemote Manager. The Neoware Firewall Configuration Utility saves the display data and export configuration separately. If you want to copy the display data to other thin clients as well as the export file, you need to do the following: 1 In the Neoware Firewall Configuration Utility dialog, click the Save button to save the current configuration. 2 Click Export to save the firewall configuration as a batch file. 3 Locate the file MFWC.DAT in the Neoware Firewall program directory (default: C:\Program Files\Neoware Firewall Configuration Utility). 4 Apply the exported template batch file on the target thin client. 5 Overwrite the MFWC.DAT file on the target thin client with the MFWC.DAT file from the source of the exported batch file. Exporting the Firewall Configuration File 43
-
 1
1 -
2
-
3
-
4
-
5
-
6
-
7
-
8
-
9
-
10
-
11
-
12
-
13
-
14
-
15
-
16
-
17
-
18
-
19
-
20
-
21
-
22
-
23
-
24
-
25
-
26
-
27
-
28
-
29
-
30
-
31
-
32
-
33
-
34
-
35
-
36
-
37
-
38
-
39
-
40
-
41
-
42
-
43
-
44
-
45
-
46
-
47
-
 48
48 -
 49
49 -
 50
50 -
 51
51 -
 52
52 -
 53
53 -
 54
54 -
 55
55 -
 56
56 -
 57
57 -
 58
58 -
59
-
60
-
61
-
62
-
63
-
64
-
65
-
66
-
67
-
68
-
69
-
70
-
71
-
72
-
73
-
74
 |
 |