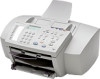
HP Officejet t65 HP OfficeJet T Series All-in-One - (English) User's Guide - Page 17
Scanning
 |
View all HP Officejet t65 manuals
Add to My Manuals
Save this manual to your list of manuals |
Page 17 highlights
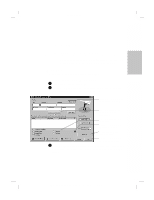
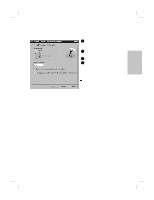
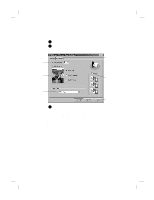
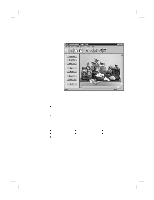
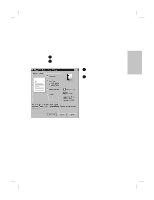
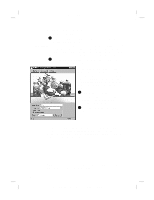
2 Polaris (US) Scanning You can scan photographs, drawings, and text in color, black and white, or shades of gray. You can also scan to email and scan text for editing. Scanning images 1 Load your original (see page 1-1). 2 On the Manager, click Scan and explore the settings in the Scan Settings dialog box. Select the appropriate setting for your image. Explore Optical Character Recognition. Press here for advanced scan settings. Discover approximate image file sizes. Read a brief description of each scan setting. To find out more about a setting, click Help. 3 After making your selections, click Start Scan to begin scanning. The image appears on your PC screen as it is scanned. Now you can edit your image in the HP Image Viewer. Scanning from the front panel Scan To scan from the front panel, load your original and press Scan. The image appears in the HP Image Viewer. The scan settings will be the same as for your previous scan. ...2-5 HP Company Confidential - 3/18/99 1:56 pm
-
 1
1 -
2
-
3
-
4
-
5
-
6
-
7
-
8
-
9
-
10
-
11
-
 12
12 -
 13
13 -
 14
14 -
 15
15 -
 16
16 -
 17
17 -
 18
18 -
 19
19 -
 20
20 -
 21
21 -
 22
22 -
23
-
24
-
25
-
26
-
27
-
28
-
29
-
30
-
31
-
32
-
33
-
34
-
35
-
36
-
37
-
38
-
39
-
40
-
41
-
42
-
43
-
44
-
45
-
46
-
47
-
48
-
49
-
50
-
51
-
52
-
53
-
54
-
55
-
56
-
57
-
58
-
59
-
60
-
61
-
62
-
63
-
64
-
65
-
66
 |
 |
