HP Pavilion dm1-2100 HP Pavilion dm1 Notebook PC - Maintenance and Service Gui - Page 69
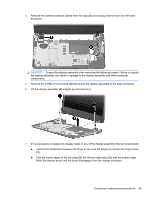
the display panel to the display enclosure., two on the right side and one on the left top that secure
 |
View all HP Pavilion dm1-2100 manuals
Add to My Manuals
Save this manual to your list of manuals |
Page 69 highlights
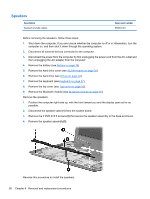
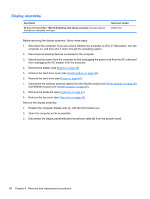
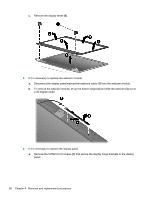
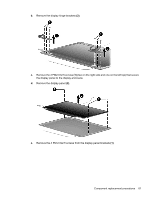
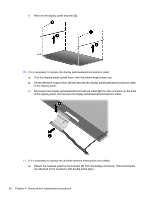
b. Remove the display hinge brackets (2). c. Remove the 3 PM2.0×2.5 screws (1) (two on the right side and one on the left top) that secure the display panel to the display enclosure. d. Remove the display panel (2). e. Remove the 4 PM 2.0x2.5 screws from the display panel brackets (1). Component replacement procedures 61
-
 1
1 -
2
-
3
-
4
-
5
-
6
-
7
-
8
-
9
-
10
-
11
-
12
-
13
-
14
-
15
-
16
-
17
-
18
-
19
-
20
-
21
-
22
-
23
-
24
-
25
-
26
-
27
-
28
-
29
-
30
-
31
-
32
-
33
-
34
-
35
-
36
-
37
-
38
-
39
-
40
-
41
-
42
-
43
-
44
-
45
-
46
-
47
-
48
-
49
-
50
-
51
-
52
-
53
-
54
-
55
-
56
-
57
-
58
-
59
-
60
-
61
-
62
-
63
-
 64
64 -
 65
65 -
 66
66 -
 67
67 -
 68
68 -
 69
69 -
 70
70 -
 71
71 -
 72
72 -
 73
73 -
 74
74 -
75
-
76
-
77
-
78
-
79
-
80
-
81
-
82
-
83
-
84
-
85
-
86
-
87
-
88
-
89
-
90
-
91
-
92
-
93
-
94
-
95
-
96
-
97
-
98
-
99
-
100
-
101
-
102
-
103
-
104
-
105
-
106
-
107
-
108
-
109
-
110
-
111
 |
 |
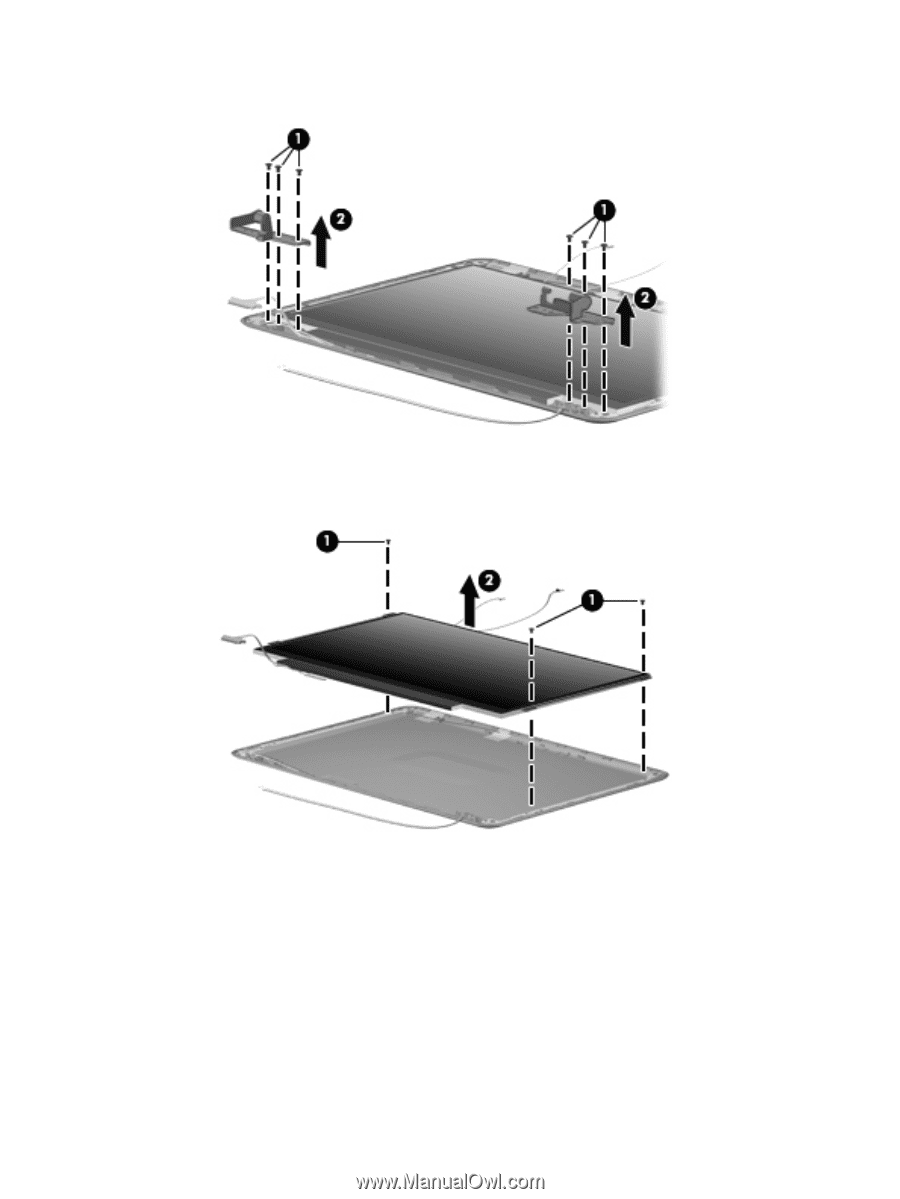
b.
Remove the display hinge brackets
(2)
.
c.
Remove the 3 PM2.0×2.5 screws
(1)
(two on the right side and one on the left top) that secure
the display panel to the display enclosure.
d.
Remove the display panel
(2)
.
e.
Remove the 4 PM 2.0x2.5 screws from the display panel brackets
(1)
.
Component replacement procedures
61