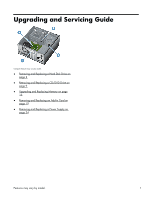
HP Pavilion p7-1400 Upgrading and Servicing Guide - Page 6
Disconnect the two cables from the end of the, out of the computer.
 |
View all HP Pavilion p7-1400 manuals
Add to My Manuals
Save this manual to your list of manuals |
Page 6 highlights
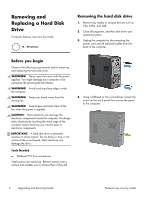
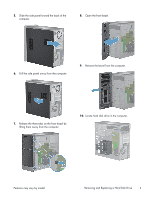
11. Lay the computer on a flat surface. 14. Grasp the hard drive cage and slide the cage toward the CD/DVD drive, and then lift the cage out of the computer. 12. Remove the two screws that secure the hard disk drive cage to the computer. 15. Disconnect the two cables from the end of the hard disk drive. The cables may have a latch that is pressed to release the cable. 13. Using a screwdriver, push the lever marked "1" on the base on the right side of the hard disk drive cage by the motherboard. 4 Upgrading and Servicing Guide Features may vary by model.
-
 1
1 -
 2
2 -
 3
3 -
 4
4 -
 5
5 -
 6
6 -
 7
7 -
 8
8 -
 9
9 -
 10
10 -
 11
11 -
 12
12 -
13
-
14
-
15
-
16
-
17
-
18
-
19
-
20
-
21
-
22
-
23
-
24
-
25
-
26
-
27
-
28
-
29
-
30
-
31
 |
 |
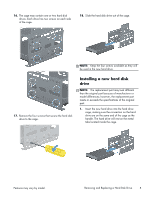
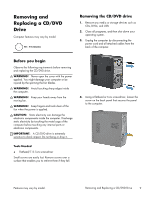
11.
Lay the computer on a flat surface.
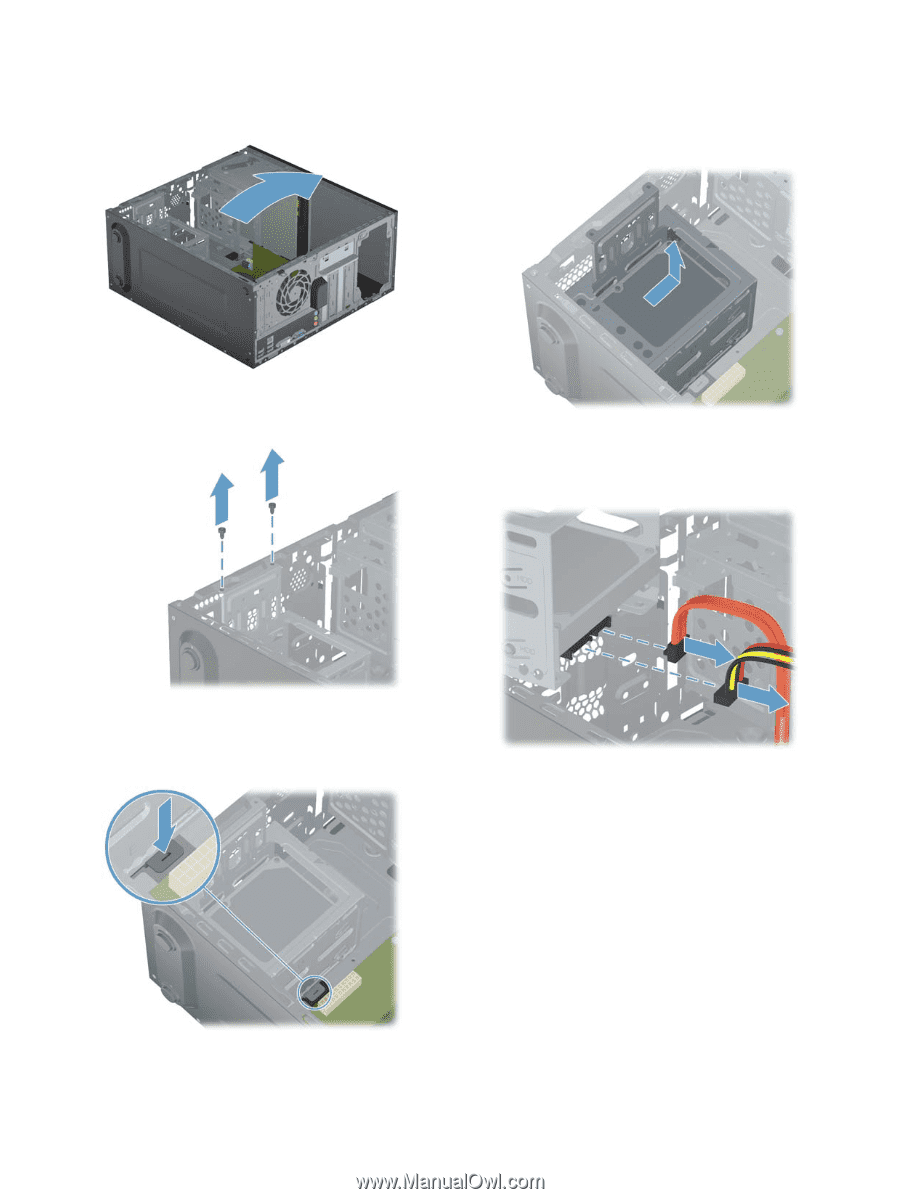
12.
Remove the two screws that secure the hard disk
drive cage to the computer.
13.
Using a screwdriver, push the lever marked “1”
on the base on the right side of the hard disk
drive cage by the motherboard.
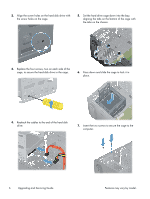
14.
Grasp the hard drive cage and slide the cage
toward the CD/DVD drive, and then lift the cage
out of the computer.
15.
Disconnect the two cables from the end of the
hard disk drive. The cables may have a latch
that is pressed to release the cable.
4
Upgrading and Servicing Guide
Features may vary by model.