HP Photosmart 1200 HP Photo Scanner 1200 - (English) User Manual - Page 40
memory cards, memory card capacity, insert and remove the memory card, format the memory card
 |
View all HP Photosmart 1200 manuals
Add to My Manuals
Save this manual to your list of manuals |
Page 40 highlights
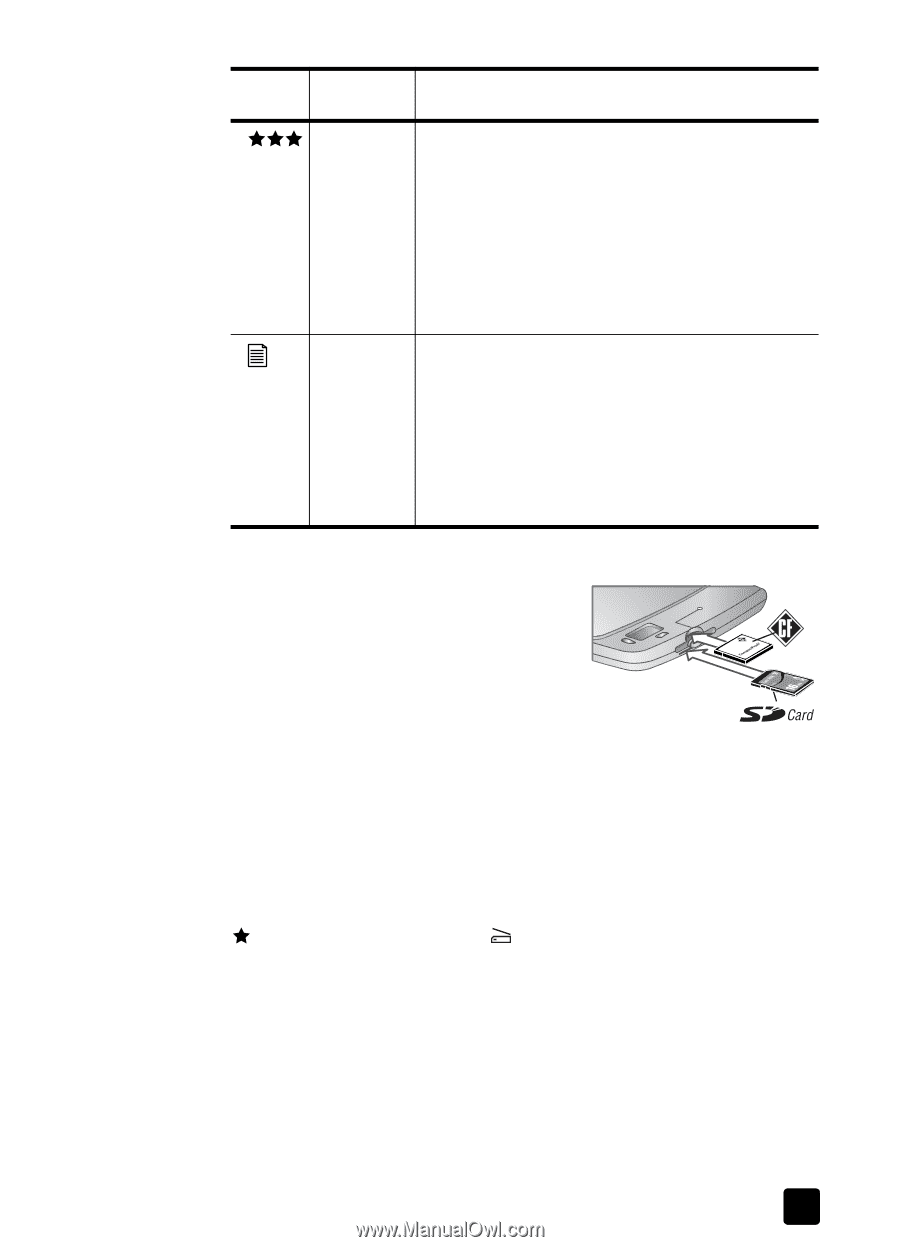
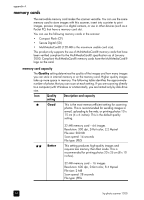
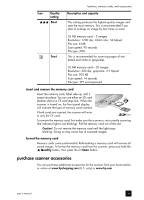
batteries, memory cards, and accessories Icon Quality Description and capacity setting Best This setting produces the highest-quality images and uses the most memory. This is recommended if you plan to enlarge an image by four times or more. Text 32 MB memory card - 5 images Resolution: 1200 dpi, 24-bit color, 34 Mpixel File size: 6 MB Scan speed: 90 seconds File type: JPEG This is recommended for scanning pages of text (black and white or grayscale). 32 MB memory card - 35 images Resolution: 300 dpi, grayscale, 2.2 Mpixel File size: 900 KB Scan speed: 14 seconds File type: TIFF uncompressed insert and remove the memory card Insert the memory card, label side up, until it snaps into place. You can use either an SD card (bottom slot) or a CF card (top slot). When the scanner is turned on, the front panel display will indicate the type of memory card inserted. If both cards are inserted, the scanner will write to only the CF card. To remove the memory card, first make sure the scanner is not currently scanning (the indicator light is not blinking). Pull the memory card out of the slot. Caution! Do not remove the memory card until the light stops blinking. Doing so may cause loss of scanned images. format the memory card Memory cards come preformatted. Reformatting a memory card will remove all saved images. To format the memory card from the scanner: press and hold the Quality button, then press the Scan button. purchase scanner accessories You can purchase additional accessories for the scanner from your local retailer or online at www.hpshopping.com (U.S. only) or www.hp.com. user's manual 39
-
 1
1 -
2
-
3
-
4
-
5
-
6
-
7
-
8
-
9
-
10
-
11
-
12
-
13
-
14
-
15
-
16
-
17
-
18
-
19
-
20
-
21
-
22
-
23
-
24
-
25
-
26
-
27
-
28
-
29
-
30
-
31
-
32
-
33
-
34
-
 35
35 -
 36
36 -
 37
37 -
 38
38 -
 39
39 -
 40
40 -
 41
41 -
 42
42 -
 43
43 -
 44
44 -
 45
45 -
46
-
47
-
48
 |
 |