HP Photosmart 715 HP Photosmart 715 Digital Camera - User Guide
HP Photosmart 715 Manual
 |
View all HP Photosmart 715 manuals
Add to My Manuals
Save this manual to your list of manuals |
HP Photosmart 715 manual content summary:
- HP Photosmart 715 | HP Photosmart 715 Digital Camera - User Guide - Page 1
- HP Photosmart 715 | HP Photosmart 715 Digital Camera - User Guide - Page 2
- HP Photosmart 715 | HP Photosmart 715 Digital Camera - User Guide - Page 3
hp photosmart 715 digital camera user guide - HP Photosmart 715 | HP Photosmart 715 Digital Camera - User Guide - Page 4
batteries that are included with the camera Disposal of this material can be regulated because of environmental considerations. For disposal or recycling information, please contact your local authorities or the Electronic Industries Alliance (EIA) (www.eiae.org). ii HP photosmart 715 user guide - HP Photosmart 715 | HP Photosmart 715 Digital Camera - User Guide - Page 5
setting 10 Using the optical or digital zoom 10 Using the self-timer 11 Chapter 3: Managing images on the camera Viewing your images 13 Deleting your 20 Chapter 4: Adjusting the camera settings Using the flash 21 Changing the image quality 23 Setting Instant Review 25 Changing the date - HP Photosmart 715 | HP Photosmart 715 Digital Camera - User Guide - Page 6
47 Chapter 7: Troubleshooting Problems and solutions 49 Getting assistance 56 Visiting HP Web sites 56 Visiting related Web sites 56 Contacting HP Customer Support 57 Obtaining support within the United States 57 Obtaining support worldwide 58 Hewlett-Packard limited warranty statement - HP Photosmart 715 | HP Photosmart 715 Digital Camera - User Guide - Page 7
Appendix A: Reference Symbols on the status LCD 63 Camera indicator lights (LEDs 64 Camera menus 65 Camera specifications 66 Index 69 Table of Contents v - HP Photosmart 715 | HP Photosmart 715 Digital Camera - User Guide - Page 8
vi - HP Photosmart 715 | HP Photosmart 715 Digital Camera - User Guide - Page 9
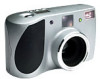
started Your HP photosmart 715 digital camera takes high-quality pictures you can share with family and friends on the Internet or by e-mail. It comes with software for manipulating, storing, and printing your photos. Your camera includes the following features: 3.3 megapixel (MP) resolution 3x - HP Photosmart 715 | HP Photosmart 715 Digital Camera - User Guide - Page 10
flash AC power adapter connection USB computer connection ON/OFF POWER PREVIEW button switch diopter control ZOOM button CF card access LED CF memory card door viewfinder viewfinder LED PLAY/MENU button 5-WAY controller image display battery compartment door 2 HP photosmart 715 user guide - HP Photosmart 715 | HP Photosmart 715 Digital Camera - User Guide - Page 11
flash symbols status LCD SHUTTER button macro symbol self-timer symbol IMAGE QUALITY button FLASH button SELF-TIMER/MACRO button Setup Setting up the digital camera is quick and easy-follow these steps and you will be ready to take pictures. Step 1: Attach the wrist strap 1 Thread the short - HP Photosmart 715 | HP Photosmart 715 Digital Camera - User Guide - Page 12
camera date and time 1 Press right or left on the controller to set the day, and then press the bottom of the controller to select the next field. 2 Set the month, year, hour, minute, and date format using the same method. 3 To confirm the date and time, press OK. 4 HP photosmart 715 user guide - HP Photosmart 715 | HP Photosmart 715 Digital Camera - User Guide - Page 13
the slot. If it stops when it is only partially inserted, turn the card over and try again. Do not force the card into the camera. 5 Fold the card ejection lever down against the card and close the CF memory card door. Tip If you cannot close the CF memory card - HP Photosmart 715 | HP Photosmart 715 Digital Camera - User Guide - Page 14
6 HP photosmart 715 user guide - HP Photosmart 715 | HP Photosmart 715 Digital Camera - User Guide - Page 15
digital camera and gives you tips for taking the best pictures. It also describes how to use the optical or digital zoom and the self-timer. Note If the camera access indicator light turns off. Note The Instant Review feature allows you to review an image immediately after you take a picture. - HP Photosmart 715 | HP Photosmart 715 Digital Camera - User Guide - Page 16
display. 2 Frame your picture in the image display by pointing the camera lens at your subject. 3 Press and hold the SHUTTER button halfway down to allow the camera to adjust the focus and exposure. 4 When you see the To turn off the image display, press the button. 8 HP photosmart 715 user guide - HP Photosmart 715 | HP Photosmart 715 Digital Camera - User Guide - Page 17
subject to be in the middle of the image or if the subject lacks contrast, use focus lock. 1 With the camera on, frame a subject that is the same distance from the lens as your subject. 2 Press the SHUTTER button halfway down to lock the focus. Wait until you see a steady green light - HP Photosmart 715 | HP Photosmart 715 Digital Camera - User Guide - Page 18
. 2 Frame your picture in the image display by pointing the camera lens at your subject. 3 Press the right side of the button to zoom in up to two times the normal view. To return to normal view, press the left side of the button. 4 Take your picture. 10 HP photosmart 715 user guide - HP Photosmart 715 | HP Photosmart 715 Digital Camera - User Guide - Page 19
of yourself or a posed group. After you turn on the self-timer and press the SHUTTER button, the camera waits 10 seconds before taking the picture. To use the self-timer 1 Attach the camera to a tripod, or place it on a stable surface at an appropriate distance and height from the subject. 2 With - HP Photosmart 715 | HP Photosmart 715 Digital Camera - User Guide - Page 20
12 HP photosmart 715 user guide - HP Photosmart 715 | HP Photosmart 715 Digital Camera - User Guide - Page 21
have taken some pictures, you can view them with the camera's image display. You can view a single image, portions of setting used to take the picture Print order status (the Printer symbol appears only if an image is marked for digital print order format [DPOF]) Lock status (the Lock symbol - HP Photosmart 715 | HP Photosmart 715 Digital Camera - User Guide - Page 22
overlay bar image file name number of the image on the CF memory card When you have finished reviewing images, be sure to turn off the image display to conserve battery power. Deleting your images You of the controller to scroll to the image you want to delete. 14 HP photosmart 715 user guide - HP Photosmart 715 | HP Photosmart 715 Digital Camera - User Guide - Page 23
right or left side of the controller to select Yes, and then press OK. A progress bar appears on the image display to indicate that the camera is formatting the CF memory card. To avoid damaging the card, do not open the CF memory card door while the card is being formatted - HP Photosmart 715 | HP Photosmart 715 Digital Camera - User Guide - Page 24
print your photos on a printer attached to the computer, the printer reads the print order and prints the specified images. You can insert the CF memory card directly into a DPOF-compatible printer. The printer reads the print order and prints the specified images. 16 HP photosmart 715 user guide - HP Photosmart 715 | HP Photosmart 715 Digital Camera - User Guide - Page 25
100 images are stored on the CF memory card, only the first 100 images will be stored in the DPOF file. Managing images on the camera 17 - HP Photosmart 715 | HP Photosmart 715 Digital Camera - User Guide - Page 26
you want to see one image in normal view, use the controller to move the yellow border to the image, and then press OK. 18 HP photosmart 715 user guide - HP Photosmart 715 | HP Photosmart 715 Digital Camera - User Guide - Page 27
Magnifying your images While reviewing an image, you can magnify an area of the image two or four times its normal size. This is helpful when you want to view a OK. 4 Use the controller to pan left and right or up and down, or press OK to return to normal view. Managing images on the camera 19 - HP Photosmart 715 | HP Photosmart 715 Digital Camera - User Guide - Page 28
an image does not prevent it from being deleted when you format the CF memory card. When you are reviewing images on the image display, a Lock symbol appears for images that are locked. To lock or unlock images of the controller to select Yes, and then press OK. 20 HP photosmart 715 user guide - HP Photosmart 715 | HP Photosmart 715 Digital Camera - User Guide - Page 29
how to: use the flash. change the image quality. set the instant-review option. change the date and time. adjust the image display brightness. turn the The camera offers four flash settings. The current flash setting is indicated by a symbol on the status LCD. Each time you turn the camera off and - HP Photosmart 715 | HP Photosmart 715 Digital Camera - User Guide - Page 30
. If necessary, use a tripod to hold the camera steady. To change the flash setting With the camera on, press the FLASH ( ) button repeatedly until the flash setting you want appears on the status LCD. The button cycles through the four available flash settings. 22 HP photosmart 715 user guide - HP Photosmart 715 | HP Photosmart 715 Digital Camera - User Guide - Page 31
-efficient image quality setting. Use this setting for taking pictures that you will only send in e-mail or place on the Internet. Resolution (in pixels) Digital zoom off: 640 by 480 Digital zoom on: 320 by 240 Adjusting the camera settings 23 - HP Photosmart 715 | HP Photosmart 715 Digital Camera - User Guide - Page 32
.4 cm (8 by 10 inches). Same resolution as the Better image quality setting, but with lower file compression. To change the image quality With the camera on, press the IMAGE QUALITY ( ) button repeatedly until the quality level you want appears on the status LCD. 24 HP photosmart 715 user guide - HP Photosmart 715 | HP Photosmart 715 Digital Camera - User Guide - Page 33
you do not want to review every picture immediately after you take it, turn Instant Review off to conserve battery power. To turn Instant Review on or off 1 then press OK. 3 Use the down side of the controller to select Instant Review. 4 Use the right or left side of the controller to select On or - HP Photosmart 715 | HP Photosmart 715 Digital Camera - User Guide - Page 34
you take each picture. The camera prompts you to enter the date and time under the following circumstances: When you turn on the camera for the first time. If the camera was without battery power (the and then press OK. 6 To confirm the date and time, press OK. 26 HP photosmart 715 user guide - HP Photosmart 715 | HP Photosmart 715 Digital Camera - User Guide - Page 35
the image display brightness You can adjust the brightness of the image display for different lighting conditions. For example, if you are using the camera in bright sunlight, you might want to increase the image display brightness to improve the visibility of the display. To set the image display - HP Photosmart 715 | HP Photosmart 715 Digital Camera - User Guide - Page 36
the controller to select On or Off, and then press OK. Changing the camera language You can change the language used for the camera menus to one of five languages: English, French, German, Italian, or Spanish. OK. 5 Press the button to return to the main menu. 28 HP photosmart 715 user guide - HP Photosmart 715 | HP Photosmart 715 Digital Camera - User Guide - Page 37
a printer with a slot for a CompactFlash (CF) memory card, you can print your images directly from a CF memory card. Check out HP's photosmart Web site at www.hp.com/photosmart for great ideas and tips about how to use your images to create fun projects. This chapter describes how to use the camera - HP Photosmart 715 | HP Photosmart 715 Digital Camera - User Guide - Page 38
(MB) Windows NT 4.0: 64 MB 180 MB 640 by 480 pixels, 256-bit color Any speed Windows 98, Windows Me, Windows XP, and Windows 2000: USB port Windows NT 4.0: CompactFlash card reader (purchased separately) or HP printer equipped with a card reader 30 HP photosmart 715 user guide - HP Photosmart 715 | HP Photosmart 715 Digital Camera - User Guide - Page 39
exe, where X is the letter of your CD-ROM drive. 2 Click Next, and then follow the instructions on the screen to install the software. Certain versions of the camera are shipped with bonus software. Keep the HP photosmart 715 CD-ROM in the computer's CD-ROM drive and continue to the next section to - HP Photosmart 715 | HP Photosmart 715 Digital Camera - User Guide - Page 40
procedure in this section if your computer runs Windows Me, Windows XP, Windows 2000, or Windows 98. To unload images to a Windows computer 1 Connect the camera to the computer using the USB cable. 2 Turn on the camera. 32 HP photosmart 715 user guide - HP Photosmart 715 | HP Photosmart 715 Digital Camera - User Guide - Page 41
the software. Using the camera with a Windows NT 4.0 computer Windows NT 4.0 does not support the USB interface, so you cannot connect your camera directly to your computer. You can transfer images from a CF memory card to the computer through either a CF memory card slot in an HP printer equipped - HP Photosmart 715 | HP Photosmart 715 Digital Camera - User Guide - Page 42
HP Photo Imaging Software icon on the Windows desktop. The main window of the HP Photo Imaging Software opens. 6 Click Unload Images in the main window. Because no USB camera is found, the software HP Automatic Image Unload software and complete the steps to unload. 34 HP photosmart 715 user guide - HP Photosmart 715 | HP Photosmart 715 Digital Camera - User Guide - Page 43
the images in your digital camera to a Macintosh computer. System requirements for a Macintosh computer To work with your camera, your Macintosh computer must meet or exceed the following requirements. For updated system requirements, go to www.hp.com/photosmart. Operating system Processor Memory - HP Photosmart 715 | HP Photosmart 715 Digital Camera - User Guide - Page 44
and continue to the next section to install the bonus software. To install the bonus software 1 Double-click the Bonus folder icon. 2 Double-click the installer icon for Panorama Maker or PhotoFantasy. 3 Follow the instructions on the screen to install the software. 36 HP photosmart 715 user guide - HP Photosmart 715 | HP Photosmart 715 Digital Camera - User Guide - Page 45
computer off when connecting or disconnecting the camera. To connect the camera to a Macintosh computer 1 Make sure that the camera is turned off. 2 Plug the smaller end of the USB cable (supplied) into the camera. 3 Plug the other end of the cable into any USB port on the computer. 4 Turn on the - HP Photosmart 715 | HP Photosmart 715 Digital Camera - User Guide - Page 46
the camera to your computer by using the USB cable. 2 Turn on the camera. The status LCD displays PC to indicate the camera is software opens and you can view, edit, print, and create projects with your images. For more information, see the ArcSoft software Help. 38 HP photosmart 715 user guide - HP Photosmart 715 | HP Photosmart 715 Digital Camera - User Guide - Page 47
manually without using the ArcSoft software. When you connect the camera to your computer, an "Untitled drive" icon representing the camera does not have the Automatic Image Unload software installed on it. Note Make sure that the computer has a USB port and that its operating system is Windows - HP Photosmart 715 | HP Photosmart 715 Digital Camera - User Guide - Page 48
photos on a printer equipped with a card reader If your printer has a slot for a CF memory card, as the HP photosmart 1000 and higher series printers do, you can print your images directly from the card. For more information, see your printer's documentation. 40 HP photosmart 715 user guide - HP Photosmart 715 | HP Photosmart 715 Digital Camera - User Guide - Page 49
to use your camera safely. Powering your camera Your digital camera can be powered by batteries or an HP-approved AC power adapter. For convenience, use batteries when you are taking pictures. To preserve battery power, use an AC adapter (purchased separately) when you are reviewing images on the - HP Photosmart 715 | HP Photosmart 715 Digital Camera - User Guide - Page 50
batteries, be sure you fully drain and recharge the batteries according to the manufacturer's instructions. Use only batteries that are in good condition. Batteries that show signs of leakage, corrosion, or swelling should not be installed in the camera. 42 HP photosmart 715 user guide - HP Photosmart 715 | HP Photosmart 715 Digital Camera - User Guide - Page 51
additional batteries from your local camera or electronics store. Use camera is off and see "Step 2: Install the batteries" on page 4 for specific instructions of different types. Always follow the instructions on the battery package when handling connecting your camera to a computer or when using the - HP Photosmart 715 | HP Photosmart 715 Digital Camera - User Guide - Page 52
the round end of the adapter cable to the camera. Note If you want to use battery power, remove the AC adapter from the camera. If the AC adapter is connected to the camera, even if it is not connected to a power source, the camera will not use battery power. 44 HP photosmart 715 user guide - HP Photosmart 715 | HP Photosmart 715 Digital Camera - User Guide - Page 53
variety of capacities. You can purchase additional CF memory cards from www.hpshopping.com (in selected countries/regions only), or from your local digital camera or electronics store. Formatting a CF memory card Most CF memory cards are already formatted when you buy them. However, if you buy a CF - HP Photosmart 715 | HP Photosmart 715 Digital Camera - User Guide - Page 54
before you use it. Lens adapter The threads on the 49 mm mount for the lens adapter are made of plastic. Be careful not to damage the threads when you attach filters and lenses. For accessory information, see the catalog that was included in the product box. 46 HP photosmart 715 user guide - HP Photosmart 715 | HP Photosmart 715 Digital Camera - User Guide - Page 55
an authorized HP Service Center for repairs. Keep the camera dry. Exposing the camera to excessive moisture can cause it to malfunction. If moisture gets inside the camera, stop using the camera immediately. Allow the camera to air-dry completely before operating it again. Your digital camera comes - HP Photosmart 715 | HP Photosmart 715 Digital Camera - User Guide - Page 56
48 HP photosmart 715 user guide - HP Photosmart 715 | HP Photosmart 715 Digital Camera - User Guide - Page 57
information about the following items: troubleshooting HP support camera warranty Problems and solutions Problem The camera does not turn on. Possible of batteries that you have installed in the camera may not be the appropriate type for a digital camera. Use only four photo-quality AA titanium, - HP Photosmart 715 | HP Photosmart 715 Digital Camera - User Guide - Page 58
. The camera needs to be reset. Turn the camera off and then on again. Remove the batteries and reinstall them. If you are using an AC power adapter, disconnect the adapter from the camera, remove and reinstall the batteries, and then reconnect the adapter. 50 HP photosmart 715 user guide - HP Photosmart 715 | HP Photosmart 715 Digital Camera - User Guide - Page 59
by using the camera's Setup menu. The batteries are empty or were removed from the camera for more than 15 minutes. Replace the batteries, and then reset the date and time using the camera menus. To avoid losing date and time information, replace low batteries promptly. Troubleshooting 51 - HP Photosmart 715 | HP Photosmart 715 Digital Camera - User Guide - Page 60
CF memory card that you have in the camera is damaged or is not formatted. Format the CF memory card or replace it with a new, formatted card. The flash is recharging. Wait until the flash icon on the status LCD stops blinking before taking another flash picture. 52 HP photosmart 715 user guide - HP Photosmart 715 | HP Photosmart 715 Digital Camera - User Guide - Page 61
Problem A blinking green light appears next to the viewfinder when I press the SHUTTER button halfway down. I cannot delete an image. Possible cause Solution The camera a different subject. The camera's automatic focus range is frame. The camera cannot find a the camera for the longer exposure. The image - HP Photosmart 715 | HP Photosmart 715 Digital Camera - User Guide - Page 62
objects that are within 3.7 m (about 12 feet) of the camera. Make sure your subject is within range of the flash when you take the picture. Your finger blocked the flash. Be sure to move your fingers away from the flash when you are ready to take a picture. 54 HP photosmart 715 user guide - HP Photosmart 715 | HP Photosmart 715 Digital Camera - User Guide - Page 63
, the software says it can't find the camera. The camera is turned off. The USB cable is not connected correctly. The camera is connected to the computer through a USB hub and your USB hub is not compatible with the camera. Slide the the camera. switch to turn on Make sure that the USB cable is - HP Photosmart 715 | HP Photosmart 715 Digital Camera - User Guide - Page 64
up and using your camera, downloading drivers, solving a problem, ordering, and information about the warranty. HP photosmart Web site Visit www.hp.com/photosmart for: Tips for using your camera more effectively and creatively. HP digital camera driver updates and software. HP assistance If you - HP Photosmart 715 | HP Photosmart 715 Digital Camera - User Guide - Page 65
addition to the Web, you can contact HP by telephone or mail for support and service for your camera. Prices, availability, and hours of support are subject to change without notice. How HP can help HP's support hotline can help resolve problems with setup, installation, configuration, and operation - HP Photosmart 715 | HP Photosmart 715 Digital Camera - User Guide - Page 66
Support Center, which can help determine if service is required and direct you to a service site. Otherwise, contact the store where you purchased the product. Or, visit www.hp.com/cpso-support/guide/psd/repairhelp.html for the nearest sales and service office. 58 HP photosmart 715 user guide - HP Photosmart 715 | HP Photosmart 715 Digital Camera - User Guide - Page 67
If the number below has changed, visit www.hp.com/cposupport/mail_support.html to check for a new one. For English support in Europe, contact +44 (0)207 512 52 02. Argentina (5411) 4778 8380 0810 555 5520 , Republic of +82 (2) 3270 0700 (Seoul) 82-80-999-0700 (outside Seoul) Troubleshooting 59 - HP Photosmart 715 | HP Photosmart 715 Digital Camera - User Guide - Page 68
Emirates 971 4 883 8454 United Kingdom (UK) +44 (0) 207 512 52 02 Venezuela 800 47 777 (Caracas 207 8488) Viet Nam +84 (0) 8 823 4530 60 HP photosmart 715 user guide - HP Photosmart 715 | HP Photosmart 715 Digital Camera - User Guide - Page 69
Hewlett-Packard limited warranty statement HP product Duration of limited warranty HP Photo Imaging Software HP photosmart 715 digital camera CompactFlash memory card • 1 year for hardware • 1 year telephone support (US and Canada-for all other regions see "Obtaining support worldwide" on page - HP Photosmart 715 | HP Photosmart 715 Digital Camera - User Guide - Page 70
, contact the store where you purchased the product. Or, visit www.hp.com/cpso-support/guide/psd/repairhelp.html for the nearest sales and service office. Service is free of charge during the warranty period. Beyond the warranty period, service will be charged. 62 HP photosmart 715 user guide - HP Photosmart 715 | HP Photosmart 715 Digital Camera - User Guide - Page 71
A Reference This appendix describes: the symbols on the status LCD. the camera indicator lights (LEDs). the menus that appear on the image display. the camera specifications. Symbols on the status LCD Batteries good Batteries low Batteries empty Automatic flash on Flash off Flash on Automatic flash - HP Photosmart 715 | HP Photosmart 715 Digital Camera - User Guide - Page 72
down 10 seconds and will then take the picture. The camera is accessing the CF memory card-do not open the CF memory card door. You can open the CF memory card door. Camera menus The following are menu icons that appear in the main menu on the image display. 64 HP photosmart 715 user guide - HP Photosmart 715 | HP Photosmart 715 Digital Camera - User Guide - Page 73
be deleted) Gain access to the following setup options: • Reformat the CompactFlash card • Set date and time • Enable or disable Instant Review • Adjust image display brightness • Turn the beep on or off • Configure USB protocol • Set the language that is used for the camera menus Reference 65 - HP Photosmart 715 | HP Photosmart 715 Digital Camera - User Guide - Page 74
I storage sizes supported 7-element lens; F2.0 to F2.5; automatic focus; 7 to 21 mm (equivalent to a 34- to 102-mm lens on a 35-mm conventional film camera) 3x optical zoom 2x digital zoom Single-shot magnification 4 AA batteries (included) or optional AC adapter 66 HP photosmart 715 user guide - HP Photosmart 715 | HP Photosmart 715 Digital Camera - User Guide - Page 75
English Interfaces Dimensions Weight USB Height: 74 mm (2.91 inches) Width: 127 mm (5 inches) Depth: 82 mm (3.23 inches) with lens fully extended 63 mm (2.48 inches) with lens in off position 308 g (10.87 oz.) without batteries Reference 67 - HP Photosmart 715 | HP Photosmart 715 Digital Camera - User Guide - Page 76
68 HP photosmart 715 user guide - HP Photosmart 715 | HP Photosmart 715 Digital Camera - User Guide - Page 77
Numbers 2x digital zoom 1 focus 9, 54 Automatic Image Unload Options 39 Automatic Image Unload Software 33 B batteries cautions 47 charge levels 41 conserving power 8, Instant Review 25 language 28 print orders 17 settings 21 USB protocol setting 35 charge levels for batteries 41 cleaning camera 46 - HP Photosmart 715 | HP Photosmart 715 Digital Camera - User Guide - Page 78
, using self-timer for 11 H height of camera 67 help, getting 56 HP Automatic Image Unload Software 33 HP photosmart Web site 56 HP product support Web site 56 HP SupportPack 58 I icons on image display 64 image display adjusting brightness 27 location 2 menus 64 70 HP photosmart 715 user guide - HP Photosmart 715 | HP Photosmart 715 Digital Camera - User Guide - Page 79
on Macintosh computer 36 software on Windows computer 31 wrist strap 3 Instant Review 25 ISO sensitivity 66 L language changing 28 choosing 4 wrong one displayed 52 lens system 66 lighting adjusting for insufficient 22 flashing settings for 21 when low 53 lights on camera 2, 64 Lock menu 65 - HP Photosmart 715 | HP Photosmart 715 Digital Camera - User Guide - Page 80
a computer 40 problems, troubleshooting 49 purchasing AC adapter 44 card reader 40 CF memory card 45 HP SupportPack 58 Q camera 50 resolution of images 23, 66 response none from camera 50 S safety precautions 47 sales and service offices 62 saved images, viewing 13 72 HP photosmart 715 user guide - HP Photosmart 715 | HP Photosmart 715 Digital Camera - User Guide - Page 81
images. See downloading images troubleshooting problems 49 turn on, camera does not 49 U unloading images pausing 33 to Macintosh computer 38 to Windows computer 32 without using software 39 unlocking images 20 unresponsive camera 50 updates for drivers 56 USB changing USB protocol setting 35 - HP Photosmart 715 | HP Photosmart 715 Digital Camera - User Guide - Page 82
of camera 67 Windows computer bonus software 31 connecting camera to 31 downloading images 32 installing software 31 system requirements 30 unloading images 39 using camera with 30 using camera with NT 4.0 33 wrist strap, attaching 3 Y yellow border 18 Z zooming 10 74 HP photosmart 715 user guide - HP Photosmart 715 | HP Photosmart 715 Digital Camera - User Guide - Page 83
- HP Photosmart 715 | HP Photosmart 715 Digital Camera - User Guide - Page 84
-
 1
1 -
 2
2 -
 3
3 -
 4
4 -
 5
5 -
 6
6 -
 7
7 -
8
-
9
-
10
-
11
-
12
-
13
-
14
-
15
-
16
-
17
-
18
-
19
-
20
-
21
-
22
-
23
-
24
-
25
-
26
-
27
-
28
-
29
-
30
-
31
-
32
-
33
-
34
-
35
-
36
-
37
-
38
-
39
-
40
-
41
-
42
-
43
-
44
-
45
-
46
-
47
-
48
-
49
-
50
-
51
-
52
-
53
-
54
-
55
-
56
-
57
-
58
-
59
-
60
-
61
-
62
-
63
-
64
-
65
-
66
-
67
-
68
-
69
-
70
-
71
-
72
-
73
-
74
-
75
-
76
-
77
-
78
-
79
-
80
-
81
-
82
-
83
-
84
 |
 |
