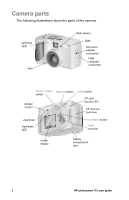
HP Photosmart 715 HP Photosmart 715 digital camera - (English) User Guide - Page 12
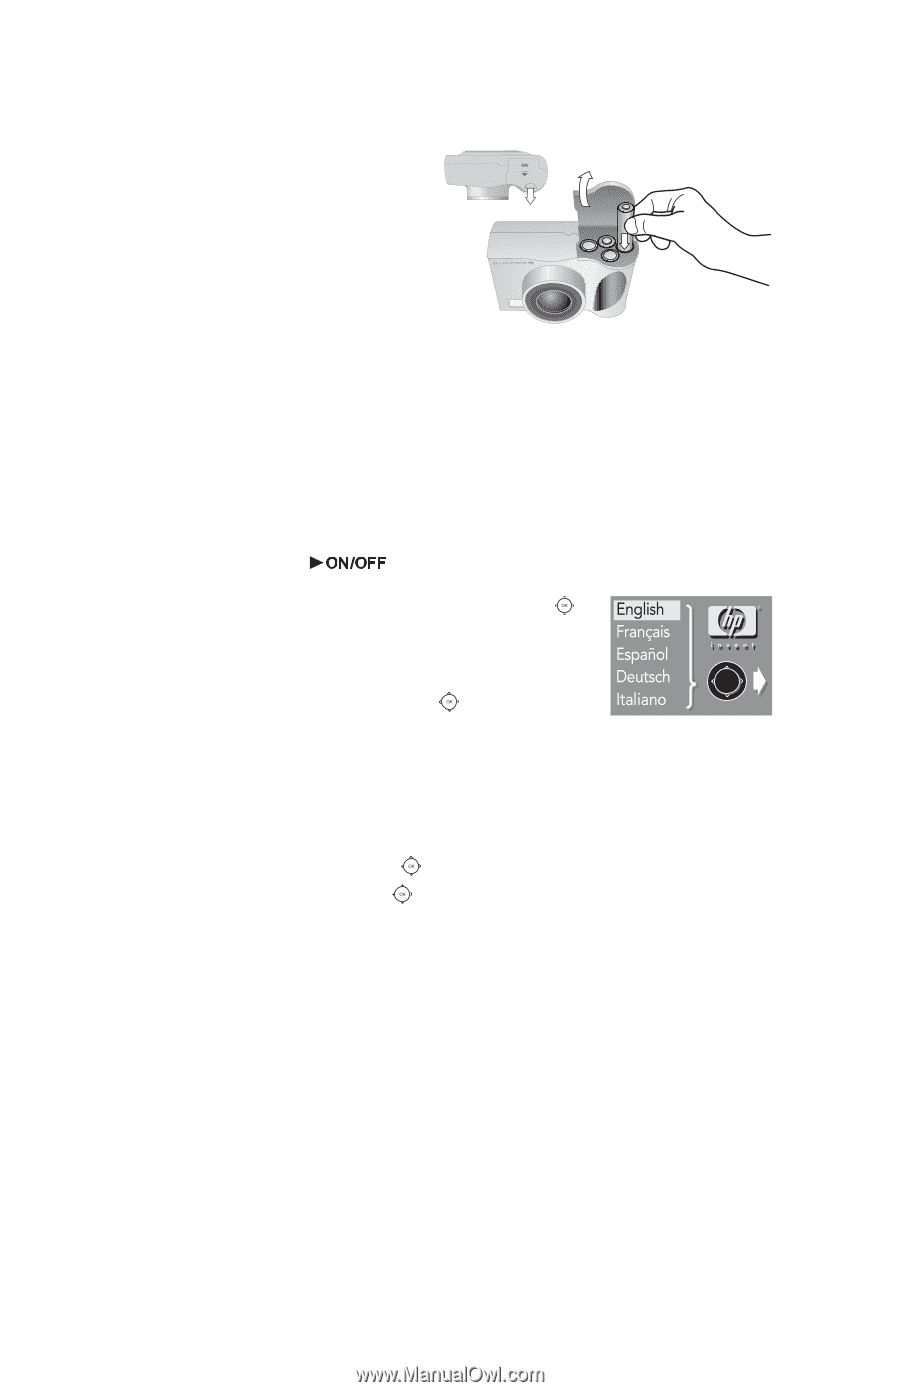
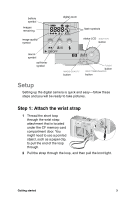
Step 2: Install the batteries, Step 3: Choose the camera language, Step 4: Set the camera date - lens cap
 |
View all HP Photosmart 715 manuals
Add to My Manuals
Save this manual to your list of manuals |
Page 12 highlights
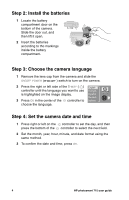
Step 2: Install the batteries 1 Locate the battery compartment door on the bottom of the camera. Slide the door out, and then lift it open. 2 Insert the batteries according to the markings inside the battery compartment. Step 3: Choose the camera language 1 Remove the lens cap from the camera and slide the ON/OFF POWER ( ) switch to turn on the camera. 2 Press the right or left side of the 5-WAY ( ) controller until the language you want to use is highlighted on the image display. OK 3 Press OK in the center of the controller to choose the language. Step 4: Set the camera date and time 1 Press right or left on the controller to set the day, and then press the bottom of the controller to select the next field. 2 Set the month, year, hour, minute, and date format using the same method. 3 To confirm the date and time, press OK. 4 HP photosmart 715 user guide
-
 1
1 -
2
-
3
-
4
-
5
-
6
-
 7
7 -
 8
8 -
 9
9 -
 10
10 -
 11
11 -
 12
12 -
 13
13 -
 14
14 -
 15
15 -
 16
16 -
 17
17 -
18
-
19
-
20
-
21
-
22
-
23
-
24
-
25
-
26
-
27
-
28
-
29
-
30
-
31
-
32
-
33
-
34
-
35
-
36
-
37
-
38
-
39
-
40
-
41
-
42
-
43
-
44
-
45
-
46
-
47
-
48
-
49
-
50
-
51
-
52
-
53
-
54
-
55
-
56
-
57
-
58
-
59
-
60
-
61
-
62
-
63
-
64
-
65
-
66
-
67
-
68
-
69
-
70
-
71
-
72
-
73
-
74
-
75
-
76
-
77
-
78
-
79
-
80
-
81
-
82
-
83
-
84
 |
 |