HP Photosmart C5300 Setup Guide - Page 2
Explore the features, Troubleshooting, Use HP software - all in one series installer
 |
View all HP Photosmart C5300 manuals
Add to My Manuals
Save this manual to your list of manuals |
Page 2 highlights
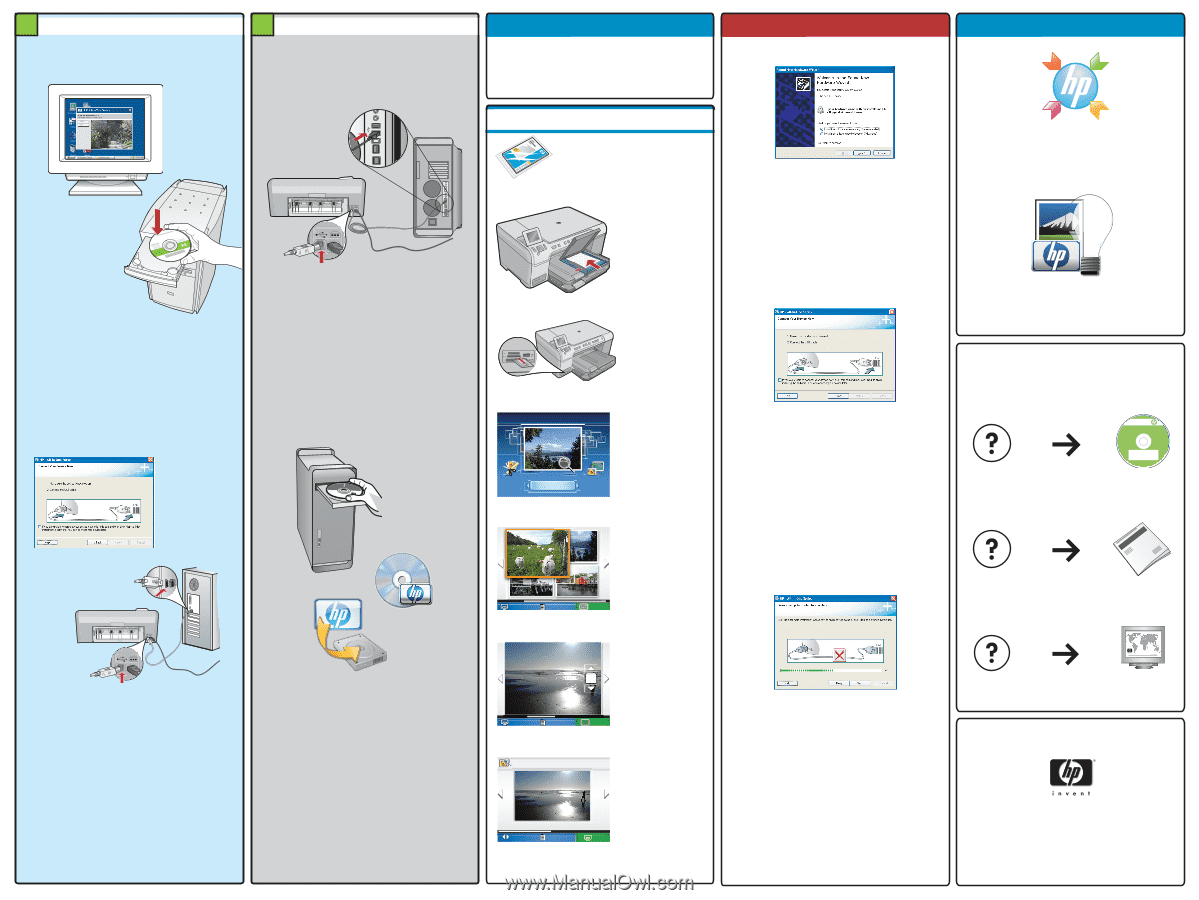
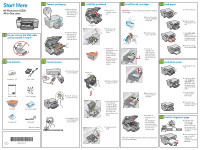
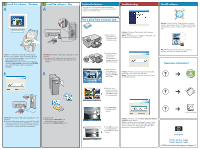
9 Install the software - Windows A 9 Install the software - Mac A Explore the features Now that your HP Photosmart software program is installed on your computer, you can try out one of the features on the HP All‑in‑One. Troubleshooting Use HP software Print a photo from a memory card a. If you have not already done so, load photo paper in the photo tray. Problem: (Windows) The Microsoft Add Hardware screen appears. Action: Cancel all screens. Unplug the USB cable, and then insert the HP All‑in‑One CD. Windows: The HP Solution Center provides convenient access to many features of your HP device and software, including device status, settings, supplies ordering, and help. NOTE: Do not attach the USB cable until prompted. a. Turn on your computer, login if necessary, and then wait for the desktop to appear. Insert the CD and follow the onscreen instructions. IMPORTANT: If the startup screen does not appear, double-click My Computer, double-click the CD‑ROM icon with the HP logo, and then double-click setup.exe. B IMPORTANT: Purchase a USB cable separately if it is not included. a. Connect the USB cable to the port on the back of the HP All‑in‑One, and then to any USB port on the computer. B b. Insert the memory card from your camera into the appropriate memory card slot in the HP All‑in‑One. Photo Menu Create View & Print Save c. When the Photo menu appears in the color graphics display, press OK to select View. Problem: (Windows only) You did not see the screen prompting you to connect the USB cable. Action: Cancel all screens. Remove, and then re-insert the HP All‑in‑One CD. Mac: HP Photosmart Studio allows you to organize, manage, and edit your images and videos. Need more information? HP Photosmart Pro HP PhotosmBa88rt0P0roserBie8s800 Series TTuuttQooQrruiiuaiacicllkkiinnSSccttallauurrddtt eedd Product in [country] Prowdwuwc.ht pi.nco[mc/osuupnptroyrt] www.hp.com/support *XXXXX-XXXXX* *XXXXX-XXXXX* *Q573XX4XX-X-XX9XXX0277* *Q5734-90277* © ©20200707HPHDPCDC IMPORTANT: Purchase a USB cable separately if it is not included. b. Once the USB prompt appears, connect the USB cable to the port on the back of the HP All‑in‑One, and then to any USB port on the computer. Follow the onscreen instructions to complete the software installation. b. Insert the CD. c. Double-click the HP Installer icon. Follow the onscreen instructions. d. Complete the Setup Assistant screen. d. Press the arrow buttons to view the desired photo, then press OK to display the selected photo. Print Options OK View e. Press Print Photos to display photo options. 0 www.hp.com/support Print Edit OK Done Print Preview: Page 1/2 8.5 x 11 paper Next Settings Print f. Press OK to preview the selected photo. g. Press OK to print the photo. Problem: (Windows only) The Device Setup Has Failed To Complete screen appears. Action: Unplug the device and plug it in again. Check all connections. Make sure the USB cable is plugged into the computer. Do not plug the USB cable into a keyboard or a non-powered USB hub. www.hp.com Printed in [country] - English Printed in [country] - English © 2008 Hewlett-Packard Development Company, L.P.
-
 1
1 -
 2
2
 |
 |