HP ProLiant DL380p DVD-ROM and DVD-RW Drive Option Installation Instructions f - Page 2
European Union regulatory notice, Korean class B notice
 |
View all HP ProLiant DL380p manuals
Add to My Manuals
Save this manual to your list of manuals |
Page 2 highlights
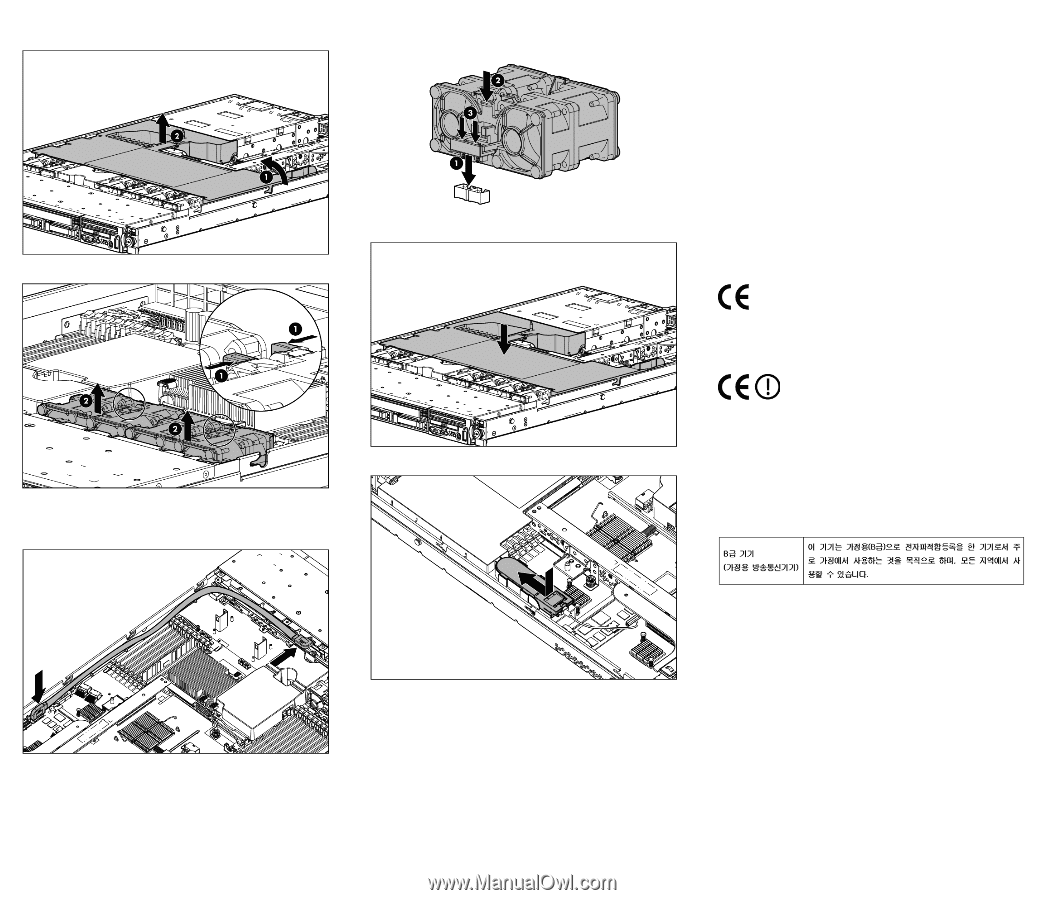
9. Remove the air baffle. 13. Install fan modules 3 and 4. 10. Remove fan modules 3 and 4. 14. Install the air baffle. 11. Connect the SATA optical drive cable to the rear of the drive. 12. Route the SATA optical drive cable along the edge of the system board, and then connect the cable to the system board. 15. Install the BBWC battery, if removed. • EMC Directive 2004/108/EC • Ecodesign Directive 2009/125/EC, where applicable CE compliance of this product is valid if powered with the correct CE-marked AC adapter provided by HP. Compliance with these directives implies conformity to applicable harmonized European standards (European Norms) that are listed in the EU Declaration of Conformity issued by HP for this product or product family and available (in English only) either within the product documentation or at the following HP website (http://www.hp.eu/certificates) (type the product number in the search field). The compliance is indicated by one of the following conformity markings placed on the product: For non-telecommunications products and for EU harmonized telecommunications products, such as Bluetooth® within power class below 10mW. For EU non-harmonized telecommunications products (If applicable, a 4-digit notified body number is inserted between CE and !). Please refer to the regulatory label provided on the product. The point of contact for regulatory matters is Hewlett-Packard GmbH, Dept./MS: HQ-TRE, Herrenberger Strasse 140, 71034 Boeblingen, GERMANY. Korean class B notice 16. Install the access panel. 17. Slide the server into the rack. 18. Connect all power cords to the server, and then power up the server. The installation is complete. European Union regulatory notice Products bearing the CE marking comply with the following EU Directives: • Low Voltage Directive 2006/95/EC
-
 1
1 -
 2
2
 |
 |