HP Scitex FB7500 Advanced Printer Guide Rev. B
HP Scitex FB7500 Manual
 |
View all HP Scitex FB7500 manuals
Add to My Manuals
Save this manual to your list of manuals |
HP Scitex FB7500 manual content summary:
- HP Scitex FB7500 | Advanced Printer Guide Rev. B - Page 1
HP Scitex FB7500 Advanced Printer Guide - HP Scitex FB7500 | Advanced Printer Guide Rev. B - Page 2
and reference only. The specifications on which they are based are subject to change without notice. The names HP, HP Scitex, and the HP logo are registered trademarks or service marks of Hewlett-Packard. The mark HP Scitex FB7500 is a trademark of the Company. Other company and brand, product and - HP Scitex FB7500 | Advanced Printer Guide Rev. B - Page 3
in this guide and any such laws, regulations and standards, the customer shall follow the stricter between the requirements and procedures specified in this guide and the requirements and procedures specified in any such laws, regulations or standards. ii HP Scitex FB7500 Advanced Printer Guide - HP Scitex FB7500 | Advanced Printer Guide Rev. B - Page 4
Safety Hazard Warning Conventions The safety hazard warning conventions used in this guide (and supplementary HP Scitex FB7500 documentation) are provided for the identification of safety hazards. They are used to identify conditions or actions for which a specific hazard is known to exist, - HP Scitex FB7500 | Advanced Printer Guide Rev. B - Page 5
per Inch Postscript Encapsulated Postscript International Color Consortium Company Field Service Engineer Power Distribution Unit Uninterrupted Power Supply Ultra Violet Raster Image Processing Tagged Image File Format Tagged Image File Format - Bitmap iv HP Scitex FB7500 Advanced Printer Guide - HP Scitex FB7500 | Advanced Printer Guide Rev. B - Page 6
Contents Chapter 1 Introduction 1 Safety Instructions 2 About HP Scitex FB7500 Printer 2 Features and Benefits 3 Applications 3 Substrates ...5 Print Modes 5 HP Scitex FB7500 Workflow 6 RIP Software 6 Chapter 2 System Description 7 General ...8 FB7500 Printer Directions and Axes - HP Scitex FB7500 | Advanced Printer Guide Rev. B - Page 7
Controls Section 74 Jobs List Section 75 Toolbar ...76 Job Statuses 77 Job Options Drop-Down Menu 78 Preview and File Information Section 79 viii HP Scitex FB7500 Advanced Printer Guide - HP Scitex FB7500 | Advanced Printer Guide Rev. B - Page 8
Operations Section 81 System Status Section 82 Chapter 4 Printing with FB7500 83 System Startup ...84 Loading/Unloading System Setup 86 Constant Loading/Unloading System for the Rigid Media 89 Substrate Loading 91 Manual Substrate Loading 91 Printing a Job ...92 System Shutdown 93 - HP Scitex FB7500 | Advanced Printer Guide Rev. B - Page 9
x HP Scitex FB7500 Advanced Printer Guide - HP Scitex FB7500 | Advanced Printer Guide Rev. B - Page 10
CHAPTER 1 Introduction Safety Instructions 2 About HP Scitex FB7500 Printer 2 HP Scitex FB7500 Workflow 6 - HP Scitex FB7500 | Advanced Printer Guide Rev. B - Page 11
Reference For the HP Scitex FB7500 safety instructions refer to HP Scitex FB7500 Operator Manual. About HP Scitex FB7500 Printer The HP Scitex FB7500 is a digital wide-format flatbed printer. It allows remarkably high quality printing on both rigid and flexible substrates up to 25mm thick - HP Scitex FB7500 | Advanced Printer Guide Rev. B - Page 12
printer operators • Very high versatility in formats and media types - from paper sheets to thick (25 mm/1") boards • Maximum printing speed of up to 500 m2/hr (5,380 ft2/hr) • HP Scitex The range of applications you can print on the FB7500 printer is virtually unlimited. You can use it for: - HP Scitex FB7500 | Advanced Printer Guide Rev. B - Page 13
Figure 1-2 FB7500 Applications 4 HP Scitex FB7500 Advanced Printer Guide - HP Scitex FB7500 | Advanced Printer Guide Rev. B - Page 14
board, aluminum, styrene, acrylic, polyester, wood, ceramics, marble, and more Flexible substrates - banner, self-adhesive vinyl, paper, and more Print Modes The FB7500 printer offers a choice of different print modes to meet an enormous variety of general and special printing requirements. The - HP Scitex FB7500 | Advanced Printer Guide Rev. B - Page 15
required for the RIP software according to HP Scitex specifications provided in the HP Scitex FB7500 Site Preparation Guide. Network PS, EPS, PDF 1-bit TIFF DTP I-RIP Macintosh or PC RIP Station HP Scitex FB7500 Figure 1-3 HP Scitex FB7500 Workflow 6 HP Scitex FB7500 Advanced Printer Guide - HP Scitex FB7500 | Advanced Printer Guide Rev. B - Page 16
CHAPTER 2 System Description General 8 FB7500 Printer Directions and Axes 9 Printing Bridge 10 Printing Table 15 Ink System 16 Loading/Unloading Cabinet 33 Pneumatic System 33 Vacuum System 34 Maintenance System 36 Operator Console 38 Printer's Computer 39 Data Path 40 UV System 41 - HP Scitex FB7500 | Advanced Printer Guide Rev. B - Page 17
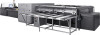
software The FB7500 printer components are shown in the picture below. Unloader lift Printing bridge Loader Printing table Maintenance bath SICK safety device Loader table Ink cabinet Operator station Figure 2-1 HP Scitex FB7500 Printer Components 8 HP Scitex FB7500 Advanced Printer Guide - HP Scitex FB7500 | Advanced Printer Guide Rev. B - Page 18
FB7500 Printer Directions and Axes Figure 2-2 FB7500 Directions The FB7500 printer has 7 motor-driven axes. The function of each axis is described in Table 2-1 on page 10. T S Y W M X Z Figure 2-3 FB7500 Axes Chapter 2 - System Description 9 - HP Scitex FB7500 | Advanced Printer Guide Rev. B - Page 19
external shutters on the rear side. Printing Bridge The FB7500 printing bridge contains the print heads and all of the peripheral systems supporting them, such as secondary ink tanks with taps, vacuum their location are shown in Figure 2-4 to Figure 2-7. 10 HP Scitex FB7500 Advanced Printer Guide - HP Scitex FB7500 | Advanced Printer Guide Rev. B - Page 20
Loader Bridge upper hoods Bridge lower hood Machine chassis BLSC cabinet Open bridge upper hoods UV fumes extraction duct UV lamp housing Figure 2-4 Printing Bridge with Closed/Open Upper Hoods Chapter 2 - System Description 11 - HP Scitex FB7500 | Advanced Printer Guide Rev. B - Page 21
Water reservoir Electrical cables Secondary tanks with taps UV external shutter Ink tubing Bridge lifting piston Ink valves Figure 2-5 Bridge Rear Side without the Lower Hood 12 HP Scitex FB7500 Advanced Printer Guide - HP Scitex FB7500 | Advanced Printer Guide Rev. B - Page 22
Print heads power distribution boards Vacuum knife Purge manifold UV lamp housing Fumes outlet Media cooling fans ORCA board PIC board Overflow board Figure 2-6 Bridge Top and Front Side Views Chapter 2 - System Description Water manifold for print heads heating 13 - HP Scitex FB7500 | Advanced Printer Guide Rev. B - Page 23
Do not position a light source directly above the printing bridge. If there is one directly above the printer, it should be turned off while the bridge is in vertical position for more than a few seconds for more than a few moments - it should be covered. 14 HP Scitex FB7500 Advanced Printer Guide - HP Scitex FB7500 | Advanced Printer Guide Rev. B - Page 24
in place during printing. Figure 2-8 Vacuum Printing Table There are 4 registration pins on the printing table, which are used for manual loading of the substrate (see Manual Substrate Loading on page 91). In this process, you press a pedal, which deactivates the vacuum to the printing table and - HP Scitex FB7500 | Advanced Printer Guide Rev. B - Page 25
5 liter plastic containers. Note The ink containers can be replaced during the print run. The FB7500 ink system contains the following components: • Ink containers • Circulation and Switch valves • Ink System Functional Diagram" shown in Figure 2-10. 16 HP Scitex FB7500 Advanced Printer Guide - HP Scitex FB7500 | Advanced Printer Guide Rev. B - Page 26
Chapter 2 - System Description Purge Valve Figure 2-10 FB7500 Ink System Functional Diagram Print Heads Print Heads Secondary Ink Tank Tap Ink Bar Tap Secondary Ink Tank Tap Water Reservoir Switch Valve 0 Water Tank - HP Scitex FB7500 | Advanced Printer Guide Rev. B - Page 27
Reference For the ink system maintenance procedures refer to HP Scitex FB7500 User Safety and Maintenance Guide. Ink Cabinet The ink cabinet is located on the left side of the FB7500 printer (see Figure 2-1 on page 8). It contains 6 sockets for SMYK, LM and MC colors and 2 spare sockets. Figure - HP Scitex FB7500 | Advanced Printer Guide Rev. B - Page 28
Secondary Ink Tanks The ink container is closed with a special cap, which prevents air from entering into the ink system. For instructions on how to replace the ink containers, refer to Replacing Ink Container on page 97. Figure 2-12 Secondary Ink Tanks with Taps The 12 secondary - HP Scitex FB7500 | Advanced Printer Guide Rev. B - Page 29
Secondary ink tank Tap Figure 2-13 Secondary Tanks Assembly Load cell Ink pump Ink filter Figure 2-14 Ink System Components 20 HP Scitex FB7500 Advanced Printer Guide - HP Scitex FB7500 | Advanced Printer Guide Rev. B - Page 30
array contains 8 print heads, which are connected to their PIC board. Print head slot Ink inlets Water inlets/outlet Figure 2-15 Ink Bar - Top View HP Scitex X2 Print Head The X2 print head specifications are: • 128 nozzles per print head, 64 nozzles on each side • Native resolution: 100 dpi • Drop - HP Scitex FB7500 | Advanced Printer Guide Rev. B - Page 31
Nozzles Figure 2-16 HP Scitex X2 Print Head Reference For instructions on how to replace the print head, refer to HP Scitex FB7500 User Safety and Maintenance Guide. Print Heads Heating Water 18, and Figure 2-19 accordingly). Figure 2-17 Water Reservoir 22 HP Scitex FB7500 Advanced Printer Guide - HP Scitex FB7500 | Advanced Printer Guide Rev. B - Page 32
Figure 2-18 Water Manifold Water manifold Figure 2-19 Water Tank and Water Pump Water tank Water pump Chapter 2 - System Description 23 - HP Scitex FB7500 | Advanced Printer Guide Rev. B - Page 33
Loading/Unloading System The FB7500 loading/unloading system is a 3/4 automatic system, which controls loading and unloading of the substrate sheets. The the substrate prior to automatic loading. Note The substrates should be placed one at a time. 24 HP Scitex FB7500 Advanced Printer Guide - HP Scitex FB7500 | Advanced Printer Guide Rev. B - Page 34
Loader Intake media piston Dynamic frame Gripper Iron roller Static frame W-axis T-axis Loading suction cup NIP motor Unloading suction cup Loader cabinet NIP Media pressure piston Figure 2-21 Loader Structure The loader mechanism is comprised of the following components: • Dynamic - HP Scitex FB7500 | Advanced Printer Guide Rev. B - Page 35
, loading continues and a message appears on the operator console. • If the value measured is higher or lower than the predefined value, printing is aborted. 26 HP Scitex FB7500 Advanced Printer Guide - HP Scitex FB7500 | Advanced Printer Guide Rev. B - Page 36
Intake Media Pistons for Rigid Substrates These pistons blow air on the substrate board against the NIP roller while the media advances from the loading table over the NIP roller. The pistons working pressure is 6 bars. Figure 2-22 Intake Media Piston Media Pressure Pistons for Flexible Substrates - HP Scitex FB7500 | Advanced Printer Guide Rev. B - Page 37
/Off switch Air pressure gauge for pistons Iron Roller Up/Down Rigid/Flexible Media Selector Air pressure regulator Figure 2-25 Loader Cabinet Front View 28 HP Scitex FB7500 Advanced Printer Guide - HP Scitex FB7500 | Advanced Printer Guide Rev. B - Page 38
NIP motor controller W-axis driver T-axis driver Pressure gauges Unloader grippers Thickness Vacuum to Loading detector loading suction cups valve suction cups N/A Vacuum to Unloading unloading suction cups valve suction cups Figure 2-26 Inside of the Loader Cabinet Chapter 2 - System - HP Scitex FB7500 | Advanced Printer Guide Rev. B - Page 39
above the unloader lift. 19 Unloading suction cups move down and place the printed substrate onto the unloader lift. 20 Unloading pistons go up. 30 HP Scitex FB7500 Advanced Printer Guide - HP Scitex FB7500 | Advanced Printer Guide Rev. B - Page 40
Unloader Lift The unloader lift is a surface where printed substrates are stacked on. At the end of every print run, after the substrate boards are stacked, the lift automatically moves down so as to be at an appropriate height for unloading the next board. Unloader lift Unloader cover Figure 2-27 - HP Scitex FB7500 | Advanced Printer Guide Rev. B - Page 41
• Etherway boards • Power supplies • Safety controller • Drivers • Connectors' panel Machine computer Etherway boards Power supplies Safety controller Drivers Connectors' panel Figure 2-28 Electrical Cabinet 32 HP Scitex FB7500 Advanced Printer Guide - HP Scitex FB7500 | Advanced Printer Guide Rev. B - Page 42
pressure regulator Pumps board Figure 2-29 BLSC Cabinet Pneumatic System The FB7500 pneumatic system supplies compressed dry air to the following subsystems: • Printing table - pancake pistons and registration pins for the manual loading • Loader/Unloader system - media pressure pistons, intake - HP Scitex FB7500 | Advanced Printer Guide Rev. B - Page 43
the print heads - as part of the maintenance system, a vacuum knife is used to clean the print heads (see Vacuum Knife on page 37). 34 HP Scitex FB7500 Advanced Printer Guide - HP Scitex FB7500 | Advanced Printer Guide Rev. B - Page 44
positioned outside the print production area. Figure 2-31 Vacuum Pump in the Silence Cabinet Vacuum inlet Fumes extraction outlet Figure 2-32 Vacuum Inlet on the Printer's Read Side Chapter 2 - System Description 35 - HP Scitex FB7500 | Advanced Printer Guide Rev. B - Page 45
Maintenance System The FB7500 maintenance system includes the maintenance bath, vacuum knife, and vacuum separator. Maintenance bath Maintenance bath Figure into the waste funnel, located inside the machine, on its left side. Drainage valve Waste funnel 36 HP Scitex FB7500 Advanced Printer Guide - HP Scitex FB7500 | Advanced Printer Guide Rev. B - Page 46
Vacuum Knife The vacuum knife piston moves the vacuum knife along the Y-axis. The vacuum knife sucks dirt and ink dripping from the print heads (all six colors simultaneously). Vacuum knife piston Y-axis Vacuum knife Figure 2-34 Vacuum Knife Vacuum Separator The vacuum separator is user for - HP Scitex FB7500 | Advanced Printer Guide Rev. B - Page 47
FB7500 printer's operator console is mounted on the operator arm together with Safety lights, Service key and Emergency Stop button. Safety lights Operator console Service key Emergency Stop button Operator arm Figure 2-36 Operator Console The Service 38 HP Scitex FB7500 Advanced Printer Guide - HP Scitex FB7500 | Advanced Printer Guide Rev. B - Page 48
configuration is based on the HP 8200xw workstation. Note Make sure that all cables are connected as shown in Figure 2-28. The wrong USB connection may cause failure of communication with the Weight and PILZ controller. Power USB to Weight Board Figure 2-37 Printer's Computer Connections COM to - HP Scitex FB7500 | Advanced Printer Guide Rev. B - Page 49
PIC PIC PIC PIC PIC 6/8 Per PIC Print Head Print Head Print Head Print Head Print Head Print Head Print Head Print Head Figure 2-38 FB7500 Data Path 40 HP Scitex FB7500 Advanced Printer Guide - HP Scitex FB7500 | Advanced Printer Guide Rev. B - Page 50
UV System The UV system includes the following components: • UV lamp housing • UV electrical cabinet • Extraction fan • UV cooler • UV bulb • UV Shutters UV Lamp Housing The UV lamp housing (see Figure 2-39) is located above the printing table. Figure 2-39 UV Lamp Housing The UV lamp housing - HP Scitex FB7500 | Advanced Printer Guide Rev. B - Page 51
cooler. • Supply the required voltages to the UV extractor fan. • Control the UV lamp housing. • Control the UV cooler. • Control the UV extraction fan. 42 HP Scitex FB7500 Advanced Printer Guide - HP Scitex FB7500 | Advanced Printer Guide Rev. B - Page 52
Extraction Fan The function of the extraction fan (see Figure 2-41) is to: • Remove heat from the UV lamp housing. • Remove the generated ozone particles from the vicinity of the UV lamp housing. Silencer Extraction duct Figure 2-41 UV Extraction Fan The extraction fan is controlled by the UV - HP Scitex FB7500 | Advanced Printer Guide Rev. B - Page 53
distilled water through the system. Water level indicator Output water temperature Pressure of the circulation pump Figure 2-42 UV Cooler (Front and Side View) 44 HP Scitex FB7500 Advanced Printer Guide - HP Scitex FB7500 | Advanced Printer Guide Rev. B - Page 54
CHAPTER 3 FB7500 Software FB7500 Main Window 46 Main Menu 48 Print Controls Section 74 Jobs List Section 75 Preview and File Information Section 79 Maintenance and Motion Section 80 Machine Operations Section 81 System Status Section 82 - HP Scitex FB7500 | Advanced Printer Guide Rev. B - Page 55
cycle. During any stage of the printing process, you can view dynamically-updated print information at a glance. To start the FB7500 application, click the FB7500 icon on your Desktop; the FB7500 main window appears. Figure 3-1 FB7500 Main Window 46 HP Scitex FB7500 Advanced Printer Guide - HP Scitex FB7500 | Advanced Printer Guide Rev. B - Page 56
sections, as shown in Figure 3-1: 1 - Main menu 2 - Print controls 3 - Jobs list 4 - Preview and file information 5 - Maintenance and motion 6 - Machine operations 7 - Current Job 8 - System status 1 2 3 6 5 7 8 Figure 3-2 FB7500 Main Menu Sections Chapter - HP Scitex FB7500 | Advanced Printer Guide Rev. B - Page 57
and features are described in the following sections. Figure 3-3 File Menu Option Used to... Add New Job Add a new job to the Jobs List. For instructions refer to Adding a New Job on page 49. Add Existing Job Add a new job to the Jobs List. 48 HP Scitex FB7500 Advanced Printer Guide - HP Scitex FB7500 | Advanced Printer Guide Rev. B - Page 58
Edit a job from the Job Properties window as described in Adding a New Job on page 49. Delete a job from the Jobs List. Exit Exit the FB7500 application. Adding a New Job 1 In the File menu, select Add New Job; the Job Properties window appears. Within this window, there are three tabs: Layout - HP Scitex FB7500 | Advanced Printer Guide Rev. B - Page 59
2 Click the button, next to the Image box; the Choose Image File window appears. 50 HP Scitex FB7500 Advanced Printer Guide - HP Scitex FB7500 | Advanced Printer Guide Rev. B - Page 60
and click OK; the Job Properties window appears again displaying the file's preview and information, as shown in Figure 3-4. Figure 3-4 Job Properties - Layout Tab Chapter 3 - FB7500 Software 51 - HP Scitex FB7500 | Advanced Printer Guide Rev. B - Page 61
UV power. Note All substrates are saved in a dedicated folder, which is an integral part of the FB7500 software. You may add new substrates from the Substrate Editor window (see Substrate Editor on page 59). the number of copies and the margins' values. 52 HP Scitex FB7500 Advanced Printer Guide - HP Scitex FB7500 | Advanced Printer Guide Rev. B - Page 62
copies (on the single sheet and the number of sheets to print) and the gaps between them (see Figure 3-5). Figure 3-5 Job Properties - Step&Repeat Chapter 3 - FB7500 Software 53 - HP Scitex FB7500 | Advanced Printer Guide Rev. B - Page 63
the selected substrate. 10 If needed, select the Job Notes box and enter the notes. These notes will be printed aside the printed image. 54 HP Scitex FB7500 Advanced Printer Guide - HP Scitex FB7500 | Advanced Printer Guide Rev. B - Page 64
registration marks that can be used for double-side or backlit printing. Crop marks Prints crop marks on the margins of the current job. Chapter 3 - FB7500 Software 55 - HP Scitex FB7500 | Advanced Printer Guide Rev. B - Page 65
move of the printing table under the printing bridge. Option Advanced Description Opens the Appearance Editor window. Refer to Appearance Editor on page 61. 56 HP Scitex FB7500 Advanced Printer Guide - HP Scitex FB7500 | Advanced Printer Guide Rev. B - Page 66
when the ink is not cured enough and additional curing (forward and/or backward cycle) is required. Figure 3-8 Job Properties - Media Parameters Tab (Gloss) Chapter 3 - FB7500 Software 57 - HP Scitex FB7500 | Advanced Printer Guide Rev. B - Page 67
15 Click Save As and enter the job name. 16 Click Save and then Yes to save the job. Tools Menu The job is displayed in the Jobs List with the Not Ready status. Figure 3-9 Tools Menu 58 HP Scitex FB7500 Advanced Printer Guide - HP Scitex FB7500 | Advanced Printer Guide Rev. B - Page 68
page 64. Appearance Editor Define appearance of a printed image (Normal, Semi-Gloss, or Gloss). Refer to Appearance Editor on page 61. Calibration Settings Calibrate the FB7500 printer. For instructions refer to Calibration Settings - Heads V-Trimming Tab on page 66. Chapter - HP Scitex FB7500 | Advanced Printer Guide Rev. B - Page 69
and manage a list of customers. This list is accessible in the Job Properties window, under the Job Info tab (see Figure 3-6 on page 55). 60 HP Scitex FB7500 Advanced Printer Guide - HP Scitex FB7500 | Advanced Printer Guide Rev. B - Page 70
. You may rely on your own judgment when changing settings in the Appearance Editor to achieve the desired appearance. Figure 3-10 Appearance Editor - Gloss Chapter 3 - FB7500 Software 61 - HP Scitex FB7500 | Advanced Printer Guide Rev. B - Page 71
the appearances listed on the left side of the window. Save the new appearance settings under a new name. Save changes for the existing appearance. 62 HP Scitex FB7500 Advanced Printer Guide - HP Scitex FB7500 | Advanced Printer Guide Rev. B - Page 72
Option Reset Used to... Reset all settings to defaults, i.e. to change back to their original settings. The Appearance Editor window for the Normal type is shown in Figure 3-11. Figure 3-11 Appearance Editor - Normal Chapter 3 - FB7500 Software 63 - HP Scitex FB7500 | Advanced Printer Guide Rev. B - Page 73
Preferences The Preferences window contains the three tabs: General, Quality and Additional Settings (see Figure 3-12). Figure 3-12 Preferences Window Tabs 64 HP Scitex FB7500 Advanced Printer Guide - HP Scitex FB7500 | Advanced Printer Guide Rev. B - Page 74
compensation of the missing nozzles, also called MNC procedure, via the Calibration Settings window shown in Figure 3-15 on page 69. For instructions refer to Missing Nozzles Compensation (MNC) Procedure on page 98. Motion Parameters For service purposes only. Chapter 3 - FB7500 Software 65 - HP Scitex FB7500 | Advanced Printer Guide Rev. B - Page 75
(see Figure 3-13). Reference For detailed instructions on how to perform the Trimming procedure, refer to ACT-Trimming User Guide on the ACT DVD supplied in the FB7500 User Documentation Pack. Figure 3-13 Calibration Settings - Heads V-Trimming Tab 66 HP Scitex FB7500 Advanced Printer Guide - HP Scitex FB7500 | Advanced Printer Guide Rev. B - Page 76
procedure and exporting/importing of the CalibrationDB.ini file. Figure 3-14 Calibration Settings - Import & Export Tab Reference For detailed instructions on how to import the .meir file, refer to ACTTrimming User Guide on the ACT DVD supplied in the FB7500 User Documentation Pack. Chapter - HP Scitex FB7500 | Advanced Printer Guide Rev. B - Page 77
the file under a different name. The CalibrationDB.ini file contains all machine settings created during the FB7500 Calibration Procedure. Calibration Settings Import Imports the CalibrationDB.ini file to restore the machine settings previously saved. 68 HP Scitex FB7500 Advanced Printer Guide - HP Scitex FB7500 | Advanced Printer Guide Rev. B - Page 78
Tab This option should be activated from the Preferences => Quality tab (see Missing Nozzles Compensation (MNC) Procedure on page 98). Figure 3-15 MNC Window For instructions on the MNC procedure, refer to Missing Nozzles Compensation (MNC) Procedure on page 98. Chapter - HP Scitex FB7500 | Advanced Printer Guide Rev. B - Page 79
73). Machine Operation Opens/Hides the Machine Operations section on the FB7500 main window (see Machine Operations Section on page 81). Motion For service purposes only. Device Tree For service purposes only. Task List For service purposes only. 70 HP Scitex FB7500 Advanced Printer Guide - HP Scitex FB7500 | Advanced Printer Guide Rev. B - Page 80
failure, time it happened, and filter. Open this window to if you suspect a problem with the printer. Buttons: Clear Error - clears the error messages Clear - clears all messages Filters - Open Existing Job shows the Calibration jobs only. For service purposes only. Chapter 3 - FB7500 Software 71 - HP Scitex FB7500 | Advanced Printer Guide Rev. B - Page 81
sheets wider than 2.3 m Load and Unload Test - used for checking if the loading/unloading system functions properly (see Loading/Unloading Sequence on page 30). 72 HP Scitex FB7500 Advanced Printer Guide - HP Scitex FB7500 | Advanced Printer Guide Rev. B - Page 82
to Maintenance Moves the printing table to the left; then the printing table takes the maintenance bath to the position under the print heads. Chapter 3 - FB7500 Software 73 - HP Scitex FB7500 | Advanced Printer Guide Rev. B - Page 83
current FB7500 software version and Copyright. Print Controls Section Option Single Queue 74 Description This allows you to add several jobs to the list and set their printing parameters. The jobs will be printed one by one (one copy or more). Future option HP Scitex FB7500 Advanced Printer Guide - HP Scitex FB7500 | Advanced Printer Guide Rev. B - Page 84
displays all the image files waiting to be printed with their status, print mode, and the number of copies. Figure 3-16 Job List Section Chapter 3 - FB7500 Software 75 - HP Scitex FB7500 | Advanced Printer Guide Rev. B - Page 85
After selecting the job and saving it, the job is automatically archived in a dedicated folder within the FB7500 application folder. Add Existing Add a job which was previously added to the list (same as Add print it later. Remove a job from the list. 76 HP Scitex FB7500 Advanced Printer Guide - HP Scitex FB7500 | Advanced Printer Guide Rev. B - Page 86
distributed among the print heads and the different passes/cycles. "Prepare Job Offline" should be activated manually by the user. Jobs that are prepared successfully switch to the "Ready" status. Abort Prepare Abort the user) in the middle of the Prepare process. Chapter 3 - FB7500 Software 77 - HP Scitex FB7500 | Advanced Printer Guide Rev. B - Page 87
upward so as to print it earlier Move a job on the list downward so as to print it later. Remove a job from the list. 78 HP Scitex FB7500 Advanced Printer Guide - HP Scitex FB7500 | Advanced Printer Guide Rev. B - Page 88
Preview and File Information Section The Preview window, located on the right side of the FB7500 main window, displays the selected image, together with general file information as seen in a New Job on page 49). Figure 3-18 Preview and File Information Section Chapter 3 - FB7500 Software 79 - HP Scitex FB7500 | Advanced Printer Guide Rev. B - Page 89
service and R&D purposes only. Current Job Section This section allows visual indication of the job printing progress. Option Print Speed # of Passes Total Length Description Printing speed level. Number of passes. Total image length that has been printed. 80 HP Scitex FB7500 Advanced Printer - HP Scitex FB7500 | Advanced Printer Guide Rev. B - Page 90
Operations Section Tab Main tab Option Description Manual Loading Refer to Manual Substrate Loading on page 91. Automatic Loading Move to End Moves the printing table to the left for the manual loading. Arrows Remove Media Continuously moves the printing table to the right/left. Automatically - HP Scitex FB7500 | Advanced Printer Guide Rev. B - Page 91
General Description The machine current status Substrate parameters Indication of the ink level in the ink containers Current UV system settings Free disk space 82 HP Scitex FB7500 Advanced Printer Guide - HP Scitex FB7500 | Advanced Printer Guide Rev. B - Page 92
CHAPTER 4 Printing with FB7500 System Startup 84 Loading/Unloading System Setup 86 Substrate Loading 91 Manual Substrate Loading 91 Printing a Job 92 System Shutdown 93 Replacing Ink Container 97 Missing Nozzles Compensation (MNC) Procedure 98 Trimming Procedure 101 - HP Scitex FB7500 | Advanced Printer Guide Rev. B - Page 93
the following: • Check the ink level in the main ink tanks. • Make sure the air pressure in the main air pressure regulator is 6 bars. 84 HP Scitex FB7500 Advanced Printer Guide - HP Scitex FB7500 | Advanced Printer Guide Rev. B - Page 94
4 On the electrical cabinet, turn on the main power switch. 5 On the UV electrical cabinet, turn on the UV main power switch. 6 Launch the HP Scitex FB7500 application; the UV system turns on automatically. Chapter 4 - Printing with FB7500 85 - HP Scitex FB7500 | Advanced Printer Guide Rev. B - Page 95
page 73). 9 Print the Head Signature to evaluate status of the nozzles. Follow the instructions in Missing Nozzles Compensation (MNC) Procedure on page 98). Loading/Unloading System Setup You should components, refer to Loading/Unloading System on page 24. 86 HP Scitex FB7500 Advanced Printer Guide - HP Scitex FB7500 | Advanced Printer Guide Rev. B - Page 96
detector loading suction cups suction cups valve N/A Vacuum to Unloading unloading suction cups valve suction cups Figure 4-1 Inside of the Loader Cabinet Chapter 4 - Printing with FB7500 87 - HP Scitex FB7500 | Advanced Printer Guide Rev. B - Page 97
cups supplied in the Accessories Kit. Note Figure 4-3 Black and White Suction Cups Unlike all flexible media types, Yopu requires the black suction cups. 88 HP Scitex FB7500 Advanced Printer Guide - HP Scitex FB7500 | Advanced Printer Guide Rev. B - Page 98
Cabinet Front View on page 88. 2 Use the black suction cups supplied in the Accessories Kit. Figure 4-4 Black and White Suction Cups Chapter 4 - Printing with FB7500 89 - HP Scitex FB7500 | Advanced Printer Guide Rev. B - Page 99
Kappa (thk 5mm) 2.4 x 1.2 5 bars PVC (thk 5mm) 2.4 x 1.2 5 bars Polystyrene (thk 5mm) 1.6 x 1.6 5 bars Compressed Cardboard (thk 2mm) 1.6 x 1.2 5 bars Acrylic/Polycarbonate 1.6 x 1 (thk 3mm) 5 bars Cardboard 1.2 x 0.8 5 bars 90 HP Scitex FB7500 Advanced Printer Guide - HP Scitex FB7500 | Advanced Printer Guide Rev. B - Page 100
first substrate and stacks it on the unloader lift. Simultaneously, it feeds the second substrate onto the printing table. Manual Substrate Loading In this method, the substrate is placed on the printing table manually, by the machine operator. Attach the substrate to registration pins Pedal Figure - HP Scitex FB7500 | Advanced Printer Guide Rev. B - Page 101
To load the substrate manually: 1 In the FB7500 main window, click Print Job; the printing table moves to the left. 2 Press the pedal; the system deactivates the job and click the Prepare Job Offline icon on the toolbar; the job status changes to Ready. 92 HP Scitex FB7500 Advanced Printer Guide - HP Scitex FB7500 | Advanced Printer Guide Rev. B - Page 102
the substrate sheet. 5 Click the Print Job button to start printing. System Shutdown 1 Exit the FB7500 application; • The UV system shuts down automatically. • All axes automatically move to their home position. the condition of the nozzles in each print head. Chapter 4 - Printing with FB7500 93 - HP Scitex FB7500 | Advanced Printer Guide Rev. B - Page 103
there is a problem with any of FB7500 Software DVD. Note Do not change parameters of any of the Calibration jobs! 4 From the machine application, select Machine =>Calibration Mode. 5 On the toolbar, click the file. icon and select the Head Signature 94 HP Scitex FB7500 Advanced Printer Guide - HP Scitex FB7500 | Advanced Printer Guide Rev. B - Page 104
each nozzle prints, it is possible to trace misfiring nozzles since their corresponding line segments are missing (see Figure 4-8 on page 96). Chapter 4 - Printing with FB7500 95 - HP Scitex FB7500 | Advanced Printer Guide Rev. B - Page 105
Missing nozzle Perfect print head Missing nozzle Figure 4-8 Missing Nozzles 7 If necessary, perform a full maintenance cycle from the Maintenance window. 96 HP Scitex FB7500 Advanced Printer Guide - HP Scitex FB7500 | Advanced Printer Guide Rev. B - Page 106
performed asneeded and can be done without interrupting printer operation. Figure 4-9 Ink Containers' Sockets and Ink Container The ink level in the ink tanks is indicated in the FB7500 main window: However, it is recommended to manually check the ink containers every 8 hours. Chapter 4 - Printing - HP Scitex FB7500 | Advanced Printer Guide Rev. B - Page 107
be clogged nozzles, nozzles firing aside (shifting), or not stable nozzles. These problems create quality problems such as micro banding. The MNC allows to eliminate these nozzles and compensate with Warranty Policy. Figure 4-10 Problematic Print Head 98 HP Scitex FB7500 Advanced Printer Guide - HP Scitex FB7500 | Advanced Printer Guide Rev. B - Page 108
To compensate the missing nozzles: 1 In the FB7500 main menu, select Tools => Preferences => Quality tab. Figure 4-11 Quality Tab 2 Select the Use Quality MissMinisgsianngdasndhisfthiinftginngonzozzlzelses Figure 4-12 Signature of the Specific Print Head Chapter 4 - Printing with FB7500 99 - HP Scitex FB7500 | Advanced Printer Guide Rev. B - Page 109
Note Nozzles 1A and 16H might be missing but this is hard to detect. 5 Select Tools => Calibration Setting => Nozzles Compensation. 1 2 3 4 Figure 4-13 Nozzle Compensation Tab 6 Mark all missing/problematic nozzles and click Apply. 100 HP Scitex FB7500 Advanced Printer Guide - HP Scitex FB7500 | Advanced Printer Guide Rev. B - Page 110
tab, your current jobs should be prepared again (via the Prepare Job Offline). Trimming Procedure Reference For detailed instructions on how to perform the Trimming procedure, refer to ACT User Guide on the ACT DVD supplied in the FB7500 User Documentation Pack. Chapter 4 - Printing with - HP Scitex FB7500 | Advanced Printer Guide Rev. B - Page 111
102 HP Scitex FB7500 Advanced Printer Guide - HP Scitex FB7500 | Advanced Printer Guide Rev. B - Page 112
49 Electrical cabinet, 32 Emergency Stop button, 38 F FB7500 loading/unloading system, 24 FB7500 main window, 46 FB7500 printer applications, 3 FB7500 printer axes, 9 FB7500 printer benefits, 3 FB7500 printer components, 8 FB7500 system components, 8 FB7500 workstation, 39 Features, 3 File menu, 48 - HP Scitex FB7500 | Advanced Printer Guide Rev. B - Page 113
, 36 Maintenance and motion, 47 Maintenance bath, 36 Maintenance system, 36 Maintenance window, 73 Manual Loading, 81 Margins, 54 M-axis, 10 Media pressure pistons for flexible substrates, 27 Media 60 ORCA, 40 ORCA board, 13 Overflow board, 13 P PIC, 40 104 HP Scitex FB7500 Advanced Printer Guide - HP Scitex FB7500 | Advanced Printer Guide Rev. B - Page 114
marks, 55 Remove Media, 81 RIP, 6 S Safety, 2 Safety lights, 38 S-axis, 10 Secondary ink tank, 19 Secondary ink tanks, 12 Semi Gloss, 56, 61 Service key, 38 Single, 74 Special marks, 55, 57 Status, 54 Step&Repeat, 53 Stop, 75, 81 Substrate, 82 Substrate Editor, 59 Suction cups, 28 System - HP Scitex FB7500 | Advanced Printer Guide Rev. B - Page 115
Water pump, 23 Water reservoir, 12, 22 Water system, 22 Water tank, 23 W-axis, 10 Wing, 65 Workflow, 6 X X-axis, 10 Y Y-axis, 10 Z Z-axis, 10 106 HP Scitex FB7500 Advanced Printer Guide - HP Scitex FB7500 | Advanced Printer Guide Rev. B - Page 116
-
 1
1 -
 2
2 -
 3
3 -
 4
4 -
 5
5 -
 6
6 -
 7
7 -
8
-
9
-
10
-
11
-
12
-
13
-
14
-
15
-
16
-
17
-
18
-
19
-
20
-
21
-
22
-
23
-
24
-
25
-
26
-
27
-
28
-
29
-
30
-
31
-
32
-
33
-
34
-
35
-
36
-
37
-
38
-
39
-
40
-
41
-
42
-
43
-
44
-
45
-
46
-
47
-
48
-
49
-
50
-
51
-
52
-
53
-
54
-
55
-
56
-
57
-
58
-
59
-
60
-
61
-
62
-
63
-
64
-
65
-
66
-
67
-
68
-
69
-
70
-
71
-
72
-
73
-
74
-
75
-
76
-
77
-
78
-
79
-
80
-
81
-
82
-
83
-
84
-
85
-
86
-
87
-
88
-
89
-
90
-
91
-
92
-
93
-
94
-
95
-
96
-
97
-
98
-
99
-
100
-
101
-
102
-
103
-
104
-
105
-
106
-
107
-
108
-
109
-
110
-
111
-
112
-
113
-
114
-
115
-
116
 |
 |

±²³´µ¶·¸¹³º»¼½¾¾
¿ÀÁÂõ¸À³²Ä¶Ã·¸Ä³ÅƶÀ¸