HP Scitex LX820 HP Scitex LX850 & LX820 Printer: Installation Guide - Page 65
Callme@HP Setup Process
 |
View all HP Scitex LX820 manuals
Add to My Manuals
Save this manual to your list of manuals |
Page 65 highlights
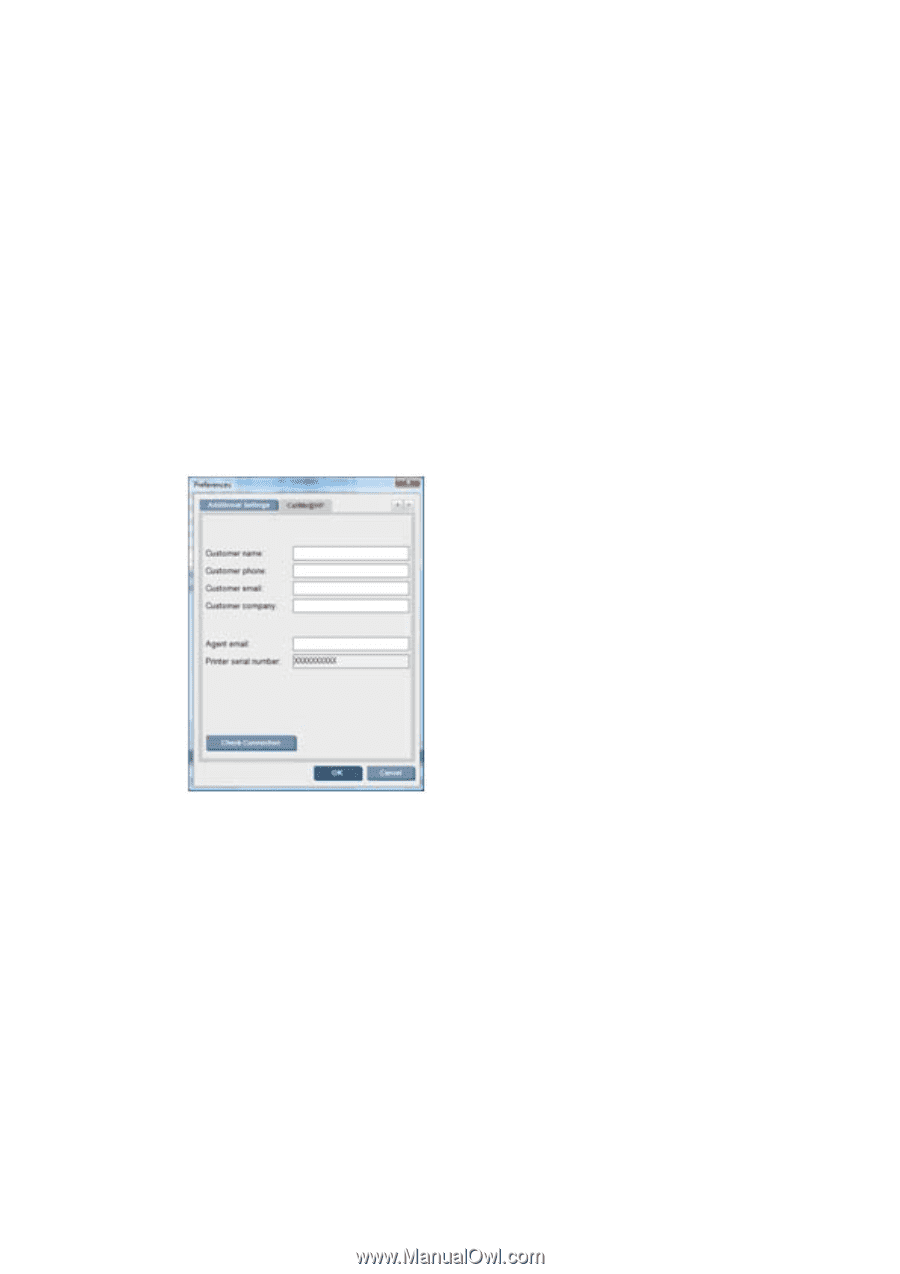
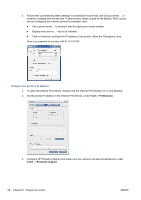
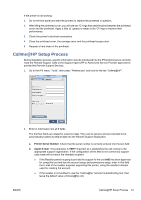
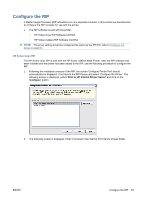
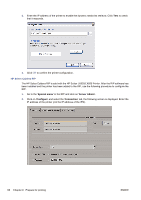
If the primer is not working: 1. Go to the front panel and start the process to replace the printhead in question. 2. After lifting the printhead cover, you will see two 'O' rings that seal the joints between the printhead cover and the printhead. Apply a little oil, grease or water to the 'O' rings to improve their performance. 3. Check the primer's electrical connections. 4. Close the printhead cover, the carriage cover and the printhead access door. 5. Request a hard clean of the printhead. Callme@HP Setup Process During installation process, specific information must be introduced into the IPS preferences to correctly route the Remote Support Calls to the Support Agent (HP or Authorized Service Provider approved to provide this Remote Support Service). 1. Go to the IPS menu "Tools", then press "Preferences" and look for the tab "Callme@HP". 2. Enter in information into all 6 fields The first four fields are related to customer data. They can be generic and are intended to be automatically loaded as default data into the Remote Support Application. a. Printer Serial Number: Check that the serial number is correctly entered into the text field. b. Agent E-mail: This parameter is VERY important as it establishes the call routing to the appropriate support organization. If the configuration of this field is not correct any support calls made will not reach the intended recipient. ● If the Reseller partner is going to provide the support for the unit AND has been approved for using this tool and has the account setup and permissions setup, enter in this field the E-mail of the reseller engineer supporting this printer, using the reseller's domain used for creating the account. ● If the reseller is not entitled to use the "Callme@hp" remote troubleshooting tool, then leave the default value: [email protected] ENWW Callme@HP Setup Process 61
-
 1
1 -
2
-
3
-
4
-
5
-
6
-
7
-
8
-
9
-
10
-
11
-
12
-
13
-
14
-
15
-
16
-
17
-
18
-
19
-
20
-
21
-
22
-
23
-
24
-
25
-
26
-
27
-
28
-
29
-
30
-
31
-
32
-
33
-
34
-
35
-
36
-
37
-
38
-
39
-
40
-
41
-
42
-
43
-
44
-
45
-
46
-
47
-
48
-
49
-
50
-
51
-
52
-
53
-
54
-
55
-
56
-
57
-
58
-
59
-
 60
60 -
 61
61 -
 62
62 -
 63
63 -
 64
64 -
 65
65 -
 66
66 -
 67
67 -
 68
68 -
 69
69 -
 70
70 -
71
-
72
-
73
-
74
-
75
-
76
-
77
-
78
-
79
-
80
-
81
-
82
-
83
-
84
-
85
 |
 |