HP StorageWorks 8/24 Brocade Web Tools Administrator's Guide v6.2.0 (53-100119 - Page 74
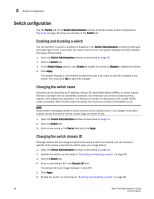
Switch configuration, Enabling and disabling a switch, Changing the switch name
 |
View all HP StorageWorks 8/24 manuals
Add to My Manuals
Save this manual to your list of manuals |
Page 74 highlights
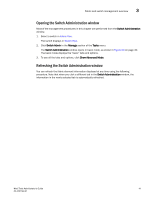
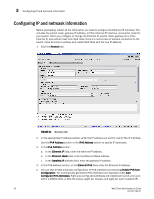
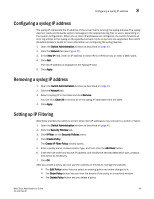
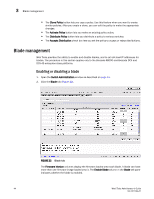
3 Switch configuration Switch configuration Use the Switch tab of the Switch Administration window to perform basic switch configuration. Figure 20 on page 40 shows an example of the Switch tab. Enabling and disabling a switch You can identify if a switch is enabled or disabled in the Switch Administration window by looking at the lower-right corner. If you hover the cursor over the icon, the system displays text that indicates the status of the switch. 1. Open the Switch Administration window as described on page 41. 2. Click the Switch tab. 3. In the Switch Status section, click Enable to enable the switch or Disable to disable the switch. 4. Click Apply. The system displays a confirmation window that asks if you want to save the changes to the switch. You must click Yes to save the changes. Changing the switch name Switches can be identified by IP address, domain ID, World Wide Name (WWN), or switch names. Names must begin with an alphabetic character, but otherwise can consist of alphanumeric, hyphen, and underscore characters. The maximum number of characters is 30, unless FICON mode is enabled. When FICON mode is enabled, the maximum number of characters is 24. NOTE Some system messages identify a switch service by the chassis name. If you assign meaningful chassis names and switch names, system logs are easier to use. 1. Open the Switch Administration window as described on page 41. 2. Click the Switch tab. 3. Enter a new name in the Name field and click Apply. Changing the switch domain ID Although domain IDs are assigned dynamically when a switch is enabled, you can request a specific ID to resolve a domain ID conflict when you merge fabrics. 1. Open the Switch Administration window as described on page 41. 2. Disable the switch, as described in "Enabling and disabling a switch" on page 46. 3. Click the Switch tab. 4. Enter a new domain ID in the Domain ID field. The domain ID is an integer between 1 and 239. 5. Click Apply. 6. Enable the switch, as described in "Enabling and disabling a switch" on page 46. 46 Web Tools Administrator's Guide 53-1001194-01
-
 1
1 -
2
-
3
-
4
-
5
-
6
-
7
-
8
-
9
-
10
-
11
-
12
-
13
-
14
-
15
-
16
-
17
-
18
-
19
-
20
-
21
-
22
-
23
-
24
-
25
-
26
-
27
-
28
-
29
-
30
-
31
-
32
-
33
-
34
-
35
-
36
-
37
-
38
-
39
-
40
-
41
-
42
-
43
-
44
-
45
-
46
-
47
-
48
-
49
-
50
-
51
-
52
-
53
-
54
-
55
-
56
-
57
-
58
-
59
-
60
-
61
-
62
-
63
-
64
-
65
-
66
-
67
-
68
-
 69
69 -
 70
70 -
 71
71 -
 72
72 -
 73
73 -
 74
74 -
 75
75 -
 76
76 -
 77
77 -
 78
78 -
 79
79 -
80
-
81
-
82
-
83
-
84
-
85
-
86
-
87
-
88
-
89
-
90
-
91
-
92
-
93
-
94
-
95
-
96
-
97
-
98
-
99
-
100
-
101
-
102
-
103
-
104
-
105
-
106
-
107
-
108
-
109
-
110
-
111
-
112
-
113
-
114
-
115
-
116
-
117
-
118
-
119
-
120
-
121
-
122
-
123
-
124
-
125
-
126
-
127
-
128
-
129
-
130
-
131
-
132
-
133
-
134
-
135
-
136
-
137
-
138
-
139
-
140
-
141
-
142
-
143
-
144
-
145
-
146
-
147
-
148
-
149
-
150
-
151
-
152
-
153
-
154
-
155
-
156
-
157
-
158
-
159
-
160
-
161
-
162
-
163
-
164
-
165
-
166
-
167
-
168
-
169
-
170
-
171
-
172
-
173
-
174
-
175
-
176
-
177
-
178
-
179
-
180
-
181
-
182
-
183
-
184
-
185
-
186
-
187
-
188
-
189
-
190
-
191
-
192
-
193
-
194
-
195
-
196
-
197
-
198
-
199
-
200
-
201
-
202
-
203
-
204
-
205
-
206
-
207
-
208
-
209
-
210
-
211
-
212
-
213
-
214
-
215
-
216
-
217
-
218
-
219
-
220
-
221
-
222
-
223
-
224
-
225
-
226
-
227
-
228
-
229
-
230
-
231
-
232
-
233
-
234
-
235
-
236
-
237
-
238
-
239
-
240
-
241
-
242
-
243
-
244
-
245
-
246
-
247
-
248
-
249
-
250
-
251
-
252
-
253
-
254
-
255
-
256
-
257
-
258
-
259
-
260
-
261
-
262
-
263
-
264
-
265
-
266
-
267
-
268
-
269
-
270
-
271
-
272
-
273
-
274
-
275
-
276
-
277
-
278
-
279
-
280
-
281
-
282
-
283
-
284
-
285
-
286
-
287
-
288
-
289
-
290
-
291
-
292
-
293
-
294
-
295
-
296
-
297
-
298
-
299
-
300
-
301
-
302
-
303
-
304
-
305
-
306
-
307
-
308
-
309
-
310
-
311
-
312
-
313
-
314
 |
 |