HP Surestore S10 Rackmount Kit Installation Guide - Page 1
HP Surestore S10 - Hub Manual
 |
View all HP Surestore S10 manuals
Add to My Manuals
Save this manual to your list of manuals |
Page 1 highlights
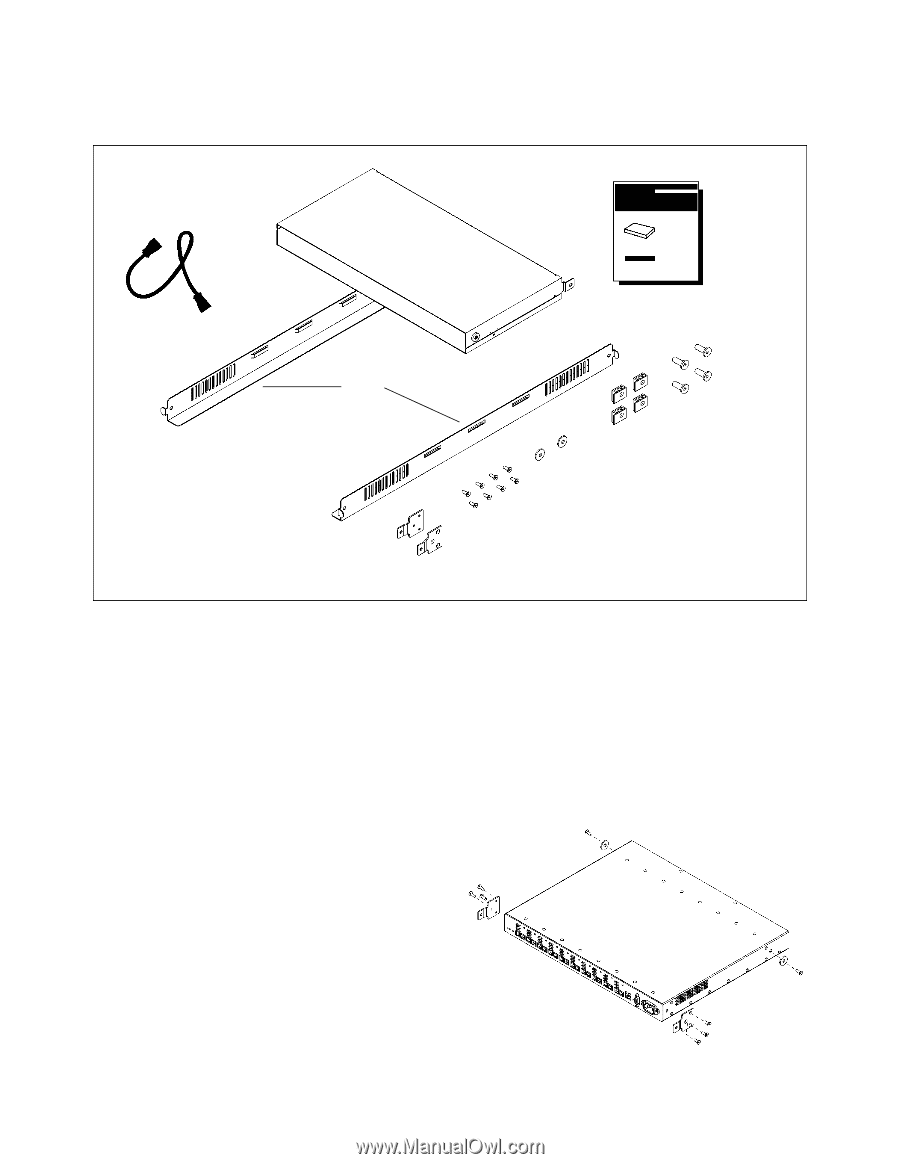
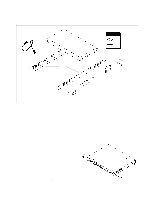
FC-AL Hub Rackmount Kit Installation Guide Plenum shroud PDU cable FC-AL Hub Rackmount Kit Installation Guide Rails 10-32x.625 screws Sheet metal nuts Nylon retainers M3x.5 screws Mounting ear brackets Figure 1 Select a secure location in the rack. The FC-AL hub requires only one EIA of rack space. Remove filler panels as needed and mount the hub as follows: Step 1: Unpack the rackmount kit. Unpack the rackmount kit and check the contents for the parts shown in Figure 1. If parts are missing, contact an HP sales representative. Step 2: Prepare the hub for mounting. • For a new hub, unpack the hub and discard the rubber feet from hub contents. • For a hub that has been used as a standalone: 1. Move the hub to its new location and peel off the rubber feet attached to the bottom of the hub. 2. Replace missing mounting ear brackets. Attach the brackets to the outside front corners of the hub using three M3x.5 screws for each and turning the angled end of the bracket outward. See Figure 2. 3. Replace missing nylon retainers on the left and right sides of the hub. Insert one M3x.5 screw through the center of the retainer and into the hole on each side of the hub. See Figure 2. • For a new or existing hub, record the MAC address located below the 10Base-T port on the hub. This unique address identifies the hub. Figure 2
-
 1
1 -
 2
2
 |
 |