HP TouchSmart 610-1151f Wall-Mounting your HP TouchSmart User Guide - Page 13
The computer can be mounted in either landscape or portrait orientation. If mounted
 |
View all HP TouchSmart 610-1151f manuals
Add to My Manuals
Save this manual to your list of manuals |
Page 13 highlights
4. Attach the wall-mounting hardware (purchased separately) to the VESA adapter plate, according to the manufacturer's instructions, using either the 100 mm x 100 mm screw holes or the 100 mm x 200 mm screw holes. 5. Mount the computer on the wall. CAUTION: The computer is heavy and may require two people to mount it to the wall. NOTE: The computer can be mounted in either landscape or portrait orientation. If mounted in portrait orientation make sure the CD/DVD drive is at the top. For landscape orientation, keep the same orientation as when the computer is on the stand. Wall-Mounting your HP TouchSmart Installing the VESA adapter plate 9
-
 1
1 -
2
-
3
-
4
-
5
-
6
-
7
-
 8
8 -
 9
9 -
 10
10 -
 11
11 -
 12
12 -
 13
13 -
 14
14 -
 15
15 -
 16
16 -
 17
17 -
 18
18 -
19
-
20
 |
 |
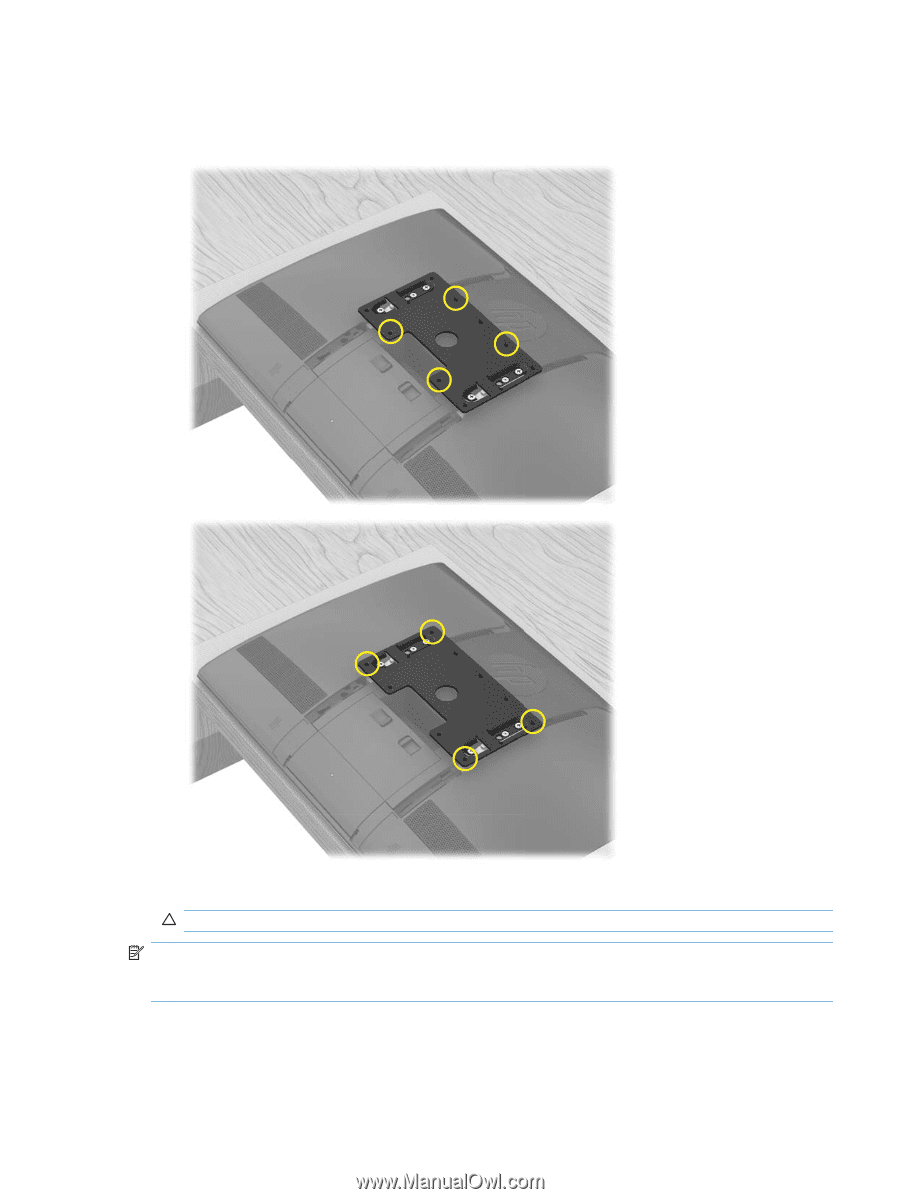
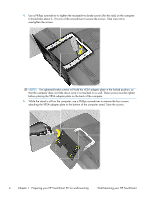
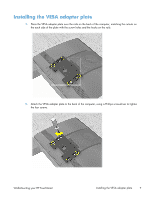
4.
Attach the wall-mounting hardware (purchased separately) to the VESA adapter plate, according
to the manufacturer's instructions, using either the 100 mm x 100 mm screw holes or the
100 mm x 200 mm screw holes.
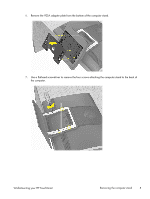
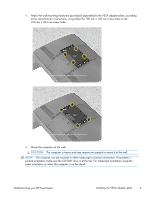
5.
Mount the computer on the wall.
CAUTION:
The computer is heavy and may require two people to mount it to the wall.
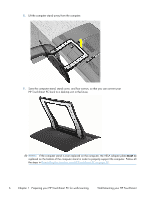
NOTE:
The computer can be mounted in either landscape or portrait orientation. If mounted in
portrait orientation make sure the CD/DVD drive is at the top. For landscape orientation, keep the
same orientation as when the computer is on the stand.
Wall-Mounting your HP TouchSmart
Installing the VESA adapter plate
9