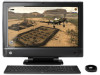
HP TouchSmart 610-1250xt Wall-Mounting your HP TouchSmart User Guide - Page 8
Preparing your HP TouchSmart PC for wall-mounting, While the stand is still on the computer
 |
View all HP TouchSmart 610-1250xt manuals
Add to My Manuals
Save this manual to your list of manuals |
Page 8 highlights
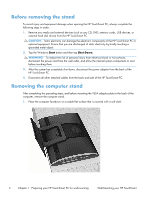
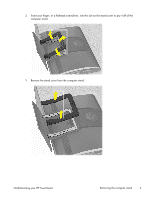
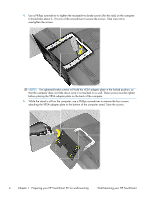
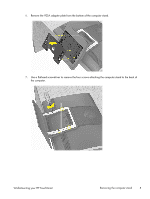
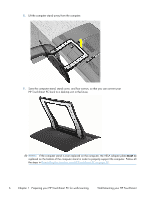
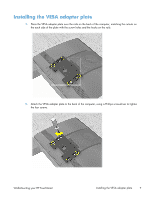
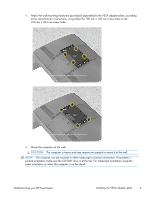
4. Use a Phillips screwdriver to tighten the recessed two brake screws (for the rails) on the computer. It should take about 5-10 turns of the screwdriver to secure the screws. Take care not to overtighten the screws. NOTE: The tightened brake screws will hold the VESA adapter plate in the locked position, so that the computer does not slide down once it is mounted on a wall. These screws must be tighten before placing the VESA adapter plate on the back of the computer. 5. While the stand is still on the computer, use a Phillips screwdriver to remove the four screws attaching the VESA adapter plate to the bottom of the computer stand. Save the screws. 4 Chapter 1 Preparing your HP TouchSmart PC for wall-mounting Wall-Mounting your HP TouchSmart
-
 1
1 -
2
-
 3
3 -
 4
4 -
 5
5 -
 6
6 -
 7
7 -
 8
8 -
 9
9 -
 10
10 -
 11
11 -
 12
12 -
 13
13 -
14
-
15
-
16
-
17
-
18
-
19
-
20
 |
 |
