HP Tx2635us Drives - Windows Vista
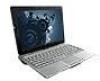
HP Tx2635us - Pavilion Entertainment - Turion X2 Ultra 2.2 GHz Manual
 |
UPC - 884420449898
View all HP Tx2635us manuals
Add to My Manuals
Save this manual to your list of manuals |
HP Tx2635us manual content summary:
- HP Tx2635us | Drives - Windows Vista - Page 1
Drives User Guide - HP Tx2635us | Drives - Windows Vista - Page 2
2008 Hewlett-Packard Development Company, L.P. Microsoft and Windows are U.S. registered trademarks of Microsoft Corporation. The information contained herein is subject to change without notice. The only warranties for HP products and services are set forth in the express warranty statements - HP Tx2635us | Drives - Windows Vista - Page 3
Product notice This user guide describes features that are common to most models. Some features may not be available on your computer. iii - HP Tx2635us | Drives - Windows Vista - Page 4
iv Product notice - HP Tx2635us | Drives - Windows Vista - Page 5
drive performance Using Disk Defragmenter ...12 Using Disk Cleanup ...13 5 Replacing the hard drive 6 Resolving problems The computer does not detect the optical drive 16 Uninstall and reinstall drivers ...17 Obtaining the latest HP device drivers 17 Obtaining the latest Windows device drivers - HP Tx2635us | Drives - Windows Vista - Page 6
Index ...20 vi - HP Tx2635us | Drives - Windows Vista - Page 7
1 Identifying installed drives To view the drives installed on the computer, select Start > Computer. The installed hard drives will be listed, along with the total capacity and space available on each drive. Devices with removable storage will also be listed. NOTE: Windows® includes the User - HP Tx2635us | Drives - Windows Vista - Page 8
. Do not touch the connector pins on a removable drive or on the computer. Handle a drive carefully; do not drop a drive or place items on it. Before removing or installing a drive, shut down the computer. If you are unsure whether the computer is off, in the Sleep state, or in Hibernation, turn - HP Tx2635us | Drives - Windows Vista - Page 9
Using an optical drive Identifying the installed optical drive Select Start > Computer. Using optical discs (CDs and DVDs) An optical drive supports optical discs (CDs and DVDs). Blank CD-R discs can be used to record music or store data permanently. This information cannot be updated. If you plan - HP Tx2635us | Drives - Windows Vista - Page 10
Optical drive type Read CD and DVD-ROM media Write to CDRW media Write to DVD ±RW/R media Write to DVD +RW DL media Write label to ±RW/R Write to DVDRAM media * LightScribe is media software that allows you to add a designer label to the outside of a disc. 4 Chapter 3 Using an optical drive - HP Tx2635us | Drives - Windows Vista - Page 11
Playing a CD or DVD 1. Turn on the computer. 2. Press the release button (1) on the drive bezel to release the disc tray. 3. Pull out the tray (2). 4. Hold the disc by the edges to avoid touching the flat surfaces and position the - HP Tx2635us | Drives - Windows Vista - Page 12
about using software included with the computer, refer to the software manufacturer's instructions, which may be provided with the hard drive. 4. When prompted, remove the source disc from the optical drive and insert a blank disc into the drive. After the information is copied, the disc you created - HP Tx2635us | Drives - Windows Vista - Page 13
is the same as the process for creating a data file. MP3 files can be played only on MP3 players or on computers with MP3 software installed. To burn a CD or DVD, follow these steps: 1. Download or copy the source files into a folder on your hard drive. 2. Insert a blank CD or DVD into the optical - HP Tx2635us | Drives - Windows Vista - Page 14
button (1) on the drive bezel to release the disc tray, and then gently pull out the tray (2) until it stops. 2. Remove the disc (3) from the fully accessible, tilt the disc carefully as you remove it. 3. Close the disc tray and place the disc in a protective case. When the disc tray does not open - HP Tx2635us | Drives - Windows Vista - Page 15
the disc by the edges and avoid touching the flat surfaces. NOTE: If the tray is not fully accessible, tilt the disc carefully as you remove it. 4. Close the disc tray and place the disc in a protective case. Removing a CD or DVD 9 - HP Tx2635us | Drives - Windows Vista - Page 16
restart the disc. In rare cases, you may need to exit the program and then restart it. ● Increase system resources: Turn off printers and scanners. Unplug cameras and portable handheld devices. Windows looks for Plug and Play devices. Disconnecting them frees up valuable system resources and results - HP Tx2635us | Drives - Windows Vista - Page 17
to improve the security of your computer. You may be prompted for your permission or password for tasks such as installing software, running utilities, or changing Windows settings. Refer to Windows Help for more information. 3. Click the "+" sign next to DVD/CD-ROM drives. 4. Right-click the DVD - HP Tx2635us | Drives - Windows Vista - Page 18
hard drive at least once a month. You may set Disk Defragmenter to run on a monthly schedule, but you can defragment your computer manually at any time. To run Disk Defragmenter: 1. Select Start > All Programs > Accessories > System Tools > Disk Defragmenter. 2. Click Defragment now. NOTE: Windows - HP Tx2635us | Drives - Windows Vista - Page 19
searches the hard drive for unnecessary files that you can safely delete to free up disk space and help the computer to run more efficiently. To run Disk Cleanup: 1. Select Start > All Programs > Accessories > System Tools > Disk Cleanup. 2. Follow the on-screen instructions. Using Disk Cleanup 13 - HP Tx2635us | Drives - Windows Vista - Page 20
Turn the computer upside down on a flat surface. 6. Remove the battery from the computer. 7. With the hard drive bay toward you, loosen the 2 hard drive cover screws (1). 8. Lift the hard drive cover away from the computer (2). 9. Remove the 2 hard drive screws. 14 Chapter 5 Replacing the hard drive - HP Tx2635us | Drives - Windows Vista - Page 21
10. Pull the hard drive tab up, and then lift the hard drive away from the computer. To install a hard drive: 1. Insert the hard drive into the hard drive bay. 2. Gently press the hard drive down until it snaps into place. 3. Align the tabs (1) on the hard drive cover with the notches on the - HP Tx2635us | Drives - Windows Vista - Page 22
In the Device Manager window, click the plus sign (+) next to DVD/CD-ROM drives, unless a minus sign (-) is already showing. Look for an optical drive listing. If the drive is not listed, install (or reinstall) the device driver as instructed in the following section. 16 Chapter 6 Resolving problems - HP Tx2635us | Drives - Windows Vista - Page 23
reinstall drivers 1. Remove any discs from the optical drive. HP software updates. To use the HP Web site: 1. Open your Internet browser, go to http://www.hp.com, and click the Software & Driver Downloads link. 2. On the Software & Driver downloads page, type your computer model number as instructed - HP Tx2635us | Drives - Windows Vista - Page 24
an updated driver to open a window containing additional information. 6. Click Install now to install the updated driver without downloading the file. - or - Click Download only to save the file to your computer. When prompted, click Save and then select a storage location on your hard drive. After - HP Tx2635us | Drives - Windows Vista - Page 25
, and then burn from your hard drive. ● Reinstall the disc-burning device driver located in the DVD/CD-ROM drives category in Device Manager. A DVD playing in Windows Media Player produces no sound or display To resolve this problem, download and install HP Memories Disc Creator, available from the - HP Tx2635us | Drives - Windows Vista - Page 26
with Double-Layer support 3 M maintenance Disk Cleanup 13 Disk Defragmenter 12 O optical drive 3 R region codes, DVD 11 S software Disk Cleanup 13 Disk Defragmenter 12 H hard disk drive installing 15 removing 14 replacing 14 hard drive installing 15 removing 14 replacing 14 L LightScribe DVD - HP Tx2635us | Drives - Windows Vista - Page 27
-
 1
1 -
 2
2 -
 3
3 -
 4
4 -
 5
5 -
 6
6 -
 7
7 -
8
-
9
-
10
-
11
-
12
-
13
-
14
-
15
-
16
-
17
-
18
-
19
-
20
-
21
-
22
-
23
-
24
-
25
-
26
-
27
 |
 |

Drives
User Guide