HP Vectra XA 5/xxx HP Vectra XA 5/xxx , User's Guide for Minitower models - Page 18
Starting the PC for the First Time
 |
View all HP Vectra XA 5/xxx manuals
Add to My Manuals
Save this manual to your list of manuals |
Page 18 highlights
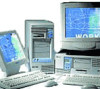
NOTE 1 Setting Up and Using Your PC Starting and Stopping Your PC Starting the PC for the First Time If your PC has preinstalled software, it is initialized the first time you start the PC. The software initialization process takes approximately three minutes. This process sets up the software in your language and sets up your software to use the hardware installed in your computer (you can change the settings after the software has been initialized). Initializing Your Software Do NOT switch OFF the PC while the software is being initialized-this could cause unexpected results. To initialize your software: 1 Turn on the display first, and then the PC. When the PC is switched on, the Vectra Logo is displayed. The PC performs a Power-On-Self-Test (POST). Press if you want to view the POST details in the HP Summary Screen (refer to the "HP Summary Screen", on page 32). If an error is detected during the Power-On-Self-Test, the PC will automatically display the error. You may be prompted to press to start the Setup program to correct the error. 2 The software initialization routine starts. It displays the software license agreement, gives you an opportunity to read Working in Comfort (ergonomic advice for computer users), and then asks questions about the PC. For example: • The name of the person who will use the PC and your company name. (If necessary, the name of the user can be modified later.) • The current date and time. • The type of printer (for example, HP LaserJet 5L). This is shown on the front of the printer. You also need to enter the connection used by the printer. • The model number of your display. The display's model number is shown on the cover of the manual supplied with the display and on a label on the rear of the display. 8 English
-
 1
1 -
2
-
3
-
4
-
5
-
6
-
7
-
8
-
9
-
10
-
11
-
12
-
 13
13 -
 14
14 -
 15
15 -
 16
16 -
 17
17 -
 18
18 -
 19
19 -
 20
20 -
 21
21 -
 22
22 -
 23
23 -
24
-
25
-
26
-
27
-
28
-
29
-
30
-
31
-
32
-
33
-
34
-
35
-
36
-
37
-
38
-
39
-
40
-
41
-
42
-
43
-
44
-
45
-
46
-
47
-
48
-
49
-
50
-
51
-
52
-
53
-
54
-
55
-
56
-
57
-
58
-
59
-
60
-
61
-
62
-
63
-
64
-
65
-
66
-
67
-
68
-
69
-
70
-
71
-
72
-
73
-
74
-
75
-
76
-
77
-
78
-
79
-
80
-
81
-
82
-
83
-
84
-
85
-
86
-
87
-
88
-
89
-
90
-
91
-
92
-
93
-
94
-
95
-
96
 |
 |
