HP W1907 User's Guide - HP vs15, vs17, vs19, f1705, f1905 LCD Monitor
HP W1907 - 19" LCD Monitor Manual
 |
UPC - 882780774636
View all HP W1907 manuals
Add to My Manuals
Save this manual to your list of manuals |
HP W1907 manual content summary:
- HP W1907 | User's Guide - HP vs15, vs17, vs19, f1705, f1905 LCD Monitor - Page 1
User's Guide HP vs15 LCD Monitor HP vs17 LCD Monitor HP vs19 LCD Monitor HP f1705 LCD Monitor HP f1905 LCD Monitor - HP W1907 | User's Guide - HP vs15, vs17, vs19, f1705, f1905 LCD Monitor - Page 2
HP. Hewlett-Packard Company P.O. Box 4010 Cupertino, CA 95015-4010 USA Copyright © 2004-2005 Hewlett-Packard Development Company, L.P. Microsoft and Windows by Hewlett-Packard Company under license. HP supports lawful use of technology and does not endorse or encourage the use of its products for - HP W1907 | User's Guide - HP vs15, vs17, vs19, f1705, f1905 LCD Monitor - Page 3
Å WARNING: Text set off in this manner indicates that failure to follow directions could result in bodily harm or loss of life. Ä CAUTION: Text set off in this manner indicates that failure to follow directions could result in damage to equipment or loss of information. ✎ Text set off in this manner - HP W1907 | User's Guide - HP vs15, vs17, vs19, f1705, f1905 LCD Monitor - Page 4
- HP W1907 | User's Guide - HP vs15, vs17, vs19, f1705, f1905 LCD Monitor - Page 5
vs Monitor 3-4 Placing the f Monitor on a Desktop 3-7 Wall-Mounting the f Monitor 3-10 Assembling the f Monitor Satellite Speakers 3-13 Connecting the Monitor 3-14 Connecting the Monitor Video Input Cable. . . 3-14 Connecting the Audio Cable 3-17 Connecting the Power Cable 3-19 User's Guide - HP W1907 | User's Guide - HP vs15, vs17, vs19, f1705, f1905 LCD Monitor - Page 6
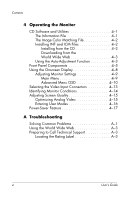
CD 4-2 Downloading from the World Wide Web 4-3 Using the Auto-Adjustment Function 4-3 Front Panel Components 4-5 Using the Onscreen Display 4-8 Adjusting Monitor Settings 4-9 Main Menu 4-9 Advanced Menu OSD 4-10 Selecting the Video Input Connectors 4-13 Identifying Monitor Conditions 4-14 - HP W1907 | User's Guide - HP vs15, vs17, vs19, f1705, f1905 LCD Monitor - Page 7
HP vs LCD Monitors B-1 HP f LCD Monitors B-4 Pre-set Video Modes B-6 LCD Monitor Quality and Pixel Policy B-8 Power Cord Set Requirements B-9 C Agency Regulatory Notices Federal Communications Commission Notice. . . . . C-1 Modifications C-2 Cables C-2 Declaration of Conformity for Products - HP W1907 | User's Guide - HP vs15, vs17, vs19, f1705, f1905 LCD Monitor - Page 8
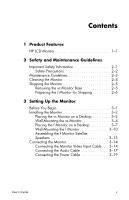
Contents viii User's Guide - HP W1907 | User's Guide - HP vs15, vs17, vs19, f1705, f1905 LCD Monitor - Page 9
1 Product Features HP LCD Monitor The HP LCD (liquid crystal display) Monitor has an active matrix, thin-film transistor (TFT) screen. This guide discusses five models: ❏ HP vs15 LCD Monitor, a 15-inch (38.1 cm) display ❏ HP vs17 LCD Monitor, a 17-inch (43.2 cm) display ❏ HP vs19 LCD Monitor, a 19- - HP W1907 | User's Guide - HP vs15, vs17, vs19, f1705, f1905 LCD Monitor - Page 10
diagonal viewable area display ■ 1280 × 1024 factory-set resolution, plus full-screen support for lower resolutions (HP vs15 LCD Monitor: 1024 x 768) ■ Video inputs supported: ❏ VGA analog signal ❏ DVI-D (select f monitor models only) digital signal ■ VGA cable ■ Fast response time providing better - HP W1907 | User's Guide - HP vs15, vs17, vs19, f1705, f1905 LCD Monitor - Page 11
Star ❏ European Union CE Directives ❏ Swedish MPR II 1990 ❏ TCO Environmental Requirements ■ CD with: ❏ Information (INF) file ❏ Image Color Matching (ICM) file ❏ Auto-adjustment pattern software ❏ Safety information ❏ TCO Environmental Requirements ❏ The User's Guide ❏ Adobe® Acrobat® Reader User - HP W1907 | User's Guide - HP vs15, vs17, vs19, f1705, f1905 LCD Monitor - Page 12
Product Features 1-4 User's Guide - HP W1907 | User's Guide - HP vs15, vs17, vs19, f1705, f1905 LCD Monitor - Page 13
on the cord. Ä CAUTION: To protect your monitor, as well as your computer, connect all power cords for your computer and its peripheral devices (such as a monitor, printer, or scanner) to a surge protection device policy so you can replace your equipment if surge protection fails. User's Guide 2-1 - HP W1907 | User's Guide - HP vs15, vs17, vs19, f1705, f1905 LCD Monitor - Page 14
this monitor, as indicated on the label/back plate of the monitor. ■ Be sure the total ampere rating of the products connected your monitor near an outlet that you can easily reach. Disconnect the monitor by grasping the plug firmly and pulling it from the outlet. Never disconnect the monitor by - HP W1907 | User's Guide - HP vs15, vs17, vs19, f1705, f1905 LCD Monitor - Page 15
, or service provider. ■ Adjust only those controls that are described in the operating instructions. ■ Turn your monitor off when not in use. You can substantially increase the life expectancy of your monitor by using a screen saver program and turning off the monitor when not in use. ■ Keep your - HP W1907 | User's Guide - HP vs15, vs17, vs19, f1705, f1905 LCD Monitor - Page 16
cleaning, use an antistatic screen cleaner. 4. Dust the monitor housing. Use a damp cloth to clean the cabinet. ❏ If the cabinet requires additional cleaning, use a clean cloth dampened with isopropyl alcohol. 5. Plug in the monitor. 6. Turn on the monitor and the computer. 2-4 User's Guide - HP W1907 | User's Guide - HP vs15, vs17, vs19, f1705, f1905 LCD Monitor - Page 17
disassembling the monitor, turn off the monitor power, and disconnect all power, video, and audio cables. To disconnect power from the equipment, unplug the power cord from the power outlet by grasping the plug firmly. Never pull on the cord. Ä CAUTION: The screen is fragile. Placing the monitor - HP W1907 | User's Guide - HP vs15, vs17, vs19, f1705, f1905 LCD Monitor - Page 18
off the monitor power, and disconnect all power, video, and audio cables. To disconnect power from the equipment, unplug the power cord from the power outlet by grasping the plug firmly. Never pull on the cord. Ä CAUTION: Do not touch the LCD screen; doing so can cause damage. 2-6 User's Guide - HP W1907 | User's Guide - HP vs15, vs17, vs19, f1705, f1905 LCD Monitor - Page 19
cables from the monitor. 2. Push the panel straight down to flatten the hinge 1, as shown in the following illustration. Place the strap that came with the monitor LCD screen, doing so can cause damage. 1 2 3 Folding the f monitor for shipping Å WARNING: Do not lay the LCD panel of the monitor - HP W1907 | User's Guide - HP vs15, vs17, vs19, f1705, f1905 LCD Monitor - Page 20
Safety and Maintenance Guidelines 2-8 User's Guide - HP W1907 | User's Guide - HP vs15, vs17, vs19, f1705, f1905 LCD Monitor - Page 21
f monitors only) inputs on the monitor. The vs monitor supports only VGA. For the f monitor, you can connect one or both cables. ❏ VGA cable: Standard VGA 15-pin cable. ❏ DVI-D cable: For digital operation, use a DVI-D-to-DVI-D video cable (sold separately). The DVI-D connector on the f monitor is - HP W1907 | User's Guide - HP vs15, vs17, vs19, f1705, f1905 LCD Monitor - Page 22
-ventilated location near your computer. If the monitor will be installed on a: ■ Desktop or table, see "Placing the Monitor on a Desktop" for your monitor type. ■ Wall, swing arm, or other mounting fixture, see "Wall-Mounting the Monitor" for your monitor type. Instructions are specific for each - HP W1907 | User's Guide - HP vs15, vs17, vs19, f1705, f1905 LCD Monitor - Page 23
Setting Up the Monitor 2. Pick up the panel with the back toward you and lower the pedestal onto the base, as shown in the following illustration, until the base locks. Inserting the vs monitor onto the base 3. Stand the monitor in the upright position on a desktop or table. User's Guide 3-3 - HP W1907 | User's Guide - HP vs15, vs17, vs19, f1705, f1905 LCD Monitor - Page 24
power, and disconnect all power, video, and audio cables. To install the vs monitor on a wall, a swing arm, or other mounting fixture: 1. Remove the vs monitor base. Refer to "Removing the vs Monitor Base" in the previous chapter. Keep the monitor panel screen down on the flat, soft area. 3-4 User - HP W1907 | User's Guide - HP vs15, vs17, vs19, f1705, f1905 LCD Monitor - Page 25
Setting Up the Monitor Ä CAUTION: The screen is fragile. Placing the monitor screen down on a flat, soft area prevents scratches, defacing, or breakage. 2. Remove all three screws are accessible. 4. Slide the pedestal off the monitor panel 3. 2 1 3 Wall-mounting the vs monitor User's Guide 3-5 - HP W1907 | User's Guide - HP vs15, vs17, vs19, f1705, f1905 LCD Monitor - Page 26
the HP logo, are compliant with the VESA standard for mounting flat-panel monitors. The vs15 Monitor uses the 75 mm spacing standard, while the other vs Monitors use the 100 mm spacing standard. Use the four holes to attach a swing arm or other mounting fixture. Follow the instructions included - HP W1907 | User's Guide - HP vs15, vs17, vs19, f1705, f1905 LCD Monitor - Page 27
on a flat surface. 2. Hold the base of the monitor and lift up the panel at the top 1, as shown in the following illustration. 3. Continue to lift the panel 2 to its easily adjustable position 3. 1 2 3 Opening the f monitor 4. Stand the monitor in the upright position on a desktop or table. User - HP W1907 | User's Guide - HP vs15, vs17, vs19, f1705, f1905 LCD Monitor - Page 28
adjustable position. -5º 35º Adjusting the f monitor tilt Å WARNING: Tilt the monitor carefully. If you tilt the monitor back more than 35 degrees, beyond its easily adjustable position, it can fall over. Position the monitor so that it cannot fall off the table if bumped. 3-8 User's Guide - HP W1907 | User's Guide - HP vs15, vs17, vs19, f1705, f1905 LCD Monitor - Page 29
adjust the f monitor so that the panel is fully forward and the bottom of the panel is nearly on the desktop, as shown in the following illustration. Adjusting the f monitor fully forward 6. Assemble the speakers. Refer to "Assembling the f Monitor Satellite Speakers" in this chapter. User's Guide - HP W1907 | User's Guide - HP vs15, vs17, vs19, f1705, f1905 LCD Monitor - Page 30
cables. To install the f monitor on a wall, a swing arm, or other mounting fixture: Ä CAUTION: The screen is fragile. Placing the monitor screen down on a flat, soft area prevents scratches, defacing, or breakage. 1. Set the monitor screen down on a flat, soft, protected surface. 3-10 User's Guide - HP W1907 | User's Guide - HP vs15, vs17, vs19, f1705, f1905 LCD Monitor - Page 31
the rectangular back cover 1 as shown in the following illustration. Set the back cover aside. Four screws are exposed. 1 2 3 Wall-mounting the f monitor 3. Holding the pedestal-base assembly so it cannot fall, remove the four screws 2. Use a Phillips-head screwdriver. Lift the assembly 3 and set - HP W1907 | User's Guide - HP vs15, vs17, vs19, f1705, f1905 LCD Monitor - Page 32
use. 5. Mount the f monitor to a swing arm or other mounting fixture. 6. The four threaded mounting holes on the monitor panel are spaced 100 mm instructions included with the mounting fixture, to ensure that the monitor is safely attached. 8. Assemble the speakers. Refer to "Assembling the f Monitor - HP W1907 | User's Guide - HP vs15, vs17, vs19, f1705, f1905 LCD Monitor - Page 33
Satellite Speakers To assemble the two satellite speakers for the f monitor: 1. Invert each speaker as shown in the following illustration. 2 1 2. Hold a speaker base inverted over the inverted speaker. With the opening in the base toward the back of the speaker, match the speaker center tab - HP W1907 | User's Guide - HP vs15, vs17, vs19, f1705, f1905 LCD Monitor - Page 34
computer: ❏ Connect one end of the 15-pin VGA cable to the VGA input connector on the monitor 1 (as shown in the following illustrations). The monitor may come with the VGA cable connected. ❏ Then, connect the other end of the cable to the VGA output connector on the computer. 3-14 User's Guide - HP W1907 | User's Guide - HP vs15, vs17, vs19, f1705, f1905 LCD Monitor - Page 35
Setting Up the Monitor 7 5 3 1 Connecting cables on the vs monitor Item 1 3 5 7 Description VGA connector and VGA cable Audio connector and audio cable AC Power connector and power cord Security lock slot for a Kensington security lock cable (sold separately) User's Guide 3-15 - HP W1907 | User's Guide - HP vs15, vs17, vs19, f1705, f1905 LCD Monitor - Page 36
Setting Up the Monitor 7 6 4 5 2 1 Connecting cables on the f monitor Item 1 2 4 5 6 7 Description VGA connector and VGA cable DVI-D connector (select models only) and DVI-D cable (cable sold separately) DC power connector and DC power cable for speakers AC Power connector and power cord - HP W1907 | User's Guide - HP vs15, vs17, vs19, f1705, f1905 LCD Monitor - Page 37
of the DVI-D cable to the DVI-D input connector on the monitor 2. ❏ Then, connect the other end of the cable to the DVI connector on the computer. Connecting the Audio Cable To enable the speakers, connect the audio cable to the line out connector on the computer according to your monitor type. To - HP W1907 | User's Guide - HP vs15, vs17, vs19, f1705, f1905 LCD Monitor - Page 38
end of the cable to the DC power connector 4 on the f monitor. 5. As needed, connect headphones to the headphone jack connector (not shown) on the right speaker. SERIAL ETHERNET TV-OUT FM TV S-VID IN VID/AUD LINE IN IR 3 8 4 9 12 10 11 Connecting the f monitor speakers 3-18 User's Guide - HP W1907 | User's Guide - HP vs15, vs17, vs19, f1705, f1905 LCD Monitor - Page 39
Setting Up the Monitor Item 3 4 8 Not shown Description Speaker audio cable at computer connector Speaker DC power connector and DC power cable w (connects to right speaker DC power q connector) Right speaker with Control knob 9, and connectors for subwoofer - and speaker DC power q Headphone - HP W1907 | User's Guide - HP vs15, vs17, vs19, f1705, f1905 LCD Monitor - Page 40
, the computer and other attached devices. For the f monitor, turn the satellite speakers on and adjust volume by turning the Control knob 9 on the right speaker. 5. The Monitor Status displays a message: ❏ VGA Input: Active or No Input Signal ❏ DVI Input: Active or No Input Signal (select f monitor - HP W1907 | User's Guide - HP vs15, vs17, vs19, f1705, f1905 LCD Monitor - Page 41
picture quality of your VGA monitor. See "Using the Auto-Adjustment Function" in this chapter. Adobe Acrobat Reader is supplied on the CD and can be installed from the menu. The Information File This monitor is Microsoft® Windows® Plug and Play compatible, and the monitor will work correctly without - HP W1907 | User's Guide - HP vs15, vs17, vs19, f1705, f1905 LCD Monitor - Page 42
, restart the computer. 6. Ensure that the proper resolutions and refresh rates appear in the Display Control Panel settings. Refer to your Windows operating system documentation for more information. ✎ You may need to install the digitally signed monitor INF or ICM files manually from the CD - HP W1907 | User's Guide - HP vs15, vs17, vs19, f1705, f1905 LCD Monitor - Page 43
your system meets the requirements. 4. Download the software by following the instructions. Using the Auto-Adjustment Function You can easily optimize the screen performance for the VGA input by using the Auto/Select button on the monitor and the auto-adjustment pattern software on the CD provided - HP W1907 | User's Guide - HP vs15, vs17, vs19, f1705, f1905 LCD Monitor - Page 44
. 3. Insert the CD in your computer's CD-drive. The CD menu launches. 4. Select Open Auto-Adjustment Software. 5. The setup test pattern displays. Auto-adjustment setup test pattern 6. Press the Auto/Select button on the monitor front panel to produce a stable, centered image. 4-4 User's Guide - HP W1907 | User's Guide - HP vs15, vs17, vs19, f1705, f1905 LCD Monitor - Page 45
Operating the Monitor Front Panel Components The monitor buttons are located on the side of the front panel. Front panel buttons on the vs monitor A B C D E F User's Guide 4-5 - HP W1907 | User's Guide - HP vs15, vs17, vs19, f1705, f1905 LCD Monitor - Page 46
Operating the Monitor A B C D E Front panel buttons on the f monitor 4-6 User's Guide - HP W1907 | User's Guide - HP vs15, vs17, vs19, f1705, f1905 LCD Monitor - Page 47
video input. D Auto/Select OSD Menu Active Button acts as an Enter (Select) key to select setting screen options. OSD Inactive Button starts auto-adjustment, which automatically adjusts the display to the ideal setting. E Power Power Switch Turns monitor on and to standby (sleep mode). Power - HP W1907 | User's Guide - HP vs15, vs17, vs19, f1705, f1905 LCD Monitor - Page 48
already on, press the Power switch (E) to turn on the monitor. 2. To access the OSD menu, press the Menu button (A). The OSD Main Menu displays. Main Menu Brightness Contrast Auto-Adjustment* Volume** Advanced Menu Exit *Auto-Adjustment appears for VGA connections only. **Volume appears for the vs - HP W1907 | User's Guide - HP vs15, vs17, vs19, f1705, f1905 LCD Monitor - Page 49
Menu selections and levels. Main Menu Menu Level 1 Menu Level 2 Brightness Adjustment Scale Contrast Adjustment Scale Auto-Adjustment* Volume** Adjustment Scale Advanced Menu Exit *Auto-Adjustment appears for VGA connections only. **Volume appears for the vs monitors only. User's Guide - HP W1907 | User's Guide - HP vs15, vs17, vs19, f1705, f1905 LCD Monitor - Page 50
, and factory pre-sets. Level 1 Brightness Contrast Image Control (analog only) Volume (vs monitor only) Color Advanced Menu OSD Level 2 Level 3 Adjustment Scale Adjustment Scale Auto-Adjustment "Adjusting" Message Horizontal Position Adjustment Scale Vertical Position Adjustment Scale - HP W1907 | User's Guide - HP vs15, vs17, vs19, f1705, f1905 LCD Monitor - Page 51
Selection Sleep Timer Timer Set Menu Default Video Input (select f monitor models only) • Analog: VGA • Digital: DVI Basic Menu Cancel Save and Return Horizontal Position Adjustment Scale Vertical Position Adjustment Scale OSD Timeout Adjustment Scale Cancel Save and Return Factory Pre - HP W1907 | User's Guide - HP vs15, vs17, vs19, f1705, f1905 LCD Monitor - Page 52
Operating the Monitor Level 1 Information Factory Reset Exit Advanced Menu OSD (Continued) Level 2 Level 3 Current Settings Recommended Settings Serial Number Total Hours Backlight Hours Exit Yes No Factory Pre-set 4-12 User's Guide - HP W1907 | User's Guide - HP vs15, vs17, vs19, f1705, f1905 LCD Monitor - Page 53
Selecting the Video Input Connectors The two input connectors are: ■ VGA connector (analog) ■ DVI-D connector (digital) (f monitor, select models only) The monitor automatically determines which inputs have valid video signals and displays the image. The video input can be manually selected through - HP W1907 | User's Guide - HP vs15, vs17, vs19, f1705, f1905 LCD Monitor - Page 54
from the computer on the monitor video input connector(s). Check to see if the computer or input signal source is off or in the power-saving mode. ■ Auto-Adjustment is in Progress - Indicates the Auto-adjustment function is active. See "Adjusting Screen Quality" in this chapter. 4-14 User's Guide - HP W1907 | User's Guide - HP vs15, vs17, vs19, f1705, f1905 LCD Monitor - Page 55
main Clock setting. ❏ When adjusting the Clock and Clock Phase values, if the monitor images become distorted, continue adjusting the values until the distortion disappears. To restore the factory settings, access the Advanced Menu OSD, select Factory Reset, and then select Yes. User's Guide 4-15 - HP W1907 | User's Guide - HP vs15, vs17, vs19, f1705, f1905 LCD Monitor - Page 56
them in memory. The monitor automatically stores the new setting, then recognizes the new mode just as it does a pre-set mode. Ten user modes can be entered and stored, in addition to the factory pre-set modes (see the table "Factory Pre-set Video Input Modes" in Appendix B). 4-16 User's Guide - HP W1907 | User's Guide - HP vs15, vs17, vs19, f1705, f1905 LCD Monitor - Page 57
watts of power. For power usage, refer to "Technical Specifications" (Appendix B). The monitor also supports a power-saver mode that is controlled by the computer. When the monitor is in the reduced power state, the monitor screen is blank, the backlight is off, and the Power light is amber. The - HP W1907 | User's Guide - HP vs15, vs17, vs19, f1705, f1905 LCD Monitor - Page 58
Operating the Monitor 4-18 User's Guide - HP W1907 | User's Guide - HP vs15, vs17, vs19, f1705, f1905 LCD Monitor - Page 59
. Press a key on the keyboard or move the mouse to turn off the screen blanking utility. Press the Auto/Select button on the monitor front panel. If this does not correct the image, press the Menu button to open the Basic OSD Menu, and adjust the brightness and contrast scales as needed. User - HP W1907 | User's Guide - HP vs15, vs17, vs19, f1705, f1905 LCD Monitor - Page 60
Troubleshooting Problem Image is not centered. Possible Cause Position may need adjustment. "No Connection, Check Signal Cable" displays on screen. Monitor video cable is disconnected. "Out of Range." Video resolution and refresh rate are set higher than what your monitor supports. Solution - HP W1907 | User's Guide - HP vs15, vs17, vs19, f1705, f1905 LCD Monitor - Page 61
Troubleshooting Using the World Wide Web Before contacting customer service, refer to the HP Technical Support at: http://www.hp.com/support Select your country/region, and then follow the links to the support page for your monitor. Preparing to Call Technical Support If you cannot solve a problem - HP W1907 | User's Guide - HP vs15, vs17, vs19, f1705, f1905 LCD Monitor - Page 62
Troubleshooting A-4 User's Guide - HP W1907 | User's Guide - HP vs15, vs17, vs19, f1705, f1905 LCD Monitor - Page 63
vary either higher or lower. HP vs LCD Monitors HP vs LCD Monitor Display Type TFT LCD Active Matrix HP vs15: 15.0 in. HP vs17: 17.0 in. HP vs19: 19.0 in. 38.1 cm 43.2 cm 48.3 cm Viewable Image Size HP vs15: 15.0-in. diagonal HP vs17: 17.0-in. diagonal HP vs19: 19.0-in. diagonal Tilt -5o to - HP W1907 | User's Guide - HP vs15, vs17, vs19, f1705, f1905 LCD Monitor - Page 64
HP vs LCD Monitor (Continued) Dimensions (including base) Height x Width x Depth Height x Width x Depth HP vs15: 13.6 x 13.7 x 7.5 in. 345 x 347 x 189 mm HP vs17: 15.4 x 15.0 x 8.1 in. 391 x 381 x 204 mm HP vs19: 16.7 x 16.8 x 8.1 in. 424 x 426 x 204 mm Maximum Graphics Resolution HP - HP W1907 | User's Guide - HP vs15, vs17, vs19, f1705, f1905 LCD Monitor - Page 65
HP vs LCD Monitor (Continued) Power Consumption HP vs15: - HP W1907 | User's Guide - HP vs15, vs17, vs19, f1705, f1905 LCD Monitor - Page 66
Technical Specifications HP f LCD Monitors HP f LCD Monitor Display Type TFT LCD Active Matrix HP f1705: 17.0 in. HP f1905: 19.0 in. 43.2 cm 48.3 cm Viewable Image Size HP f1705: 17.0-in. diagonal HP f1905: 19.0-in. diagonal Tilt -5o to 35o 43.2 cm 48.3 cm Face Treatment Antiglare - HP W1907 | User's Guide - HP vs15, vs17, vs19, f1705, f1905 LCD Monitor - Page 67
Technical Specifications HP f LCD Monitor (Continued) Vertical Refresh Rate (analog mode) 50 to - HP W1907 | User's Guide - HP vs15, vs17, vs19, f1705, f1905 LCD Monitor - Page 68
This monitor automatically recognizes many pre-set video input modes that will appear properly sized and centered on the screen. The following modes are assigned at the factory and are the most commonly used display resolutions: ■ HP vs15 supports pre-set modes 1 through 11 ■ HP vs17 supports pre - HP W1907 | User's Guide - HP vs15, vs17, vs19, f1705, f1905 LCD Monitor - Page 69
Factory Pre-set Video Input Modes (Continued) Pre-set Pixel Format Horizontal Frequency (kHz) Vertical Frequency (Hz) 12* 1152 x 870 68.7 75.6 13* 1152 x 900 71.7 76.0 14* 1280 x 1024 63.9 60.0 15* 1280 x 1024 80.0 75.0 *Pre-set not supported for HP vs15 monitor. User's Guide - HP W1907 | User's Guide - HP vs15, vs17, vs19, f1705, f1905 LCD Monitor - Page 70
a supported resolution and refresh rate, from a distance of approximately 50 cm (16 inches). We expect that, over time, the industry will continue to improve its ability to produce displays with fewer cosmetic imperfections, and we will adjust guidelines as improvements are made. B-8 User's Guide - HP W1907 | User's Guide - HP vs15, vs17, vs19, f1705, f1905 LCD Monitor - Page 71
monitor to operate on input voltages between 100-120V or 200-240V . The power cord set (flexible cord or wall plug) received with the monitor product and for the voltage and current marked on the product on the product. In addition to use, contact your HP-authorized service provider. A power cord - HP W1907 | User's Guide - HP vs15, vs17, vs19, f1705, f1905 LCD Monitor - Page 72
Technical Specifications B-10 User's Guide - HP W1907 | User's Guide - HP vs15, vs17, vs19, f1705, f1905 LCD Monitor - Page 73
radiate radio frequency energy and, if not installed and used in accordance with the instructions, may cause harmful interference to radio communications. However, there is no guarantee that interference Consult the dealer or an experienced radio or television technician for help. User's Guide C-1 - HP W1907 | User's Guide - HP vs15, vs17, vs19, f1705, f1905 LCD Monitor - Page 74
approved by Hewlett-Packard Company may void the user's authority to operate the equipment. Cables Connections to this device must be made with shielded cables with metallic RFI/EMI connector hoods to maintain compliance with FCC rules and regulations. Declaration of Conformity for Products Marked - HP W1907 | User's Guide - HP vs15, vs17, vs19, f1705, f1905 LCD Monitor - Page 75
Regulatory Notices Materials Disposal This HP product contains the following materials that might require special handling at end-of-life: ■ Mercury in the fluorescent lamp in the display LCD. ■ Lead in the solder les exigences du Règlement sur le matériel brouilleur du Canada. User's Guide C-3 - HP W1907 | User's Guide - HP vs15, vs17, vs19, f1705, f1905 LCD Monitor - Page 76
with these directives implies conformity to applicable harmonized European standards (European Norms) which are listed on the EU Declaration of Conformity issued by Hewlett-Packard for this product or product family. This compliance is indicated by the following conformity marking placed on the - HP W1907 | User's Guide - HP vs15, vs17, vs19, f1705, f1905 LCD Monitor - Page 77
environment. For more information about where you can drop off your waste equipment for recycling, please contact your local city office, your household waste disposal service or the shop where you purchased the product. Japanese Notice User's Guide C-5 - HP W1907 | User's Guide - HP vs15, vs17, vs19, f1705, f1905 LCD Monitor - Page 78
marked with the ENERGY STAR® logo on the packaging box qualify with the U.S. Environmental Protection Agency's ENERGY STAR® guidelines for energy efficiency. Products with the ENERGY STAR® label are designed to use less energy, help you save money on utility bills, and help protect the environment - HP W1907 | User's Guide - HP vs15, vs17, vs19, f1705, f1905 LCD Monitor - Page 79
Agency Regulatory Notices HP Recycling Program HP offers product end-of-life return programs for HP and other manufacturers' hardware in several geographic local customer demand. For information on the HP recycling program, refer to the HP Web site at: http://www.hp.com/recycle User's Guide C-7 - HP W1907 | User's Guide - HP vs15, vs17, vs19, f1705, f1905 LCD Monitor - Page 80
Part Number: 406079-A21
-
 1
1 -
 2
2 -
 3
3 -
 4
4 -
 5
5 -
 6
6 -
 7
7 -
8
-
9
-
10
-
11
-
12
-
13
-
14
-
15
-
16
-
17
-
18
-
19
-
20
-
21
-
22
-
23
-
24
-
25
-
26
-
27
-
28
-
29
-
30
-
31
-
32
-
33
-
34
-
35
-
36
-
37
-
38
-
39
-
40
-
41
-
42
-
43
-
44
-
45
-
46
-
47
-
48
-
49
-
50
-
51
-
52
-
53
-
54
-
55
-
56
-
57
-
58
-
59
-
60
-
61
-
62
-
63
-
64
-
65
-
66
-
67
-
68
-
69
-
70
-
71
-
72
-
73
-
74
-
75
-
76
-
77
-
78
-
79
-
80
 |
 |

User’s Guide
HP vs15 LCD Monitor
HP vs17 LCD Monitor
HP vs19 LCD Monitor
HP f1705 LCD Monitor
HP f1905 LCD Monitor