HP t5525 HP Image Manager 5.0: Quick Setup Guide - Page 32
Using a Pre-Built Microsoft Windows Image - driver
 |
View all HP t5525 manuals
Add to My Manuals
Save this manual to your list of manuals |
Page 32 highlights
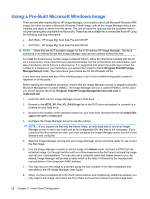
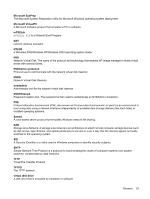
Using a Pre-Built Microsoft Windows Image There are two after-market kits for HP Image Manager, one contains a pre-built Microsoft Windows XP® image; the other contains a Microsoft Windows Vista® image, with all the Image Manager drivers preinstalled and ready to serve from the server. The use of these kits requires that the customer have a volume licensing key (available from Microsoft). These kits are available for a nominal fee from HP using the following ordering information: ● AU726AA - HP Image Mgr Supt disk-Pre-built WinXP ● AU727AA - HP Image Mgr Supt disk-Pre-built WinVS NOTE: These kits are NOT bootable images for the 5730 without HP Image Manager. The file is structured in an internal format that Image Manager uses and are useless without this tool. To install the kit and serve out the image contained therein, follow the directions included with the kit. As a convenience, these directions are reproduced below, but the kit directions are authoritative, and take precedence where there is a discrepancy. It is suggested that where the guide says extract the content to a location on your hard-drive, you extract the content to the C:\Program Files\HP Image Manager\Server folder. The instructions given below are for the Windows XP kit. If you have any issues with any of the following steps, refer to the troubleshooting guide located in Appendix A of this guide. Before starting the installation procedure, ensure that the Image Manager service is stopped using the Microsoft Management Console (MMC). The Image Manager service is called HPIMSvc. At this point you should rename the file C:\Program Files\HP Image Manager\Server\nvdd.conf to nvdd.conf.old. 1. Insert the DVD into the Image Manager server's DVD drive. 2. Browse to the t5730_XP_Pro_VL_5-0-0-0.zip file on the DVD drive and extract its contents to a location on your hard drive. 3. Browse to the location of the extracted content on your hard drive. Rename the the file nvdd.5730xppro.vol.conf to nvdd.conf. 4. Configure the Image Manager server to use the volume. NOTE: If you unpack the files into the Server folder, as instructed above, and your Image Manager server is set to use nvdd.conf as its configuration file, this step is not necessary. If you unpacked the files somewhere else, you must configure the Image Manager server to point to that directory and config file. 5. Start the Image Manager service and your Image Manager server should be ready to use to boot the first image. 6. Use the Image Manager console to set the image into Admin mode, and boot a 5730 from the extracted image. Go through the Microsoft out-of-box experience the first time to activate the image and set your customizations. You can also set a computer name that makes sense to you. By default, Image Manager will provide a name which is the letter h followed by the hexadecimal representation of the computer's MAC address. 7. You may also join the image to a domain using the tool included in the client installation and described in the HP Image Manager User Guide. 8. When you have completed all of the client customizations and installed any additional software you may need in the image, shut-down the Thin Client and use the console to put the image back 28 Chapter 5 Initial Client Configuration
-
 1
1 -
2
-
3
-
4
-
5
-
6
-
7
-
8
-
9
-
10
-
11
-
12
-
13
-
14
-
15
-
16
-
17
-
18
-
19
-
20
-
21
-
22
-
23
-
24
-
25
-
26
-
 27
27 -
 28
28 -
 29
29 -
 30
30 -
 31
31 -
 32
32 -
 33
33 -
 34
34 -
 35
35 -
 36
36 -
 37
37 -
38
-
39
 |
 |