Hitachi CB6YI Instruction Manual - Page 14
Fig. K, Fig. L, Fig. M
 |
View all Hitachi CB6YI manuals
Add to My Manuals
Save this manual to your list of manuals |
Page 14 highlights
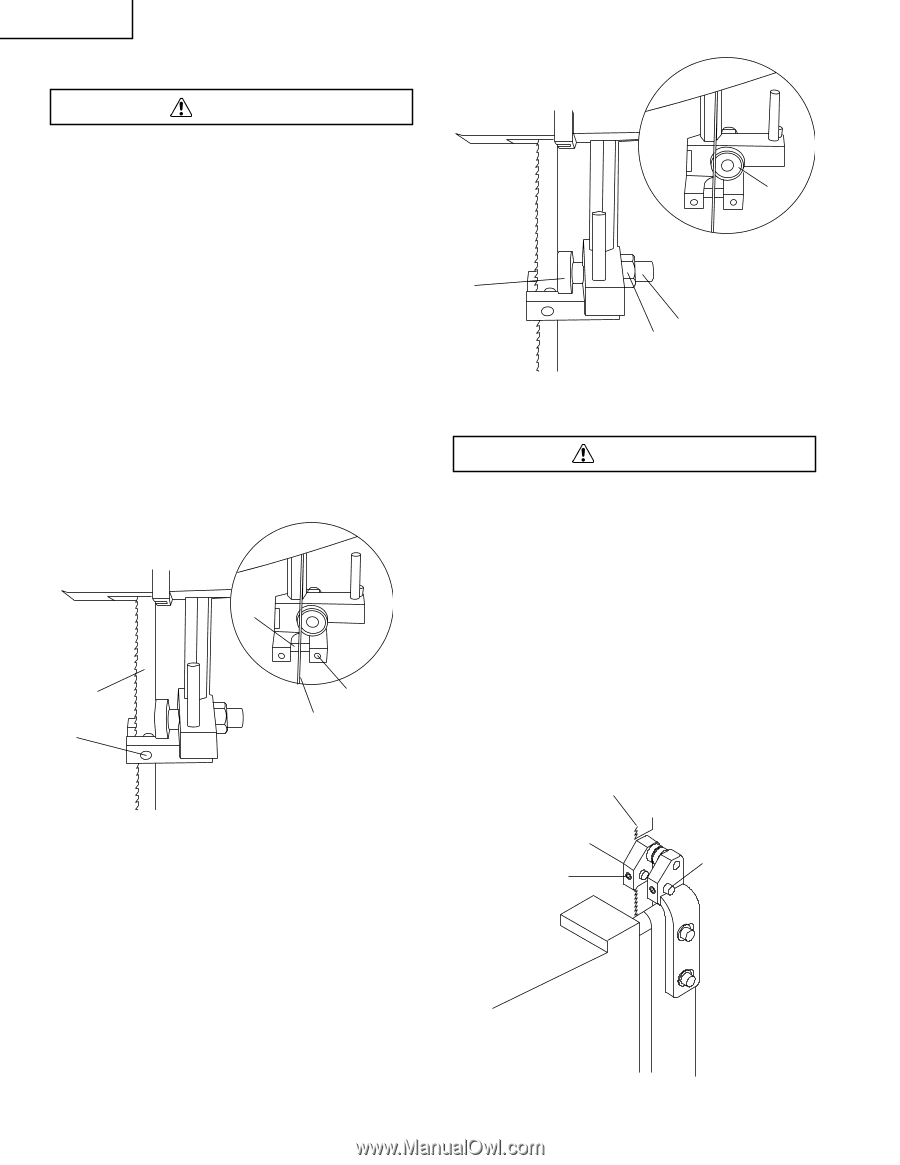
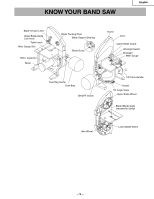
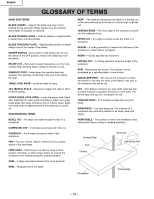
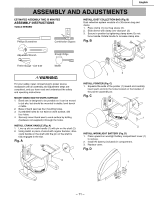
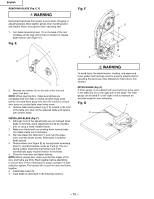
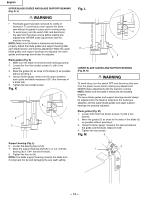
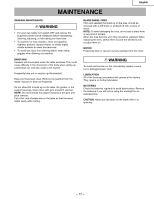
English UPPER BLADE GUIDES AND BLADE SUPPORT BEARING (Fig. K, L) WARNING • The blade guard has been removed for clarity of illustration. To avoid injury never operate the band saw without all guards in place and in working order. • To avoid injury, turn the switch OFF and disconnect the saw from the power source before making any adjustments. NEVER make adjustments with the machine running. NOTE: Make sure the blade is tensioned and tracking properly. Adjust the blade guides and support bearing after each blade tension and tracking adjustment. When the upper blade guides and support bearings are adjusted, the lower guides and bearings should also be adjusted. Blade guides (Fig. K) 1. Make sure the blade is tensioned and tracking properly. 2. Loosen the front hex socket screws (1) with a hex wrench. 3. Move the guides (2) as close to the blade (3) as possible without pinching it. 4. Using a feeler gauge, make sure the space between each guide and blade measures 0.02″ (the thickness of a dollar bill). 5. Tighten the hex socket screws. Fig. K 3 2 2 1 3 Fig. L 6 6 5 4 LOWER BLADE GUIDES AND SUPPORT BEARING (Fig. M, N) WARNING To avoid injury, turn the switch OFF and disconnect the saw from the power source before making any adjustments. NEVER make adjustments with the machine running. NOTE: Make sure the blade is tensioned and tracking properly. The lower blade guides and support bearings should always be adjusted after the blade is tensioned, the tracking is adjusted, and the upper blade guides and upper support bearings are properly adjusted. Blade guides (Fig. M) 1. Loosen both front hex socket screws (1) with a hex wrench. 2. Move the guides (2) as close to the sides of the blade (3) as possible without pinching it. 3. Using the feeler gauge, measure the spaces between the guide and the blade. Adjust to 0.02″. 4. Tighten the hex screws. Fig. M 3 Support bearing (Fig. L) 6. Loosen the bearing hex nut (4). 7. Move the support bearing shaft (5) in or out, until the bearing (6) is 1/64″ behind the blade. 8. Tighten the hex nut (4). NOTE: The blade support bearing prevents the blade from moving back too far and damaging the saw teeth setting. 2 1 - 14 -
-
 1
1 -
2
-
3
-
4
-
5
-
6
-
7
-
8
-
 9
9 -
 10
10 -
 11
11 -
 12
12 -
 13
13 -
 14
14 -
 15
15 -
 16
16 -
 17
17 -
 18
18 -
 19
19 -
20
-
21
-
22
-
23
-
24
-
25
-
26
-
27
-
28
-
29
-
30
-
31
-
32
-
33
-
34
-
35
-
36
-
37
-
38
-
39
-
40
-
41
-
42
-
43
-
44
-
45
-
46
-
47
-
48
-
49
-
50
-
51
-
52
-
53
-
54
-
55
-
56
-
57
-
58
-
59
-
60
 |
 |