Hitachi DZ-GX20MA Owners Guide
Hitachi DZ-GX20MA - 2.1 MP DVD Camcorder Manual
 |
UPC - 050585223646
View all Hitachi DZ-GX20MA manuals
Add to My Manuals
Save this manual to your list of manuals |
Hitachi DZ-GX20MA manual content summary:
- Hitachi DZ-GX20MA | Owners Guide - Page 1
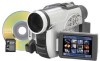
Instruction Manual DZ-GX20MA DZ-MV780MA/DZ-MV750MA DVD-RAM DVD-RW DVD-R DZ-GX20MA DZ-MV780MA DZ-MV750MA HITACHI AMERICA, LTD. HOME ELECTRONICS DIVISION 900 Hitachi Way Chula Vista, CA 91914-3556 Service Hotline: 1-800-HITACHI (1-800-448-2244) DVDCAM PC Software Support Center URL http://dvdcam - Hitachi DZ-GX20MA | Owners Guide - Page 2
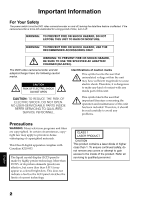
HAZARD, BE SURE TO USE THE SPECIFIED AC ADAPTER/ CHARGER (DZ-ACS2). The DVD video camera/recorder and AC adapter/charger have the following caution marks. CAUTION RISK OF ELECTRIC SHOCK DO NOT OPEN CAUTION: TO REDUCE THE RISK OF ELECTRIC SHOCK, DO NOT OPEN. NO USER-SERVICEABLE PARTS INSIDE. REFER - Hitachi DZ-GX20MA | Owners Guide - Page 3
generates, uses, and can radiate radio frequency energy and, if not installed and used in accordance with the instructions, may cause television reception, which can be determined by turning the equipment off and on, the user is encouraged to try to correct by one or more of the following measures: - Hitachi DZ-GX20MA | Owners Guide - Page 4
information that will help to assure your enjoyment and proper use of DVD video camera/ recorder and accessory equipment. 1 Read these instructions. 2 Keep these instructions. 3 Heed all warnings. 4 Follow all instructions. 5 Do not use this apparatus near water. 6 Clean only with dry cloth. 7 Do - Hitachi DZ-GX20MA | Owners Guide - Page 5
, firmly secure the DVD video camera/recorder on it. Do not use the DVD video camera/recorder with a tripod in a place where it is subject to severe vibrations or impact. No sand or dust! • Fine sand or dust entering the DVD video camera/recorder or AC adapter/charger could cause malfunctions or - Hitachi DZ-GX20MA | Owners Guide - Page 6
8 cm CD lens cleaner: • Cleaning the lens is not necessary when using this DVD video camera/recorder in the usual way. • Using 8 cm CD lens cleaner could cause this DVD video camera/recorder to be faulty. • If you have to clean the lens, use a Hitachi Maxell cleaner that is exclusively for 8 cm - Hitachi DZ-GX20MA | Owners Guide - Page 7
the instructions. Also read the instructions attached with optional accessories: • For optional accessories, observe the cautions and follow instruction manuals attached. English The battery provided has not been charged at time of purchase: • Charge it before using the DVD video camera/recorder - Hitachi DZ-GX20MA | Owners Guide - Page 8
home-use recording and playback. The recorded contents cannot be compensated for: • Hitachi cannot compensate for any damages caused when recording is not made normally or recorded contents cannot be played back because of a defect in the DVD video camera/recorder, disc or card. Also, Hitachi cannot - Hitachi DZ-GX20MA | Owners Guide - Page 9
function. Refer to these marks and identify the functions and operation to match the disc or card you use. ●Illustrations in this manual Although the external appearances of DZ-GX20MA, DZ-NV780MA and DZ-MV750MA are different, the method of operating these models is identical. The illustrations of - Hitachi DZ-GX20MA | Owners Guide - Page 10
play back desired recorded scenes (p. 108) You do not need to rewind, unlike recorders using tape. You can select any scene you want and immediately play it back (using Disc Navigation function). ●Use Disc Navigation to create your original movie (p. 127) You can delete unnecessary scenes, move - Hitachi DZ-GX20MA | Owners Guide - Page 11
play it back on this DVD video camera/ recorder: Press the record button on VCR or DVD recorder. ●Create original DVDs on PC (p. 150) You can create an original DVD, using the provided software CD-ROM. The created DVD disc can be played back on DVD player/recorder, DVD-ROM drive, etc. Original - Hitachi DZ-GX20MA | Owners Guide - Page 12
LEVEL INDICATOR ...... 43 EFFICIENT USE OF BATTERY 43 USING DVD VIDEO CAMERA/RECORDER WITH AC ADAPTER/CHARGER 44 Turning DVD Video Camera/Recorder On and Off 45 Inserting and Removing Disc 46 INSERTING DISC 46 REMOVING DISC 48 Inserting and Removing Card 49 Basic Techniques Recording Movie - Hitachi DZ-GX20MA | Owners Guide - Page 13
DVD-R DISC 73 FLOW OF QUICK MENU (WITH CARD 74 Manually Focusing Subject 75 FOCUSING DURING RECORDING 75 Adjusting Brightness of Image to be recorded (Exposure 77 Compensating for Backlight 77 Using External Microphone 78 Built-in Video Flash (for DZ-GX20MA TURNING DVD VIDEO CAMERA/RECORDER - Hitachi DZ-GX20MA | Owners Guide - Page 14
158 REUSING A RECORDED DVD-RW 159 Uninstalling Software 160 Cautions When Using DVD Video Camera/ Recorder by Connecting It to PC 160 Introduction to Video Editing Software........... 161 Subsidiary Information Introduction to Optional Accessories 162 CAMERA ACCESSORIES 162 POWER SUPPLY 162 - Hitachi DZ-GX20MA | Owners Guide - Page 15
household AC outlet and AC adapter/charger. Infrared remote control (model DZ-RM4W): Use to control the DVD video camera/ recorder from a distance. For DZ-GX20MA or DZ-MV780MA only. Lithium battery (model CR2032): To power the remote control. For DZGX20MA or DZ-MV780MA only. WARNING: Keep this - Hitachi DZ-GX20MA | Owners Guide - Page 16
Push the lever to the T side for telephoto, or to the W side for wide-angle. 10 Accessory shoe (p. 79) For DZ-GX20MA or DZ-MV780MA only: The optional video flash can be attached here. (See the instruction manual of device to be attached for details.) 11 PC connection terminal (TO PC) (p. 160) 12 AV - Hitachi DZ-GX20MA | Owners Guide - Page 17
is accessed (write or read is executed) or the DVD video camera/ recorder is connected to PC. 18 PHOTO button (p. 52) 19 DISC EJECT button (p. 46) Press down and release this button to open the cover of disc insertion block. 25 26 21 BATTERY EJECT button (p. 41) Press this button when removing - Hitachi DZ-GX20MA | Owners Guide - Page 18
you frequently use (simple menus). 28 FOCUS button (p. 75) To switch between manual focus to defaults (status when the DVD video camera/recorder was shipped from the factory To adjust the volume of sound from speaker, etc. 39 Card insertion block (p. 49) 40 BLC (backlight compensation) button - Hitachi DZ-GX20MA | Owners Guide - Page 19
/pause button (p. 59) 57 Stop button (p. 9, 59, 65) 58 Forward skip button (p. 61) * The buttons on remote control will function the same as those on DVD video camera/recorder. English 19 - Hitachi DZ-GX20MA | Owners Guide - Page 20
contents (p. 24). You can record both videos and photos on a DVD-RAM (generally available), but only videos on a DVD-RW/DVD-R (generally available). 1 Connect a power supply (p. 44). Power cable 1 4 2 3 AC adapter/charger DC power cord 2 Insert a disc (p. 46). 1 Press down the DISC - Hitachi DZ-GX20MA | Owners Guide - Page 21
way down to record. OFF Note: • When using an unformatted disc, format (initialize) it on this DVD video camera/recorder. If unformatted disc is inserted into this DVD video camera/recorder, a message will appear: Format the disc following the instructions on screen (p. 24, 47, 135). Initializing - Hitachi DZ-GX20MA | Owners Guide - Page 22
Recording and Playing Back using Card (Photo) Only photos can be recorded on a card (generally available). 1 Connect a power supply (p. 44). Power cable 1 4 2 3 AC adapter/charger DC power cord 2 Insert a card (p. 49). 1 Open the LCD monitor (p. 36). 3 Put in a card. 2 Open the cover of - Hitachi DZ-GX20MA | Owners Guide - Page 23
4 Press the PHOTO button all the way (full press). Note: • With the DZ-GX20MA only, the built-in flash may emit light in a dark area (see page 79). • See page 24 for the cards that can be used on this DVD video camera/recorder. • See Check 2 on p. 169 if recording is not possible with "P". 4 View - Hitachi DZ-GX20MA | Owners Guide - Page 24
DVD players or DVD recorders. *3: Some DVD devices conform to SD memory card. *4: When media that are sold "formatted" are used. If the initialization format differs, the media can be initialized on this DVD video camera/recorder and then used. *5: The provided software (DVD-MovieAlbumSE) is used - Hitachi DZ-GX20MA | Owners Guide - Page 25
playable on this DVD video camera/recorder, depending on the editing software used or recorded status of DVD-R disc. • If you insert a DVD-R disc recorded on this DVD video camera/recorder or a DVD video camera/recorder other than DZ-GX20MA/DZ-MV780MA/DZ-MV750MA/DZ-GX20A/DZ-MV780A/DZ-MV730A and not - Hitachi DZ-GX20MA | Owners Guide - Page 26
EXAMPLES OF DISCS THAT CANNOT BE USED ON THIS DVD VIDEO CAMERA/RECORDER: • DVD-RAM (2.6 GB) Ver. 1.0 • CD-RW • DVD-R (3.9 GB) Ver. 1.0 • CD • DVD-R (4.7 GB) for Authoring Ver. 2.0 • LD • MO • DVD+RW • MD • DVD+R • iD • DVD-ROM • Floppy disk • DVD-Video • Discs other than those with diameter of 8 cm - Hitachi DZ-GX20MA | Owners Guide - Page 27
above phenomena may occasionally occur. While the ACCESS/ PC indicator is lit, do not subject disc to vibrations or impact, and avoid using DVD video camera/recorder at extremely high or low temperatures, or in environment where condensation is likely to occur. • When recording images, the - Hitachi DZ-GX20MA | Owners Guide - Page 28
of DVD video camera/recorder or PC will change only the file control information: It will not completely delete the data on disc or memory card. When transferring or discarding a disc or memory card, it is recommended that you physically destroy it or use deletion exclusive software (generally - Hitachi DZ-GX20MA | Owners Guide - Page 29
recorded is used at high temperatures, normal playback may be impossible: Turn the DVD video camera/ recorder off once, wait until the ambient temperature becomes lower, and then operate it again. RECORDABLE STILLS (PHOTOS) ON DVD-RAM ●Number of recordable stills on one side of disc DZ-GX20MA: Can - Hitachi DZ-GX20MA | Owners Guide - Page 30
. 15,360 Approx. 30,000 With external input (DZ-GX20MA, DZ-MV780MA, DZ-MV750MA) Recording quality 16 MB 32 MB 64 MB Cards used on other devices can be used on this DVD video camera/recorder. • No movie or music data recorded on card can be checked, viewed or heard on this DVD video camera - Hitachi DZ-GX20MA | Owners Guide - Page 31
this DVD video camera/recorder records on DVDRAM disc in "N" status, a JPEG photo will be recorded, along with a photo that conforms to the DVD video recording (DVD-VR) format which is used to be output to TV (see "Terminology", p. 166). Only JPEG photos will be recorded on SD memory card. Note - Hitachi DZ-GX20MA | Owners Guide - Page 32
Setups This section explains preparations for recording - setting up the DVD video camera/recorder and battery. Setting Up the DVD Video Camera/Recorder HOLDING DVD VIDEO CAMERA/RECORDER Insert your right hand from the bottom of DVD video camera/recorder up to the base of your thumb. Put your hand - Hitachi DZ-GX20MA | Owners Guide - Page 33
the lens. Pass the shoulder strap through the shoulder strap attachments. Shorter end Longer end Note: • Always keep the lens cap on when not using the DVD video camera/recorder, to protect the lens. • When recording, attach the lens cap to the hand strap by hooking the tab inside the cap onto - Hitachi DZ-GX20MA | Owners Guide - Page 34
laws. Do not dispose of in fire. • Do not short circuit the battery. • Do not hold the battery with the metallic tweezers. • Keep the battery in a dark, cool, dry place. • The remote control (DZ-RM4W) and lithium battery (CR2032) are supplied only with the DZ-GX20MA and DZ-MV780MA. English 34 - Hitachi DZ-GX20MA | Owners Guide - Page 35
of Hitachi VCRs. If you use a Hitachi VCR, etc. with remote control code set to "VCR2", a VCR placed near the DVD video camera/ recorder will also be operated by the remote control: To prevent this, change the remote control code of the VCR. • The remote control (DZ-RM4W) and lithium battery (CR2032 - Hitachi DZ-GX20MA | Owners Guide - Page 36
90º before changing its vertical angle. • Do not record for a prolonged time with the LCD monitor turned approximately 180º in close contact with the DVD video camera/recorder body: Doing this could cause the DVD video camera/recorder and LCD monitor to become hot. 90º 180º English 36 - Hitachi DZ-GX20MA | Owners Guide - Page 37
CLOSING LCD MONITOR Before closing the LCD monitor, be sure to reset it at right angles to the DVD video camera/ recorder. Replace the LCD monitor on the DVD video camera/recorder with the LCD screen facing inward until a click is heard. Note: • Be sure to return the LCD monitor at right angles to - Hitachi DZ-GX20MA | Owners Guide - Page 38
to store the date and time in memory. If this built-in battery is exhausted, the date and time will be reset. To prevent this, connect the AC adapter/charger to DVD video camera/recorder every 3 months, and leave them for at least 24 hours with the DVD video camera/recorder turned off: The built-in - Hitachi DZ-GX20MA | Owners Guide - Page 39
Example of display M/D/Y 5:00PM 9/30/2005 D/M/Y 17:00 30/ 9/2005 Y/M/D PM 5:00 2005/ 9/30 1 Press the MENU button. The menu screen will appear. 2 Use the f/e/d/ c buttons to choose "Date Mode" on the "Date Setup" menu screen, and then press the A button. Da t e Se t u p Date Set Date Mode - Hitachi DZ-GX20MA | Owners Guide - Page 40
DZ-GX20MA or DZ-BP7S battery provided with DZ-MV780MA and DZ-MV750MA has not been charged at purchase time: Charge it before using the DVD video camera/recorder. Note: • Be sure to use the DZ-BP14S, DZ-BP7S, DZ-BP14SW (optional) or DZ-BP7SW (optional, unavailable for DZGX20MA) battery for the DVD - Hitachi DZ-GX20MA | Owners Guide - Page 41
AC adapter/ charger: Charge status During charge Charge complete CHARGE indicator Lit Goes out Note: See "Troubleshooting" on page 178 when the CHARGE indicator blinks. ●Reference for time required to charge battery (at approx. 77ºF (25ºC)): DZ-BP14S (provided with DZ-GX20MA)/DZ-BP14SW (optional - Hitachi DZ-GX20MA | Owners Guide - Page 42
the DVD video camera/recorder can continuously be used with a fully charged battery: With DZ-BP14S (provided with DZ-GX20MA)/DZ-BP14SW (optional) Video mode XTRA* FINE STD When using viewfinder When using LCD monitor When using viewfinder When using LCD monitor When using viewfinder When using LCD - Hitachi DZ-GX20MA | Owners Guide - Page 43
. Therefore, it is recommended that you charge the battery shortly before using the DVD video camera/recorder, usually on the day before you plan to use it. However, since the battery used for this DVD video camera/recorder is free from the memory effect, you do not need to completely discharge the - Hitachi DZ-GX20MA | Owners Guide - Page 44
when you perform settings on it, play back or edit images, or use it indoors. Note: Be sure to use the specified AC adapter/charger (DZ-ACS2) to power the DVD video camera/recorder. Using other AC adapter/chargers could cause electric shock or result in fire. Power cable 1 4 2 3 AC adapter - Hitachi DZ-GX20MA | Owners Guide - Page 45
power switch, set the switch according to each recording function: Set to "OFF": The DVD video camera/ recorder will turn off. Set to "P": To record still on SD memory card Set to "O": To record movie on DVDRAM/DVD-RW/DVD-R disc Set to "N": To record still on DVDRAM disc Note: • Once you turn the - Hitachi DZ-GX20MA | Owners Guide - Page 46
. Push the shaded portion. • Note that the recording surface of disc must face the inside of DVD video camera/recorder. • Never touch the disc recording surface or pickup lens. English Pickup lens • Use the disc cleaning cloth provided to wipe off any dirt adhering to the disc recording surface - Hitachi DZ-GX20MA | Owners Guide - Page 47
be inserted or removed unless a charged battery or AC adapter/charger is connected to the DVD video camera/recorder. • If a discharged battery is used, the disc cannot be inserted or removed: Connect a charged battery or AC adapter/charger to the DVD video camera/recorder. • If there is some delay - Hitachi DZ-GX20MA | Owners Guide - Page 48
the cover of disc insertion block will open. DISC EJECT If the DVD video camera/recorder is on at this time, the "EJECT" indicator will blink battery or AC adapter/charger, push down the DISC EJECT button once, and then release it. • Do not insert anything other than the 8 cm DVD-RAM, DVD-RW or DVD - Hitachi DZ-GX20MA | Owners Guide - Page 49
: Push the center of card edge. The card will come out so that it can be held by fingers. 4 Inserting Card: Insert card with its terminal inward until it locks. 5 Close the cover of card insertion block. Note: • No card is provided with this DVD video camera/ recorder: Buy cards if you need them - Hitachi DZ-GX20MA | Owners Guide - Page 50
REC again during recording will set the DVD video camera/recorder to the recording pause status. Recording indicator 5 When recording is finished, turn the DVD video camera/recorder off. 3 Check the subject on the screen (viewfinder or LCD). When using the viewfinder, close the LCD monitor before - Hitachi DZ-GX20MA | Owners Guide - Page 51
on this DVD video camera/recorder). • Do not insert a DVD-RW (VF-mode)/DVD-R recorded on a DVD recorder manufactured by a company other than Hitachi, and not finalized, in this DVD video camera/recorder: Doing so will make the disc unusable. • When using an unformatted DVD-RW/DVD-R disc, it - Hitachi DZ-GX20MA | Owners Guide - Page 52
DVD video camera/recorder on a tripod. • Do not remove the battery, AC adapter/charger or the card manual focus, and manually correct the focus before recording (see page 75). • There may be a difference between the image you see on the LCD screen or viewfinder and the recorded image. When using - Hitachi DZ-GX20MA | Owners Guide - Page 53
different from the actual display. *Not displayed on DZ-MV750MA. p 7. Microphone filter l 8. 16:9 mode 9. Video flash* 10. Self-timer 11. External Input 12. Recording status Movie recording time 17. Remaining space on disc/card 18. Remaining battery level 19. Volume Current date/time English 53 - Hitachi DZ-GX20MA | Owners Guide - Page 54
(display in English or German): Manual focus r : (display in French or Italian): Manual focus v : (display in Spanish): Manual focus 6. Backlight compensation (p. 77) No display : Backlight compensation OFF m : Backlight compensation ON 7. Microphone filter (only in movie recording mode - Hitachi DZ-GX20MA | Owners Guide - Page 55
than this DVD video camera/ recorder * Includes DVD-R recorded on a Hitachi DVD video camera/recorder model older than DZ-GX20MA/ MV780MA/MV750MA/GX20A/ MV780A/MV730A and not finalized. O : SD memory card P : Locked SD memory card No display*4 16. Movie recording quality (when using disc - Hitachi DZ-GX20MA | Owners Guide - Page 56
: The battery remaining level warning message to user. The message can operation status of DVD video camera/recorder. When the card is loaded. R • An unusable card is loaded. • An attempt to record a still is being made with a DVD-RW/DVD-R N disc used can switch to the manual focus, exposure and - Hitachi DZ-GX20MA | Owners Guide - Page 57
activated midway (when optical 10-power is exceeded on DZ-GX20MA or DZ-MV780MA, or optical 16power is exceeded on DZ-MV750MA). You can zoom up to 240-power. W: setting will be stored in memory even if the DVD video camera/recorder is turned off. • You can also use the DIGITAL ZOOM button on remote - Hitachi DZ-GX20MA | Owners Guide - Page 58
pitch: 0.5 mm When attaching the optional DZ-TL1 tele-conversion lens or DZ-WL1 wide-conversion lens, use the optional step-up ring: DZ-SR3437 for DZ-GX20MA or DZ-MV750MA, DZ-SR3037 for DZ-MV780MA (see page 162). 1 Remove the lens hood from DVD video camera/recorder, and attach the step-up ring - Hitachi DZ-GX20MA | Owners Guide - Page 59
Playing Back • Insert a disc or card recorded on this DVD video camera/recorder (p. 50, Before You Begin 52). • Turn the DVD video camera/recorder on (p. 45). PLAYING BACK Playing Back STOP/EXIT Use f / e / d / c to select, and then press A to designate. 1 Press the A button in the recording - Hitachi DZ-GX20MA | Owners Guide - Page 60
OF DISC OR CARD Use the Go To function (p. 62) or Disc Navigation function (p. 106) to play back from the start of disc or card. SEARCH PLAYBACK OF slow playback. After frame advance, frame back or slow playback, the DVD video camera/recorder will enter the playback pause status. Note: • In slow - Hitachi DZ-GX20MA | Owners Guide - Page 61
skip playback does not operate normally. 13 [When using disc] Releasing the f or e button will start continuous playback. [When using card] When the f or e button is released, the photo at that point will be displayed, and then the DVD video camera/recorder will enter the playback pause status. Set - Hitachi DZ-GX20MA | Owners Guide - Page 62
2 Choose the option Go T o To p End Spec i f y (point you want to go to), button to enter the selection. The DVD video camera/recorder will go to the specified point card) • Hold down: To move the cursor in 1-minute units (10-still units for card) Note: • If multiple scenes are selected using - Hitachi DZ-GX20MA | Owners Guide - Page 63
Repeat play*5 06 006 RAM 0 : 00 : 1 6 Playback operation*6 Counter Disc type*4 Program No. or Play List No.*3 Program or Play List*2 When using card: Scene No. File name Lock*5 Slide Show*5 003 100-0003 Recording mode*1 Playback operation*6 *1 O (VIDEO) or N (PHOTO) with disc; Only E (PHOTO - Hitachi DZ-GX20MA | Owners Guide - Page 64
DVD video camera/recorder: • Quick Menu: To display only the fundamental menu items for first timers • Normal Menu: To display all menu items for experts (p. 87) Camera Functions While the camera disc or card being used (p. 55) Guide display Functions settable Explanation on function English 64 - Hitachi DZ-GX20MA | Owners Guide - Page 65
Operating Menu You can use the f/e/d/c buttons on DVD video camera/recorder to select various setting options in Quick Menu and designate them. Press the QUICK MENU button. QUICK MENU Qu i ck Menu V I DEO Mode : F I NE 16 : 9 : Of f I npu t Sou r c e : CAMERA Menu f o r r eco r d f unc t i ons - Hitachi DZ-GX20MA | Owners Guide - Page 66
: The following shows the menu when DVD-RAM disc is being used: The details of each function are Menu V I DEO Mode 16 : 9 CAMERA I npu t Sou r ce L I NE S L I NE * Usua l l y se l ec t t h i s op t i on. ENTER RETURN RAM * Displayed on DZ-GX20MA and DZ-MV780MA only. ●Date Setup Qu i - Hitachi DZ-GX20MA | Owners Guide - Page 67
DISC): 1 The following shows the menu when DVD-RAM disc is being used: The details of each function are described on npu t Sou r c e CAMERA Se l f T ime r L I NE S L I NE * Usua l l y se l ec t t h i s op t i on. ENTER RETURN RAM * Displayed on DZ-GX20MA and DZ-MV780MA only. Qu i ck Menu - Hitachi DZ-GX20MA | Owners Guide - Page 68
Language Demo Mode Rese t Menu se t up i s r e t u r ned t o i n i t i a l s t a t e ex cep t da t e. ENTER RETURN RAM Note: No photo can be recorded on DVD-RW/DVD-R disc. (p. 104) Qu i ck Menu Language Demo Mode Rese t Change t he l angu Eng l i sh Françai s Españo l Deu t sch I tal iano - Hitachi DZ-GX20MA | Owners Guide - Page 69
ece i v i ng i mage. ENTER RETURN (p. 97) Qu i ck Menu Qua l i t y I npu t Sou r c e CAMERA Se l f T ime r L I NE S L I NE Usua l l y se l ec t t h i s op t i on. * ENTER RETURN * Displayed on DZ-GX20MA and DZ-MV780MA only. Qu i ck Menu Qua l i t y I npu t Sour ce Se l f T ime r Of f Se - Hitachi DZ-GX20MA | Owners Guide - Page 70
●Initial Setup Qu i ck Menu Language : Eng l i sh Demo Mode : Au t o Rese t Menu f o r I n i t i a l se t up. ENTER RETURN Qu i ck Menu Language Eng l i sh Demo Mode Rese t Change t he l anguage d i sp l ay. ENTER RETURN Qu i ck Menu Eng l i sh Language Demo Mode Au t o Rese t Se l ec t demons t r - Hitachi DZ-GX20MA | Owners Guide - Page 71
FLOW OF QUICK MENU (WITH DVD-RAM DISC): 1 The details of each function are described on pages showing the Normal Menu: See each reference page. ● Scene Qu i ck Menu Ed i t Ef - Hitachi DZ-GX20MA | Owners Guide - Page 72
FLOW OF QUICK MENU (WITH DVD-RW DISC): The details of each function are sc ETC F o r m a t D i s c F i n a l i z e DVD-RW ( VR ) d i s c. * ENTER RETURN RWVR * "Finalize DVD-RW (VF) disc" will appear when DVD-RW (VF-mode) is used. (p. 135) Qu i ck Menu Final i ze Di sc ETC F o r m a t - Hitachi DZ-GX20MA | Owners Guide - Page 73
Scene menu will not appear in the VF mode. "Finalize Disc" in the Disc menu will not appear with a previously finalized DVD-RW disc. FLOW OF QUICK MENU (WITH DVD-R DISC): 2 The details of each function are described on pages showing the Normal Menu: See each reference page. ● Disc (p. 138) Qu - Hitachi DZ-GX20MA | Owners Guide - Page 74
FLOW OF QUICK MENU (WITH CARD): 3 The details of each function are described on pages showing the Normal Menu: See each reference page. (p. 113) Qu i ck Menu De l e t e Qu i ck Menu - Hitachi DZ-GX20MA | Owners Guide - Page 75
2 Press the zoom lever to "T" control side to zoom in on subject. 3 Use the S R buttons to adjust the focus, while viewing the image in the viewfinder or the subject. • Manual focus is released when the DVD video camera/recorder is turned off. When you turn the DVD video camera/recorder on next - Hitachi DZ-GX20MA | Owners Guide - Page 76
Manually focus the following objects, which may not be automatically focused (see page 75): Objects not in the center of screen Objects with little variation in - Hitachi DZ-GX20MA | Owners Guide - Page 77
(Exposure) The DVD video camera/recorder usually adjusts the exposure automatically. You can also manually adjust the exposure Use the S R buttons to adjust the exposure, while viewing the image in the viewfinder or on the LCD screen. Note: • Pressing EXPOSURE will alternate between manual - Hitachi DZ-GX20MA | Owners Guide - Page 78
external microphone cannot be plugged in, while the cable is left plugged in the AV/S input/output terminal. Unplug the AV/S input/output cable to use the external microphone. • This DVD video camera/recorder cannot use a plug-in power type microphone. (Power is not supplied from this - Hitachi DZ-GX20MA | Owners Guide - Page 79
Introduction to Optional Accessories" on page 162. You can use the optional DZ-FLH3 Video Flash* (p. 162): Refer to the instruction manual of Video Flash for use. * Unavailable for DZ-MV750MA. Note: • The built-in Video Flash setting will not change even when the DVD video camera/recorder is turned - Hitachi DZ-GX20MA | Owners Guide - Page 80
123 Viewing on TV Screen Connecting to a TV CONNECTING TO A TV Use the provided AV/S input/output cable to connect the DVD video camera/recorder to a TV as follows: To AV input/output jack To S-VIDEO input jack* To video/audio input jacks AV/S input/output cable (provided) * If - Hitachi DZ-GX20MA | Owners Guide - Page 81
the TV instruction manual for how to switch the TV input. 2 Turn the DVD video camera/recorder on. The image that the DVD video camera/ recorder is remote control is useful when operating the DVD video camera/recorder while viewing an image on TV screen. However, if you use a Hitachi VCR, the remote - Hitachi DZ-GX20MA | Owners Guide - Page 82
on finalized disc. Note: Use this DVD video camera/recorder to finalize the DVD-R disc recorded on the DVD video camera/ recorder. 2 Insert the disc into the DVD player and play it back. See the instruction manual for DVD player. Note: • Do not insert a DVD-RW (VF-mode)/DVD-R disc that has not - Hitachi DZ-GX20MA | Owners Guide - Page 83
cable (provided) Red White Yellow * If you are using DZ-GX20MA or DZ-MV780MA, and the connected AV device has an S-VIDEO output jack, you can connect the S-VIDEO jack of AV/S input/output cable. 1 Set the input source on the DVD video camera/ recorder to "LINE (L IN)". FINE Switch the input - Hitachi DZ-GX20MA | Owners Guide - Page 84
the AC adapter/ charger. • If you use a Hitachi VCR, it will be operated by the remote control provided with the DVD video camera/ recorder. When recording an image from a Hitachi VCR, change the remote control code of the VCR to other than "VCR2". • With DZ-GX20MA or DZ-MV780MA, using S-VIDEO will - Hitachi DZ-GX20MA | Owners Guide - Page 85
on the DVD video camera/ recorder to "LINE (L IN)". FINE Switch the input referring to "Input Source" on page 97. L IN 0:00:00 REM 3 0 MIN 8 : 0 0 AM 9/3 0 /2005 Choose "S LINE" to input S-VIDEO signal (only for DZ-GX20MA or DZ-MV780MA). Note: • With DZ-GX20MA or DZ-MV780MA, using S-VIDEO will - Hitachi DZ-GX20MA | Owners Guide - Page 86
• Be sure to use the AC adapter/charger to power the DVD video camera/recorder from AC outlet, to prevent battery power from shutting off during recording on another video device. • If you are using a Hitachi VCR, using the remote control provided with this DVD video camera/recorder may operate the - Hitachi DZ-GX20MA | Owners Guide - Page 87
are displayed when DVD-RAM disc is used. Some items will not appear when a DVD-RW/DVD-R disc or card is used, or when no disc is inserted. No menu appears during recording. Display of selected setup item Selection of setup items S : Camera Functions Setup T : Record - Hitachi DZ-GX20MA | Owners Guide - Page 88
filter*2 (p. 93) Flash*3 (p. 79) *1: Not displayed when DZ-GX20MA or DZ-MV780MA is in "N" or "P" status. *2: Displayed only in "O" status. *3: Displayed when DZ-GX20MA *7: Displayed with DVD-RAM disc in "N" status, or "P" status. *8: Displayed only when input selection is set to camera. *9: Not - Hitachi DZ-GX20MA | Owners Guide - Page 89
t l i ght M IC . F i l t e r Sand&Snow Low L i gh t ENTER RETURN RAM Use f / e / d / c to select, and then press A to designate. Selected AE mode 0:00:00 REM will be stored in memory even if the DVD video camera/recorder is turned off. w Low Light : Allows user to record in a dark place even - Hitachi DZ-GX20MA | Owners Guide - Page 90
3.2 feet (1 m) even in a dark place. • An after-image will appear when filming a moving subject or if camera shake occurs (it is recommended that you use a tripod). • If a subject cannot be focused properly, manually adjust the focus (see page 75). 3 Press the MENU button to end the setting. REM - Hitachi DZ-GX20MA | Owners Guide - Page 91
mode can be confirmed using the on-screen information. • The white balance setting will be stored in memory even when the DVD video camera/recorder is turned off. manually set the white balance. • Be sure to remove the lens cap before turning the DVD video camera/recorder on: If the DVD video camera - Hitachi DZ-GX20MA | Owners Guide - Page 92
white balance manually 1 Point the DVD video camera/ Thick paper recorder at a white object so that it fills the screen. Use an object that is not transparent. If focus is not correct when the white object fills the screen, manually focus the object, referring to "Manually Focusing - Hitachi DZ-GX20MA | Owners Guide - Page 93
when recording photos on DZGX20MA or DZ-MV780MA. RECORDING SUBJECT USING LARGE MAGNIFICATION (DIGITAL ZOOM) See page 57 for setting on digital zoom. REDUCING WIND NOISE DURING RECORDING (MIC.FILTER) When recording sound from the microphone built into this DVD video camera/recorder, you can reduce - Hitachi DZ-GX20MA | Owners Guide - Page 94
setting. Note: • The movie quality setting will be stored in memory even when the DVD video camera/recorder is turned off. • The "VIDEO Mode" setting will not change even if the disc is replaced. • When using DVD-RW (VF-mode)/DVD-R disc, you cannot switch the setting on movie quality or widescreen - Hitachi DZ-GX20MA | Owners Guide - Page 95
12 SETTING TO WIDE TV SCREEN MODE (16:9 MODE) When viewing recorded images later on a wide-screen TV (aspect ratio 16:9), specify wide-screen (16:9) mode "On": You can also record images with the aspect ratio changed (the aspect ratio with "Off" is 4:3). "16:9 On" specified (aspect ratio 16:9) " - Hitachi DZ-GX20MA | Owners Guide - Page 96
kept even after the DVD video camera/recorder is turned off. • The 16:9 mode cannot be used with photo recording, external input, S-VIDEO external input (for DZ-GX20MA or DZ-MV780MA only), or "STD" recording using DVD-RW (VF-mode)/DVD-R disc. • Once the DVD-RW (VF-mode)/DVD-R disc has been recorded - Hitachi DZ-GX20MA | Owners Guide - Page 97
be stored in memory even when the DVD video camera/recorder is turned DZ-GX20MA or DZ-MV780MA only. 1 Press the MENU button, use the f/ Record Func t i ons Setup e/d/c/A buttons to choose "Input Source" on the "Record Functions V I DEO Mode 16 : 9 Input Source OSD Ou t p u t ENTER RETURN CAMERA - Hitachi DZ-GX20MA | Owners Guide - Page 98
of externally input images on either a DVD-RAM disc or a card. The DVD video camera/recorder can record an external image with little setting can be confirmed using the on-screen information. • The PHOTO Input setting will be stored in memory even when the DVD video camera/recorder is turned off - Hitachi DZ-GX20MA | Owners Guide - Page 99
using the self-timer function, as with ordinary cameras. 13 The self-timer function is valid only when recording photos (stills). 1 Press the MENU button, use by reviewing the on-screen information. • To release the self-timer mode, choose "Off" on the menu screen or turn DVD video camera/recorder - Hitachi DZ-GX20MA | Owners Guide - Page 100
DVD video camera/recorder to a TV to view images on TV screen, you can switch off the on-screen information (displayed in the viewfinder or on the LCD screen) from the TV screen. 1 Press the MENU button, use " setting will be stored in memory even when the DVD video camera/recorder is turned off. • - Hitachi DZ-GX20MA | Owners Guide - Page 101
the MENU button to end the setting. Note: The brightness setting will be stored in memory even after the DVD video camera/recorder is turned off. SETTING BRIGHTNESS OF VIEWFINDER (EVF BRIGHTNESS) 1 Press the MENU button, use the f/ LCD / EVF Se t up 3 Press the MENU button to end the adjustment - Hitachi DZ-GX20MA | Owners Guide - Page 102
. 1 Press the MENU 3 Press the MENU button. button, use the f/ LCD / EVF Se t up e/d/c/A Note: buttons to choose Ad j us t • The color setting will be stored in memory even after "Adjust" on the "LCD/ EVF D i s p l a y the DVD video camera/recorder is turned off. EVF Setup" menu ENTER - Hitachi DZ-GX20MA | Owners Guide - Page 103
", and then press the A button. 3 Press the MENU button to end the setting. Note: The "Beep" setting will be stored in memory even when the DVD video camera/recorder is turned off. TURNING DVD VIDEO CAMERA/RECORDER OFF AUTOMATICALLY (POWER SAVE) Setting On Off Content To engage power save. If the - Hitachi DZ-GX20MA | Owners Guide - Page 104
that English is changed to French. 1 Press the MENU button, use the f/ e/d/c/A buttons to choose "Language" on the "Initial button to end the setting. Note: The language setting will be stored in memory even when the DVD video camera/recorder is turned off. 2 Select "Français", and then press the A - Hitachi DZ-GX20MA | Owners Guide - Page 105
however, that the date/time will not be reset.) 1 Press the MENU button, use the f/ e/d/c/A buttons to choose "Reset" on the "Initial Setup" menu screen, verifying reset will appear. 2 If you are sure that you wish to reset, use the d button to choose "YES", and then press the A button. Reset - Hitachi DZ-GX20MA | Owners Guide - Page 106
Disc Navigation function. The screens in this instruction manual are basically those that will appear when DVD-RAM disc is used: Some items will not appear when DVD-RW/DVD-R disc or card is used, but the operation is the same. • Turn the DVD video camera/recorder on (p. 45). Before You Begin • When - Hitachi DZ-GX20MA | Owners Guide - Page 107
appear or some message will be displayed: - Write-protected disc - Finalized DVD-RW (VF-mode)/DVD-R disc - DVD-R recorded on a Hitachi DVD video camera/ recorder model older than DZ-GX20MA/MV780MA/ MV750MA/GX20A/MV780A/MV730A - Locked card • Do not leave the disc navigation screen displayed on TV to - Hitachi DZ-GX20MA | Owners Guide - Page 108
Press the A button. 2 Use the f/e/d/c buttons to select the 007 / 014 PLAY RAM A ●When playback ends: The DVD video camera/ recorder will enter the playback pause status at the last image Disc Navigation screen. • When playing back photos on card, "Playback" will appear. In the case of a - Hitachi DZ-GX20MA | Owners Guide - Page 109
014 The selected scene will be doubly framed in ENTER CANCEL RAM yellow and blue. Double frames in yellow and blue 4 Use the f/e/d/ c buttons to select the last scene in the range you want, and then press the A button: A Up to 999 scenes can be selected for both disc and card. English 109 - Hitachi DZ-GX20MA | Owners Guide - Page 110
You can create an original movie by changing the combination of scenes. Disc or Card initialization ●●● You can initialize a DVD-RAM/DVD-RW ● disc or card so that it can be used on this DVD video camera/recorder. Remaining display (Capacity) The remaining recordable movie time or number of - Hitachi DZ-GX20MA | Owners Guide - Page 111
screen: The menu screens for Disc Navigation and menu screens for disc and card will appear. See "Checking Flow of Normal Menu" on page 87. Refer to pages indicated for details of settings. ●When using DVD-RAM/DVD-RW (VR-mode) disc Scene Edit (p. 113) Effect (p. 117) Copy*1 (p. 120) Select - Hitachi DZ-GX20MA | Owners Guide - Page 112
●When using card Scene Delete Lock Select Detail (p. 113) (p. 121) (p. 122) (p. 123) Go To Top (p. 134) End (p. 134) Start → Current (p. 122) Current → End (p. 122) All (p. 122) Slide Show Start (p. 140) Card Format Card Capacity (p. 135) (p. 136) English 112 - Hitachi DZ-GX20MA | Owners Guide - Page 113
to be deleted 4 Choose "Scene", "Edit", "Delete", and then press the A button. When using card, choose "Scene", "Delete", and then press the A button. Scene Ed i t Dev i de will appear. • To delete an unwanted part of a scene on DVD-RAM/ DVD-RW (VR-mode) disc, divide the scene first, and then - Hitachi DZ-GX20MA | Owners Guide - Page 114
●Editing using submenu Press the MENU button before pressing the A button in step 5 (see page 113): The submenu will appear. Ed i t De l ete Exi t ENTER RETURN RAM - Hitachi DZ-GX20MA | Owners Guide - Page 115
you press the MENU button before pressing the A button in step 5, the submenu will appear (see page 114). • Search and frame advance are useful when designating division points. • Combining scenes that were divided will restore the original scene (see page 116). • If a special effect has been added - Hitachi DZ-GX20MA | Owners Guide - Page 116
COMBINING MULTIPLE SCENES (EDIT - COMBINE) 1< If you have recorded numerous short scenes, combining them will be facilitated by the use of Disc Navigation. Be sure to select consecutive multiple scenes. Combining scenes is possible only when "Category: All" is specified (p. 139). Stills cannot be - Hitachi DZ-GX20MA | Owners Guide - Page 117
B / W ENTER Ent er Canc e l You can use f/e to move the cursor to "IN", "OUT", "Enter" or "Cancel". Use d/c to choose the effect to be added, and then press on which fade has been set on scene with this DVD video camera/recorder is played on a DVD reorder/player, or the scene is captured into a - Hitachi DZ-GX20MA | Owners Guide - Page 118
the A button in step 5, the submenu screen will appear (p. 114). • If a disc on which skip has been set on scene with this DVD video camera/recorder is played on a DVD reorder/player, or the scene is captured into a PC, the set skip will not be reflected (see Note on page 110). English 118 - Hitachi DZ-GX20MA | Owners Guide - Page 119
you can change it on this screen. 6 When the image you want to use as the thumbnail of the scene appears, press the SELECT button. 7 The screen • If a disc on which thumbnail has been set with this DVD video camera/recorder is played on a DVD reorder/player, or the scene is captured into a PC, the - Hitachi DZ-GX20MA | Owners Guide - Page 120
be copied to disc. • The quality of still copied from disc to card will be the same as when you recorded still on disc. • Stills recorded on a device other than this DVD video camera/recorder may not be copied normally. If you want to change the still to be copied, you can change - Hitachi DZ-GX20MA | Owners Guide - Page 121
card so that it will not be deleted or edited by mistake. 1 Set the power switch to "P". 2 Press the DISC NAVIGATION button. 3 Select the scene to be locked. ●To unlock the scene: Select the locked scene, and then use (p. 109). • When initializing the card, the locked scenes will also be deleted - Hitachi DZ-GX20MA | Owners Guide - Page 122
"Select" function to select consecutive scenes at one time. This function is useful when there are numerous scenes. 1 Press the DISC NAVIGATION button. 4 Choose "Select" on the "Scene" menu screen. 2 Point the cursor at the first or last - Hitachi DZ-GX20MA | Owners Guide - Page 123
this DVD video camera/recorder, only if the disc has a scene whose mode is unknown. *2 This will not appear with DVD-RW/DVD-R disc, since no still image can be recorded on it. *3 Not displayed with a DVD-RAM/DVD-RW/DVD-R disc (finalized) that was recorded on another device. (When using card) De - Hitachi DZ-GX20MA | Owners Guide - Page 124
on a specific date. 1 Press the DISC NAVIGATION button. 2 Press the MENU button. 3 Use the f/e/d/ c/A buttons to P r og r am choose "Switch" on the Sw i . • If a disc recorded on another device is loaded in this DVD video camera/recorder, the program may not be a collection of recordings on the - Hitachi DZ-GX20MA | Owners Guide - Page 125
press the A button. Program Ti t l e 01 8/30/2005 02 9/10/2005 03 9/30/2005 The screen for setting a title will appear. ENTER RETURN 5 Use f/e/d/c to select a letter, and then press the A button: The selected letter will be entered. Repeat this procedure to create a title. Up to 20 characters - Hitachi DZ-GX20MA | Owners Guide - Page 126
characters set on other devices may be displayed blank on this DVD video camera/recorder. • Titles set on this DVD video camera/recorder may not be visible on other devices. ●Characters available for entering title You can use the SELECT button to select characters from the "capital letter", "small - Hitachi DZ-GX20MA | Owners Guide - Page 127
PLAY LIST"? You can create a play list on this DVD video camera/recorder by gathering your favorites from the recorded scenes. ECT ALL RAM If you want to change any of scenes you are registering, you can also use this screen (see pages 109 and 122). 6 When creation of a play list is complete, - Hitachi DZ-GX20MA | Owners Guide - Page 128
such as changing title, setting skip, adding fade, etc., use the same procedure for setting on program or scenes. Perform Changing thumbnail, Setting skip, Adding fade, Combining scenes, Dividing a scene, Copying to card, Changing title, Arranging order of scenes (only on play list) p. 113 p. 119 - Hitachi DZ-GX20MA | Owners Guide - Page 129
to PlayList Sw i t c h choose "Edit" on the Play Create "PlayList" menu screen, and then press the A Ed i t Ti tle ETC D e l e t e button. ENTER RETURN RAM 4 Use the play list select screen to select the play list to which you wish to add scenes, and then press the A button. The scenes of - Hitachi DZ-GX20MA | Owners Guide - Page 130
and then press the DELETE button on remote control: You can also delete the scene on the play list. 1< ADDING SCENES USING SUBMENU FOR EDITING (EDITING PLAY LIST) You can use the menu screen to add scenes to a play list. 1 Press the DISC NAVIGATION button. 5 Press the MENU button. 2 Display the - Hitachi DZ-GX20MA | Owners Guide - Page 131
first or last scene of those you wish to select, and then press the MENU button. To select all scenes, simply press the MENU button. 4 Use "Operating Menu" (p. 65) to choose "Start → Current", "Current → End", "All" on the "Select" menu screen, and then press the A button. Select A l l Progr ams - Hitachi DZ-GX20MA | Owners Guide - Page 132
press the MENU button before pressing the A button in step 7, the submenu screen will appear (p. 114). • Only scenes on play list can be moved. • When using DVD-RAM, scenes can be moved only when "Category: All" is specified (p. 139). If you want to change the scene selected in step 4, you can do - Hitachi DZ-GX20MA | Owners Guide - Page 133
You can change this title at any time. 1 Press the DISC NAVIGATION button. 2 Press the MENU button. 3 Use the f/e/d/c/A buttons to choose "Title" on the "PlayList" menu screen, and then press the A button. 4 Use the "Playlist Title" screen to select the play list whose title you wish to change, and - Hitachi DZ-GX20MA | Owners Guide - Page 134
Disc Navigation screen, you can jump to the first scene or last scene. TOP (END) 1 Press the DISC NAVIGATION button. 2 Press the MENU button. 3 Use the f/e/d/ c/A buttons to Go T o choose "Top" or "End" on the "Go To" menu To p screen, and then press End ETC the A button. ENTER RETURN - Hitachi DZ-GX20MA | Owners Guide - Page 135
OR CARD (FORMAT DISC. FORMAT CARD) Initializing a DVD-RAM/DVD-RW disc or card will allow you to delete any recorded contents. Before using a DVD-RW on this video camera/recorder, you must format it. Before You Begin • Be sure to use the AC adapter/charger to power the DVD video camera/ recorder - Hitachi DZ-GX20MA | Owners Guide - Page 136
protection has been engaged on another device, it may not be releasable on this DVD video camera/recorder: Use the original device that protected the disc to release the protection. 123 VERIFYING REMAINING FREE SPACE ON DISC OR CARD (CAPACITY) You can find out how long you will be able to record - Hitachi DZ-GX20MA | Owners Guide - Page 137
/recorder, the Disc Navigation may not appear normally. If this happens, use the Update Control Info function to update the data. Before You Begin • When using the AC adapter/charger to power the DVD video camera/ recorder for updating control information, make sure that power is not turned off - Hitachi DZ-GX20MA | Owners Guide - Page 138
DISC (FINALIZE DISC) 2 Before You Begin • Be sure to use the AC adapter/charger to power the DVD video camera/ recorder when finalizing a DVD-RW/DVD-R disc. Finalization cannot be executed using a battery. If the DVD video camera/recorder is turned off during finalization and the finalization - Hitachi DZ-GX20MA | Owners Guide - Page 139
has been specified: Playback of the scenes in that range will repeat. ●To release Repeat Play Use one of the following 3 methods to release: • Choose "Off" in step 4 above. • Turn the DVD video camera/recorder off once. • Press the DISC EJECT button to remove the disc. Note: • Press the C button - Hitachi DZ-GX20MA | Owners Guide - Page 140
is played for approx. 5 seconds. • With slide show, playback will start from the first photo on card regardless of the position of cursor. • If you press the C button or turn the DVD video camera/recorder off, Slide Show will be canceled. Start: To start a slide show When playback is finished, the - Hitachi DZ-GX20MA | Owners Guide - Page 141
disc or card. ●Viewing, on PC, DVD-RAM/DVD-RW (VR-mode) disc recorded on this DVD video camera/recorder: Original disc DVD-RAM/DVD-RW (VR-mode) disc recorded on this DVD video camera/ recorder and finalized Application used DVD-MovieAlbumSE** or generally available playback software conforming to - Hitachi DZ-GX20MA | Owners Guide - Page 142
be edited nor can images recorded on a DVD-RW (VF-mode)/DVDR be played using the software provided with this DVD video camera/recorder. Languages compatible with each software program: • DVD-MovieAlbumSE, DVDfunSTUDIO and UDF driver (DVD-RAM driver) can handle Japanese, English, German, French - Hitachi DZ-GX20MA | Owners Guide - Page 143
to install it in order to open the on-line manuals (instruction manual files) for DVD-MovieAlbumSE and UDF driver. Although the CD-ROM may contain a folder or file other than the above, they will not be needed on this DVD video camera/recorder unless some special instruction is given. 143 English - Hitachi DZ-GX20MA | Owners Guide - Page 144
Read the electronic instruction manuals on PC for complete information on using each software program. ● DVD-MovieAlbumSE You can read the instruction manual using either of the following procedures: • Open the PDF file in DVDMASE 4\manual\English folder contained on the provided CD-ROM. • After - Hitachi DZ-GX20MA | Owners Guide - Page 145
Software Before You Begin Before installing the UDF driver (DVD-RAM driver) provided with this DVD video camera/ recorder, check to see if another UDF driver* has already been installed in your PC. *InstantWrite® provided with the DZ-WINPC1, DZ-WINPC2 or DZ-WINPC2B PC kit for the Hitachi DZ - Hitachi DZ-GX20MA | Owners Guide - Page 146
1 Click "All" on the installer screen. Clicking "All" allows you to install the DVDRAM driver, DVD-MovieAlbumSE 4.1 and DVDfunSTUDIO 2.2 all at one time. If any of the software programs are already installed, uninstall them, and then proceed with installing the provided programs. 2 The screen - Hitachi DZ-GX20MA | Owners Guide - Page 147
not, choose "No". 7 Click "Finish". Then the installation of DVDfunSTUDIO will start. 12 Click "Finish". Then the installation of DVD-RAM driver will start. 13 After the DVD-RAM driver has been installed, a message that prompts you to restart the PC will appear: Click "OK". Click 8 The screen for - Hitachi DZ-GX20MA | Owners Guide - Page 148
15 Click "Next". 17 If you do not wish to change the folder in which the UDF driver is installed, click "Next". Click 16 Carefully read the License Agreement: If you accept it, click "Yes". The contents of agreement displayed on actual screen - Hitachi DZ-GX20MA | Owners Guide - Page 149
"Finish" and then restart the PC. Installing the UDF driver is now complete. If your PC uses Windows® 2000 Professional, proceed with step 22. Click 20 Yes" to restart the PC. Installing the software is now complete. Click Note: • If software that detects computer virus, etc., has been installed, - Hitachi DZ-GX20MA | Owners Guide - Page 150
DVD Video (DVD-RW/DVD-R) from DVD-RAM/DVD-RW (VR-mode) Disc Recorded on DVD Video Camera/Recorder Using DVD-MovieAlbumSE and DVDfunSTUDIO, you can create a DVD video (DVD-RW/DVD-R disc) from the images recorded on this DVD video camera/recorder, following the procedure below: 1 Insert a DVD-RAM/DVD - Hitachi DZ-GX20MA | Owners Guide - Page 151
the DVDfunSTUDIO instruction manual for details. Note: • The menu screen created on DVDfunSTUDIO will not appear on this DVD video camera/recorder. Also, depending on the written contents, the images may not be playable on this DVD video camera/ recorder. In such cases, use a standard DVD player to - Hitachi DZ-GX20MA | Owners Guide - Page 152
INSERTING 3D TITLE IMAGES You can attach a 3D title to the images recorded on a DVD-RAM. 1 Connect the DVD video camera/recorder in which the DVD-RAM to be edited is loaded to USB port of PC. 2 Start up DVD-MovieAlbumSE. The 3D title creation screen (3D-Title STUDIO) will start. You can then - Hitachi DZ-GX20MA | Owners Guide - Page 153
●If no image appears on DVD-MovieAlbumSE: If, when DVD-MovieAlbumSE starts, no scene recorded on DVD-RAM/DVD-RW (VR-mode) appears, or "Drive X: disc cannot be used on DVD-MovieAlbumSE" appears, use the DVDMovieAlbumSE Preferences to choose the drive in which the DVD-RAM/DVD-RW (VR-mode) is loaded. - Hitachi DZ-GX20MA | Owners Guide - Page 154
-MovieAlbumSE can be created to a DVD video using DVDfunSTUDIO, you can write video files recorded on multiple DVD-RAM/DVD-RW (VR-mode) discs collectively to one DVD-RW/DVD-R disc in order to create a DVD video. 1 Connect the DVD video camera/recorder in which a DVD-RAM/DVD-RW (VR-mode) is loaded - Hitachi DZ-GX20MA | Owners Guide - Page 155
up DVDfunSTUDIO, click Windows [Start] button, choose [All Programs] (or [Programs]), [Hitachi DVDCAM], and then [DVDfunSTUDIO]. 11 Register the scenes in DVDfunSTUDIO. All the scenes that you saved in PC using DVD-MovieAlbumSE by repeating steps 3 - 7 can easily be registered in DVDfunSTUDIO by - Hitachi DZ-GX20MA | Owners Guide - Page 156
or use the file with on generally available software that conforms to MPEG2 file (no playback or editing of MPEG2 file is possible on DVD-MovieAlbumSE provided with this DVD video camera/recorder). ●To capture in DVD-VR format 1 Connect to PC the DVD video camera/ recorder in which a DVD-RAM/DVD-RW - Hitachi DZ-GX20MA | Owners Guide - Page 157
the "Export a title" screen in step 4. Click Note: For export of wide-screen scenes recorded on this DVD video camera/recorder, the scenes will be exported in the 4:3 aspect ratio status. When using them on DVDfunSTUDIO, they will be displayed as wide images in 16:9 aspect ratio. English "Export - Hitachi DZ-GX20MA | Owners Guide - Page 158
to perform simple editing, such as creation of chapter, division of title, export of scenes, and playback. The following functions available in DVD mode cannot be used in the HDD mode: • Capturing video files on PC • Deleting titles or entire groups of data • Entering 3D title • Deleting chapter of - Hitachi DZ-GX20MA | Owners Guide - Page 159
REUSING A RECORDED DVD-RW Use DVDfunSTUDIO to delete contents on a recorded DVD-RW: It will then be reusable. 1 Choose [H Tool]-[Erase DVD RW disc] on DVDfunSTUDIO. 2 The window shown below will appear: Choose [Quick erase] or [Full erase] and then click [Run]. Erasure will start. Click Quick - Hitachi DZ-GX20MA | Owners Guide - Page 160
not guarantee the operation. • Data may be readable or writable from/to storage media in this DVD video camera/recorder using software other than that provided with this DVD video camera/recorder, but Hitachi does not guarantee the operation. • If the PC is started from suspend (see "Terminology" on - Hitachi DZ-GX20MA | Owners Guide - Page 161
be connected to a Mac via USB. When using a DVD-RAM/DVD-RW disc recorded using this DVD video camera/recorder on Mac, it is recommended that you use the DVD-Multi (or DVDRAM) drive of the above PIXELA CORPORATION. • A DVD-RAM/DVD-RW disc written using the above software may not be playable on this - Hitachi DZ-GX20MA | Owners Guide - Page 162
-TL1)* Video flash (DZ-FLH3)** Step-up ring (DZ-SR3437 for DZ-GX20MA or DZ-MV750MA, DZ- SR3037 for DZ-MV780MA) • When using camera accessories, be sure to read the instruction manuals for each accessory. * When attaching the wide or tele-conversion lens to this DVD video camera/recorder, you will - Hitachi DZ-GX20MA | Owners Guide - Page 163
- can be used on this DVD video camera/recorder: Remove the disc from the holder, cartridge or caddy when using. The way to remove a disc from its package may vary with the disc maker: See the disc instruction sheet. The following explains how to remove the discs made by Hitachi Maxell: REMOVING - Hitachi DZ-GX20MA | Owners Guide - Page 164
. ●Do not use benzene or thinner to clean DVD video camera/recorder case The coating of case could peel off or the case could deteriorate. Wipe off dirt on the case with a moist cloth which has been completely wrung out. When using chemical cleaning cloth, follow instructions for use. 164 English - Hitachi DZ-GX20MA | Owners Guide - Page 165
the demonstration approx. three minutes after the DVD video camera/recorder is turned on. Use the following procedure if you wish to view or "N", or a card is loaded with the power switch set to " P". • The demonstration function will not work when the DVD video camera/recorder is connected to PC - Hitachi DZ-GX20MA | Owners Guide - Page 166
back video and audio signals recorded on DVD-Video and DVD-R discs using the DVD video format. Most DVD players can play back a DVD-R disc recorded on the DVD video camera/recorder (some DVD players cannot play back the disc). DVD-R DISC: One-time recordable DVD disc: The recorded contents cannot be - Hitachi DZ-GX20MA | Owners Guide - Page 167
limit of the device. Howling can be prevented by changing the positional relationship between the DVD video camera/recorder and TV, or by turning down the volume on TV. INFRARED SENSOR: This sensor is used to adjust the white balance. LASER PICKUP BLOCK: This block emits laser beam to a disc - Hitachi DZ-GX20MA | Owners Guide - Page 168
SD MEMORY CARD: This is a standard of memory card developed in 1999. The card is 32 mm long × 24 mm wide × 2.1 mm thick, and has 9 pins. SLOT-IN TYPE PC: PC that has a DVD drive into/from which a DVD is directly inserted or ejected without using a tray. SUSPENDING PC: This function stores the status - Hitachi DZ-GX20MA | Owners Guide - Page 169
Still can be recorded only on DVD-RAM disc or SD memory card. Check the following: • Is proper type of disc or card inserted? • Is power switch set to match the recording medium? − When using DVD-RAM disc: Set to "N". If the LOCK switch on this DVD video camera/ recorder is set to L (upper position - Hitachi DZ-GX20MA | Owners Guide - Page 170
/recorder. Check 7 No image appears on the LCD screen or in the viewfinder • Is DVD video camera/recorder connected to PC using PC connection cable? Unplug the PC connection cable. • Does DVD video camera/recorder stop at the end of the scene to which wipe-out was set and played back? Press the - Hitachi DZ-GX20MA | Owners Guide - Page 171
in several minutes, but it may take longer (up to one hour). • Be sure to use the AC adapter/charger to power the DVD video camera/recorder when repairing data: Repair is not possible using a battery. If a battery has been attached, turn the power switch off once, connect the AC adapter - Hitachi DZ-GX20MA | Owners Guide - Page 172
be included: Use another card. Card error has occurred. Keep card inside & restart. Card error could have occurred during editing of scenes. Turn off the DVD video camera/recorder with the card being used inside, connect the AC adapter/charger, and then power the DVD video camera/recorder again - Hitachi DZ-GX20MA | Owners Guide - Page 173
Delete unnecessary stills or use another card. 30, 113 Card full. Cannot execute. Delete unnecessary stills and try the card, or use another card. 30, 113 Card is not formatted. Was the card formatted on PC? When using the card on this DVD Format the card now? video camera/recorder, choose "YES - Hitachi DZ-GX20MA | Owners Guide - Page 174
with no play list stored. Disc includes protected The disc may be software protected from a device other than this scenes. Delete scenes? DVD video camera/recorder. To release this case, use a device that has executed software-protect. Disc is full. Cannot add control info. The number of entered - Hitachi DZ-GX20MA | Owners Guide - Page 175
DVD-RAM disc scenes are not found. using a device other than this DVD video camera/recorder are to - be copied to card. No card. Insert a card. 49 No card. Please insert card. No card is inserted. Insert a card play list with no scenes cannot be supported by specifications, a play list from - Hitachi DZ-GX20MA | Owners Guide - Page 176
. See *2 on page 177. Use AC adapter/ charger. Finalization is not possible when the DVD video camera/recorder is powered by a battery: Use the AC adapter/charger for finalization. Use AC adapter/ charger. Turn off power. Scene cannot be repaired when the DVD video camera/recorder is powered by - Hitachi DZ-GX20MA | Owners Guide - Page 177
may also appear when dirt adheres to disc. Remove the disc and then use the provided disc cleaning cloth to clean off the dirt before using it. • This message may also appear when condensation occurs. Wait until the DVD video camera/ recorder dries out, and then turn it on again. • This message will - Hitachi DZ-GX20MA | Owners Guide - Page 178
try the above four procedures, it may be dead: Purchase a new battery. Battery weakens fast Are you using the DVD video camera/recorder where the temperature is low? A fully charged battery (DZ-BP14S/DZ-BP7S/DZ-BP14SW/DZ- 42 BP7SW) may be discharged sooner than usual at low temperatures. Keep - Hitachi DZ-GX20MA | Owners Guide - Page 179
protected or the card locked? Is use auto focus with your subject? Focus manually. 36, 37 - 76 Does "MF" appear? The DVD video camera/recorder is set to manual focus. Focus 75 the subject manually, or release manual DVD video camera/recorder is repair appears. powered by the AC adapter/charger - Hitachi DZ-GX20MA | Owners Guide - Page 180
Use the provided disc cleaning cloth to clean it. 27 Pressing the playback Has the image been recorded by devices other than this DVD button will not start video camera mm) and recorded? The problem may be improved if a VCR equipped with TBC - circuit is used for playback. Playback picture is - Hitachi DZ-GX20MA | Owners Guide - Page 181
back. Cause and Correction This DVD video camera/recorder can play back image data recorded on SD memory card in other digital cameras conforming to the DCF (Design rule for Camera File system) standard. The range of image data normally playable on this DVD video camera/recorder is that with pixels - Hitachi DZ-GX20MA | Owners Guide - Page 182
you use USB terminal on the back of PC. If you are using USB2.0 extended card, it is also recommended that you install the newest version driver provided by each USB2.0 card maker. DVD drive built into PC This problem can be solved if the DVD editing or creating cannot be used after the software - Hitachi DZ-GX20MA | Owners Guide - Page 183
the DVD video camera/recorder. If your PC uses Windows® 2000 Professional, the problem may be solved if you install Windows® 2000 Service Pack 3 or later. No USB HS (high Make sure that you have already installed the driver provided with speed) connection even the USB2.0 card. when USB2.0 card - Hitachi DZ-GX20MA | Owners Guide - Page 184
inserted? Was disc inserted from wrong direction? Remove the disc and then reinsert it. Connect a fully charged battery or AC adapter/charger, and then turn the DVD video camera/recorder on. Operating sound is heard cyclically. This sound is heard because the disc is cyclically operated and does - Hitachi DZ-GX20MA | Owners Guide - Page 185
using the DVD video camera/recorder. 1 Set the power switch to "OFF" to turn the DVD video camera/reorder off. Note: Do not press the reset button with undue force. Detach the battery or AC adapter/charger. 2 Use will not appear depending on the disc or card inserted. Setting method p. 89 p. 91 - Hitachi DZ-GX20MA | Owners Guide - Page 186
diameter: 1-1/4" (30.5 mm) Thread pitch: 0.5 mm DZ-MV750MA : F1.6 - 2.3 f = 1/8" - 1-1/16" (2.78 - 43.3 mm) Filter diameter: 1-5/16" (34 mm) Thread pitch: 0.5 mm Focus Auto/Manual Zoom Optical 10× (DZ-GX20MA/DZ-MV780MA), Optical 16× (DZ-MV750MA), 240× with digital zoom added, 40× for still - Hitachi DZ-GX20MA | Owners Guide - Page 187
for General Ver. 2.0) SD memory card Jacks Video/audio input/output ×1, External microphone input ×1, PC connection terminal (connected to PC USB port) ×1 Battery system Lithium-ion Power consumption When recording with LCD monitor off (DVD-RAM disc used) DZ-GX20MA approx. 4.4W (in FINE mode - Hitachi DZ-GX20MA | Owners Guide - Page 188
/charger, Battery, AV/S input/output cable, Infrared remote control (not provided with DZ-MV750MA), Lithium battery for remote control (not provided with DZ-MV750MA), Lens cap, Lens cap string, Shoulder strap, Power cable, DC power cord, Software CD-ROM, PC connection cable, Single-sided 8 cm DVD - Hitachi DZ-GX20MA | Owners Guide - Page 189
HITACHI SERVICE FACILITY IN CANADA Please consult the following telephone number Service Direct: 1-800-HITACHI (1-800-448-2244) TO ORDER ACCESSORIES (Canada only) BY PHONE HITACHI : Models: Trade Name: DVD VIDEO CAMERA/RECORDER DZ-GX20MA/DZ-MV780MA/DZ-MV750MA HITACHI This device complies with part - Hitachi DZ-GX20MA | Owners Guide - Page 190
.......41 Charging 40 Recordable time on DVD video camera/ recorder 42 Removing from DVD video camera/ recorder 41 Setting Up 40 BATTERY EJECT button 41 Beep 103 Black & White fade 117 Brightness 101 C Camera Functions Setup 89 Capacity 136 Card Available 28 Capacity 30, 136 Category - Hitachi DZ-GX20MA | Owners Guide - Page 191
Low Light (Program AE 90 M MF 75 MIC.Filter 93 Move 132 N Normal Menu 87 O Optical 10× zoom 45 Program 124 Play 125 Switch 124 Title 125 Program AE 89 Protect Disc 136 Q Quality (Card 97 Quick Menu 64 QUICK MENU button 65 R Record button 50 Recording indicator 104 Remote control 34 - Hitachi DZ-GX20MA | Owners Guide - Page 192
be used because of mechanical problem, you may temporarily use This Software on another piece of equipment. (b) Although This Software contains by any means, use these components on different computers at the same time. Article 2 Copyrights The copyrights of This Software, attached manual, etc. are - Hitachi DZ-GX20MA | Owners Guide - Page 193
, DVD, VCR, Camcorder Products, AC Adapter Charger software, or from abuse, neglect, accident or any other cause beyond the control of Limited Warranty Registration Hitachi. C. Unpacking, set-up or installation, (for your records) adjustment of customer operated controls, user instruction - Hitachi DZ-GX20MA | Owners Guide - Page 194
PARTS (Except Battery) • CAMCORDER Products For information concerning repairs, operation, • AC ADAPTER CHARGER technical assistance or for referral to the location of your nearest Authorized Service Facility or Parts A Conditions of LY D Hitachi Limited Warranty A These Hitachi Products are - Hitachi DZ-GX20MA | Owners Guide - Page 195
serve customer needs, please complete this card and return it to Hitachi America, Ltd., Home Electronics Division. Completion of this card is not required in order to validate your Hitachi limited warranty, but would assist us in developing better services and programs for our customers." (Please - Hitachi DZ-GX20MA | Owners Guide - Page 196
Register your product on-line at hitachi.com/tv or mail this portion to the following address Attn:Warranty Department Hitachi America, Ltd., Home Electronics Division 900 Hitachi Way Chula Vista, CA 91914-3556 - Hitachi DZ-GX20MA | Owners Guide - Page 197
by any other organization which is not authorized by Hitachi Canada Ltd. 11 The replacement of video camera pickup element if the pick up element has been over-exposed to an intense source of light. 12 Batteries, earphone, antennas, accessories and external parts such as cabinet and knobs. A A IN - Hitachi DZ-GX20MA | Owners Guide - Page 198
Ontario L5N 6C3 CANADA IMPORTANT NOTICE: This warranty will not apply to product purchased outside of Canada OR sold by any organization other than HITACHI CANADA LTD AVIS IMPORTANT: Notre garantie ne couvre pas les produits achetés à l'extérieur du Canada OU vendus par toute organisation autre que - Hitachi DZ-GX20MA | Owners Guide - Page 199
to better serve our customers' needs, please complete this card and return it to Hitachi Canada Ltd. Completion of this card is not required in order to validate your Hitachi limited warranty, but would assist us in developing better services and programs for our customers." (Please print or type - Hitachi DZ-GX20MA | Owners Guide - Page 200
Register your product on-line at Hitachi.ca or mail to the address on this card. Enregistrez votre produit en ligne à Hitachi.ca ou par la poste à l'adresse indiquée sur cette carte. ATT:WARRANTY DEPARTMENT HITACHI CANADA LTD. 2495 MEADOWPINE Blvd., MISSISSAUGA ON L5N 6C3
-
 1
1 -
 2
2 -
 3
3 -
 4
4 -
 5
5 -
 6
6 -
 7
7 -
8
-
9
-
10
-
11
-
12
-
13
-
14
-
15
-
16
-
17
-
18
-
19
-
20
-
21
-
22
-
23
-
24
-
25
-
26
-
27
-
28
-
29
-
30
-
31
-
32
-
33
-
34
-
35
-
36
-
37
-
38
-
39
-
40
-
41
-
42
-
43
-
44
-
45
-
46
-
47
-
48
-
49
-
50
-
51
-
52
-
53
-
54
-
55
-
56
-
57
-
58
-
59
-
60
-
61
-
62
-
63
-
64
-
65
-
66
-
67
-
68
-
69
-
70
-
71
-
72
-
73
-
74
-
75
-
76
-
77
-
78
-
79
-
80
-
81
-
82
-
83
-
84
-
85
-
86
-
87
-
88
-
89
-
90
-
91
-
92
-
93
-
94
-
95
-
96
-
97
-
98
-
99
-
100
-
101
-
102
-
103
-
104
-
105
-
106
-
107
-
108
-
109
-
110
-
111
-
112
-
113
-
114
-
115
-
116
-
117
-
118
-
119
-
120
-
121
-
122
-
123
-
124
-
125
-
126
-
127
-
128
-
129
-
130
-
131
-
132
-
133
-
134
-
135
-
136
-
137
-
138
-
139
-
140
-
141
-
142
-
143
-
144
-
145
-
146
-
147
-
148
-
149
-
150
-
151
-
152
-
153
-
154
-
155
-
156
-
157
-
158
-
159
-
160
-
161
-
162
-
163
-
164
-
165
-
166
-
167
-
168
-
169
-
170
-
171
-
172
-
173
-
174
-
175
-
176
-
177
-
178
-
179
-
180
-
181
-
182
-
183
-
184
-
185
-
186
-
187
-
188
-
189
-
190
-
191
-
192
-
193
-
194
-
195
-
196
-
197
-
198
-
199
-
200
 |
 |

English
DZ-GX20MA
DZ-MV780MA/DZ-MV750MA
HITACHI AMERICA, LTD.
HOME ELECTRONICS DIVISION
900 Hitachi Way
Chula Vista, CA 91914-3556
Service Hotline: 1-800-HITACHI
(1-800-448-2244)
HITACHI CANADA LTD.
DIGITAL MEDIA DIVISION
2495 Meadowpine Blvd.
Mississauga, Ontario L5N 6C3
CANADA
Service Direct: 1-800-HITACHI
(1-800-448-2244)
QR35742 ©Hitachi, Ltd. 2005
Printed in Japan OG-G(I)
Instruction Manual
This manual was printed
with soy based ink.
Printed on recycled paper
DVDCAM PC Software Support Center
URL http://dvdcam-pc.support.hitachi.ca/
Thank you for buying a Hitachi product. Please take time to become familiar with the manual and how it
is set up. Keep it handy for future reference.
Be sure to read page 181 before unpacking the provided CD-ROM.
The illustrations of DZ-MV780MA and DZ-MV750MA are
shown only on the front cover of this instruction manual.
The method for operating the DZ-MV780MA and DZ-MV750MA
is the same as that for DZ-GX20MA.
DVD-RAM
DVD-RW
DVD-R
DZ-GX20MA
DZ-MV780MA
DZ-MV750MA