Hitachi WR16SA Instruction Manual
Hitachi WR16SA - 4.2 Amp Electric Impact Wrench Manual
 |
UPC - 717709009035
View all Hitachi WR16SA manuals
Add to My Manuals
Save this manual to your list of manuals |
Hitachi WR16SA manual content summary:
- Hitachi WR16SA | Instruction Manual - Page 1
Model Modèle Modelo WR 16SA Impact Wrench Clé à choc Llave de impacto INSTRUCTION MANUAL AND SAFETY INSTRUCTIONS WARNING Improper and unsafe use of this power tool can result in death or serious bodily injury! This manual contains important information about product safety. Please read and - Hitachi WR16SA | Instruction Manual - Page 2
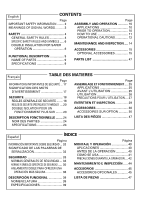
6 DOUBLE INSULATION FOR SAFER MAINTENANCE AND INSPECTION .... 14 OPERATION 8 ACCESSORIES 15 FUNCTIONAL DESCRIPTION 9 NAME OF PARTS 9 OPTIONAL ACCESSORIES 15 PARTS LIST 47 SPECIFICATIONS 9 Français TABLE DES MATIERES Page Page INFORMATIONS IMPORTANTES DE SÉCURITÉ ... 17 ASSEMBLAGE - Hitachi WR16SA | Instruction Manual - Page 3
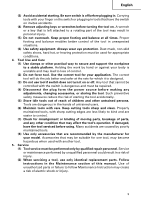
or machine damage are identified by WARNINGS on the power tool and in this Instruction Manual. NEVER use this power tool in a manner that has not been specifically recommended by HITACHI. MEANINGS OF SIGNAL WORDS WARNING indicates a potentially hazardous situations which, if ignored, could result - Hitachi WR16SA | Instruction Manual - Page 4
instructions. Failure to follow all instructions listed below, may result in electric shock, fire and/or serious personal injury. SAVE THESE INSTRUCTIONS oil, sharp edges or moving parts. Replace damaged cords immediately. Damaged cords increase the risk of electric shock. (5) When operating a - Hitachi WR16SA | Instruction Manual - Page 5
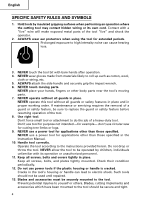
or other practical way to secure and support the workpiece to a stable platform. servicing a tool, use only identical replacement parts. Follow instructions in the Maintenance section of this manual. Use of unauthorized parts or failure to follow Maintenance Instruction may create a risk of electric - Hitachi WR16SA | Instruction Manual - Page 6
impact wrench. 6. NEVER touch moving parts. NEVER place your hands, fingers or other body parts near the tool's moving parts. 7. NEVER operate without all guards in place. NEVER operate this tool without all guards or safety features in place and in proper working order. If maintenance or servicing - Hitachi WR16SA | Instruction Manual - Page 7
arrange for repairs by a Hitachi authorized service center. 17. NEVER leave parts. Do not wipe them with such solvents. Wipe plastic parts the tightening torque by a torque wrench before use in order to ascertain the correct the hex. socket securely onto the anvil. If the hex. socket is - Hitachi WR16SA | Instruction Manual - Page 8
must still follow the normal electrical safety precautions given in this Instruction Manual, including not using the power tool in wet environments. To keep the double insulation system effective, follow these precautions: ⅜ Only HITACHI AUTHORIZED SERVICE CENTER should disassemble or assemble this - Hitachi WR16SA | Instruction Manual - Page 9
have first read and understood all safey instructions contained in this manual. Some illustrations in this Instruction Manual may show details or attachments that differ from those on your own power tool. NAME OF PARTS Anvil Air Vents Hammer Housing Case Nameplate Brush Cap (inside the tail - Hitachi WR16SA | Instruction Manual - Page 10
site is placed under appropriate conditions conforming to prescribed precautions. 6. Attacking the side handle The position of the side handle attached to the hammer case can be changed by unscrewing the handle. (Right hand screw) Turn the handle to the desired position for the job and secure the - Hitachi WR16SA | Instruction Manual - Page 11
in the square part of the anvil with the hole in the hex. socket. Then push the plunger, and mount the hex. socket on the anvil. Check that the proper tightening. In this case, stop impact on the nut and hold the bolt head with a wrench before restarting impact, or manually tighten the bolt and nut - Hitachi WR16SA | Instruction Manual - Page 12
30) 147 (20) M16 × 55 (F10T) Rating 120V 110V to 90%. When extending the power 73 (10) cord, - ness for fitting to the nut or anvil, consequently resulting in loss of tightening torque. Impact Wrench firmly with both hands by the body handle and the side handle. In this case hold the wrench in - Hitachi WR16SA | Instruction Manual - Page 13
before the job with a hand torque wrench. Factors affecting the tightening torque are as bolts are to be tightened. (5) Using optional parts: The tightening torque is reduced a little when tightness to the fitting between the nut or anvil, consequently resulting in loss of tightening torque. Using - Hitachi WR16SA | Instruction Manual - Page 14
to the fitting between the nut or anvil, consequently resulting in loss of tightening immediately. WARNING: Using this impact wrench with loosen screws is extremely parts will be used, all service and repairs must be performed by a HITACHI AUTHORIZED SERVICE CENTER, ONLY. 6. Service parts list - Hitachi WR16SA | Instruction Manual - Page 15
or mechanical damage. NOTE: Accessories are subject to change without any obligation on the part of the HITACHI. OPTIONAL ACCESSORIES ...........sold separately 1. Variety of sockets Although the Hitachi Impact Wrench is delivered with only one standard socket, ample sockets are available to cover - Hitachi WR16SA | Instruction Manual - Page 16
only when the machine is applied to the nut or bolt at a right angle. NOTE: Specifications are subject to change without any obligation on the part of the HITACHI. 16 - Hitachi WR16SA | Instruction Manual - Page 17
de ce mode d'emploi et dans les sections qui contiennent les instructions de fonctionnement et d'entretien. Les dangers qui doivent être évités manière qui n'est pas spécifiquement recommandée par HITACHI. SIGNIFICATION DES MOTS D'AVERTISSEMENT AVERTISSEMENT indique des situations potentiellement - Hitachi WR16SA | Instruction Manual - Page 18
ci-dessous peut entraîner une électrocution, un incendie et/ou de sérieuses blessures personnelles. CONSERVER CES INSTRUCTIONS 1. Zone de travail (1) Garder la zone de travail propre et bien éclairée. Les établis mal rangés et les zones sombres invitent aux accidents. (2) Ne pas - Hitachi WR16SA | Instruction Manual - Page 19
Français moment d'inattention lors de l'utilisation de l'outil motorisé peut entraîner de sérieuses blessures personnelles. (2) S'habiller correctement. Ne pas porter des vêtements larges ou des bijoux. Attacher les cheveux longs. Tenir ses cheveux, vêtements et ses gants éloignés des parties - Hitachi WR16SA | Instruction Manual - Page 20
de la section d'entretien de ce mode d'emploi. L'utilisation de pièces non autorisées ou un non respect des instructions d'entretien peut créer un risque d'électrocution ou de blessures. REGLES DE SECURITE SPECIFIQUES ET SYMBOLES 1. Tenir les outils par les surfaces de grippage lors - Hitachi WR16SA | Instruction Manual - Page 21
, fait des bruits étranges ou sans cela paraît défectueux, arrêter de l'utiliser immédiatement et le faire réparer par un centre de service Hitachi autorisé. 17. NE JAMAIS laisser fonctionner l'outil sans surveillance. Le mettre hors tension. Ne pas abandonner l'outil avant qu'il ne soit compl - Hitachi WR16SA | Instruction Manual - Page 22
Français Essuyer les parties en plastique avec un chiffon doux légèrement imbibé d'une solution d'eau savonneuse et sécher minutieusement. 20. TOUJOURS porter des lunettes de protection qui respectent les dernières révisions du Standard ANSI Z87.1. 21. Lors d'un travail en hauteur, s'assurer qu'il - Hitachi WR16SA | Instruction Manual - Page 23
Seuls les CENTRES DE SERVICE AUTORISES HITACHI peuvent démonter et remonter cet outil motorisé et uniquement des pièces de rechange HITACHI garanties d'origine doivent être le plastique risquerait de se dissoudre. CONSERVER CES INSTRUCTIONS ET LES METTRE A LA DISPOSITION DES AUTRES UTILISATEURS ET PROPRIETAIRES - Hitachi WR16SA | Instruction Manual - Page 24
et un entretien de l'outil motorisé. NE JAMAIS utiliser ni entreprendre une révision de l'outil sans avoir d'abord lu et compris toutes les instructions de sécurité contenues dans ce manuel. Certaines illustrations dans ce mode d'emploi peuvent montrer des détails ou des accessoires différents de - Hitachi WR16SA | Instruction Manual - Page 25
Français ASSEMBLAGE ET FONCTIONNEMENT APPLICATIONS ⅜ Serrer et desserrer diverses sortes de boulons et d'écrous. AVANT L'UTILISATION 1. Source d'alimentation S'assurer que la source d'alimentation qui doit être utilisée est conforme à la source d'alimentation requise spécifiée sur la plaque signalé - Hitachi WR16SA | Instruction Manual - Page 26
Français 7. Mise en place de la douille (Fig. 2) Aligner le piston, situé dans la partie carrée de l'enclume, avec l'orifice de la fiche hexagonale. Ensuite, enfoncer le piston et la fiche hexagonale dans l'enclume. S'assurer que le piston est complètement engagé dans l'orifice. Lorsqu'on enlève la - Hitachi WR16SA | Instruction Manual - Page 27
ée sur une ligne de 110 volts, le couple de serrage ft-lbs (kg-m) 294 (40) 220 (30) 147 (20) M16 × 55 (F10T) Puissance nominale 120V 110V disponible sera réduit de 70 à 90%. 73 (10) Utiliser un cordon de rallonge le plus court possible. Quand la tension secteur est basse et qu - Hitachi WR16SA | Instruction Manual - Page 28
Français 6. Vérifier le couple de serrage Les facteurs suivants contribuent à une réduction du couple de serrage. Ainsi, vérifier le couple de serrage réel désiré en serrant quelques boulons avec une clé dynamométrique main avant d'effectuer le travail. Facteurs influençant le couple de serrage. (1) - Hitachi WR16SA | Instruction Manual - Page 29
PRECAUCIÓN : Les réparations, modifications et inspections des outils électriques Hitachi doivent être confiées à un service aprèsvente Hitachi agréé. Il sera utile de présenter cette liste de pièces au service aprèsvente Hitachi agréé lorsqu'on apporte un outil nécessitant des réparations ou tout - Hitachi WR16SA | Instruction Manual - Page 30
attachement ou accessoire peut être dangereux et peut causer des blessures ou des dommages mécaniques. REMARQUE: Les accessoires sont sujets à changement sans obligation de la part de HITACHI. ACCESSOIRES SUR OPTION vendus séparément D B 1. Variété douilles Bien que la visseuse à percussion de - Hitachi WR16SA | Instruction Manual - Page 31
uniquement lorsque la machine est appliquée sur l'écrou ou le boulon à angle droit. REMARQUE: Les spécifications sont sujettes à modification sans aucune obligation de la part de HITACHI. 31 - Hitachi WR16SA | Instruction Manual - Page 32
, los riesgos están identificados con ADVERTENCIAS en dicha herramienta y en este Manual de instrucciones. No utilice NUNCA esta herramienta eléctrica de ninguna forma que no esté específicamente recomendada por HITACHI. SIGNIFICADO DE LAS PALABRAS DE SEÑALIZACIÓN ADVERTENCIA indica situaciones - Hitachi WR16SA | Instruction Manual - Page 33
de alimentación para transportar la herramienta ni para desconectarla del tomacorriente. Mantenga el cable alejado del calor, aceite, bordes cortantes, o partes móviles. Reemplace inmediatamente cualquier cable dañado. Un cable dañado puede ser la causa de descargas eléctricas. (5) Cuando utilice - Hitachi WR16SA | Instruction Manual - Page 34
produzcan accidentes. (4) Quite las llaves de ajuste y abra los interruptores antes de poner en funcionamiento la herramienta. Una llave dejada en una parte móvil de la herramienta podría resultar en lesiones. (5) No sobrepase su alcance. Mantenga en todo momento un buen equilibrio. El conservar en - Hitachi WR16SA | Instruction Manual - Page 35
de mantenimiento de este manual. La utilización de piezas no autorizadas, o el no seguir las indicaciones del Manual de instrucciones puede crear NUNCA las piezas móviles. NO coloque NUNCA sus manos, dedos, ni demás partes del cuerpo cerca de las piezas móviles de la herramienta. 7. NO utilice NUNCA - Hitachi WR16SA | Instruction Manual - Page 36
NUNCA una herramienta eléctrica para aplicaciones no especificadas en este Manual de instrucciones. 10. Maneje correctamente la herramienta. Maneje la herramienta y solicite su arreglo a un centro de reparaciones autorizado por Hitachi. 17. NO deje NUNCA la herramienta en funcionamiento desatendida. - Hitachi WR16SA | Instruction Manual - Page 37
disolventes, como gasolina, diluidor de pintura, bencina, tetracloruro de carbono, y alcohol pueden dañar o rajar las partes de plástico. No las limpie con tales disolventes. Limpie las partes de plástico con un paño suave ligeramente humedecido en agua jabonosa y después séquelas bien. 20. SIEMPRE - Hitachi WR16SA | Instruction Manual - Page 38
seguridad eléctrica ofrecidas en este Manual de instrucciones, incluyendo la no HITACHI. ⅜ Limpie el exterior de la herramienta eléctrica solamente con un paño suave humedecido en agua jabonosa, y después séquela bien. No utilice disolventes, gasolina, ni diluidor de pintura para limpiar las partes - Hitachi WR16SA | Instruction Manual - Page 39
úe el mantenimiento de la herramienta antes de leer y comprender todas las instrucciones de seguridad contenidas en este manual. Algunas ilustraciones de este Manual de Instrucciones pueden mostrar detalles o accesorios diferentes a los de la propia herramienta eléctrica. NOMENCLATURA Orificios de - Hitachi WR16SA | Instruction Manual - Page 40
Español MONTAJE Y OPERACIÓN APLICACIONES ⅜ Para apretar y aflojar diversos tipos de pernos y tuercas. ANTES DE LA OPERACIÓN 1. Fuente de alimentación Cerciórese de que la fuente de alimentación que vaya a utilizar cumpla los requisitos indicados en la placa de características del producto. 2. - Hitachi WR16SA | Instruction Manual - Page 41
Español 7. Montaje del receptáculo (Fig.2) Alinee el émbolo situado en la parte cuadrada de la boca con el orificio del cubo hexagonal. Después empuje el émbolo y monte el cubo hexagonal en la boca. Compruebe que el émbolo - Hitachi WR16SA | Instruction Manual - Page 42
ón en la tensión de la línea reduce la tensión de apriete. Por ejemplo, si se utiliza un 220 (30) 147 (20) 110V aprietatuercas de 120V en una línea de 110V, la tensión de apriete se reducirá 73 (10) en un 70-90%. Cuando se extienda el cable de la alimentación, utilizar un - Hitachi WR16SA | Instruction Manual - Page 43
a reducir la tensión de apriete. Comprobar por ello la tensión de apriete necesaria atornillando previamente algunos tornillos con una llave de tuercas manual. Factores que afectan a la tensión de apriete. (1) Tensión de la línea: La tensión de apriete disminuye cuando la tensión de la línea - Hitachi WR16SA | Instruction Manual - Page 44
, la inspección y el reemplazo de las escobillas de esta herramienta deberán realizarse SOLAMENTE en un CENTRO DE REPARACIONES AUTORIZADO POR HITACHI. 5. Mantenimiento y reparación Todas las herramientas eléctricas de calidad requieren de vez en cuando el servicio de mantenimiento o el reemplazo - Hitachi WR16SA | Instruction Manual - Page 45
otros accesorios puede resultar peligrosa y causar lesiones o daños mecánicos. NOTA: Los accesorios están sujetos a cambio sin ninguna obligación por parte de HITACHI. ACCESORIOS OPCIONALES De venta por separado 1. Variedad de receptáculos A pesar de que la llave de impacto se envía con un recept - Hitachi WR16SA | Instruction Manual - Page 46
) Emplee este accesorio sólo cuando utilice la máquina para colocar tuercas o tornillos en ángulo recto. NOTA: Las especificaciones están sujetas a cambio sin ninguna obligación por parte de HITACHI. 46 - Hitachi WR16SA | Instruction Manual - Page 47
47 A BC D 1 323-767 1 2 323-753 4 M5×35 3 323-765 1 "1, 4, 5" 4 318-704 1 5 323-766 1 6 985-207 1 "13, 14" 7 959-150 2 D6.35 8 323-764 1 9 959-155 30 D3.97 10 323-763 1 11 323-761 1 12 323-760 1 13 985-209 1 14 985-208 1 15 985-169 2 16 323-762 1 17 318-446 2 18 955-124 1 19 690-7ZZ 1 6907ZZ - Hitachi WR16SA | Instruction Manual - Page 48
y realice el trabajo utilizando el equipamiento apropiado, tal como las máscares para el polvo especialmente diseñados para eliminar las partículas minúsculas. Issued by Hitachi Koki Co., Ltd. Shinagawa Intercity Tower A, 15-1, Konan 2-chome, Minato-ku, Tokyo 108-6020, Japan Distributed by
-
 1
1 -
 2
2 -
 3
3 -
 4
4 -
 5
5 -
 6
6 -
 7
7 -
8
-
9
-
10
-
11
-
12
-
13
-
14
-
15
-
16
-
17
-
18
-
19
-
20
-
21
-
22
-
23
-
24
-
25
-
26
-
27
-
28
-
29
-
30
-
31
-
32
-
33
-
34
-
35
-
36
-
37
-
38
-
39
-
40
-
41
-
42
-
43
-
44
-
45
-
46
-
47
-
48
 |
 |
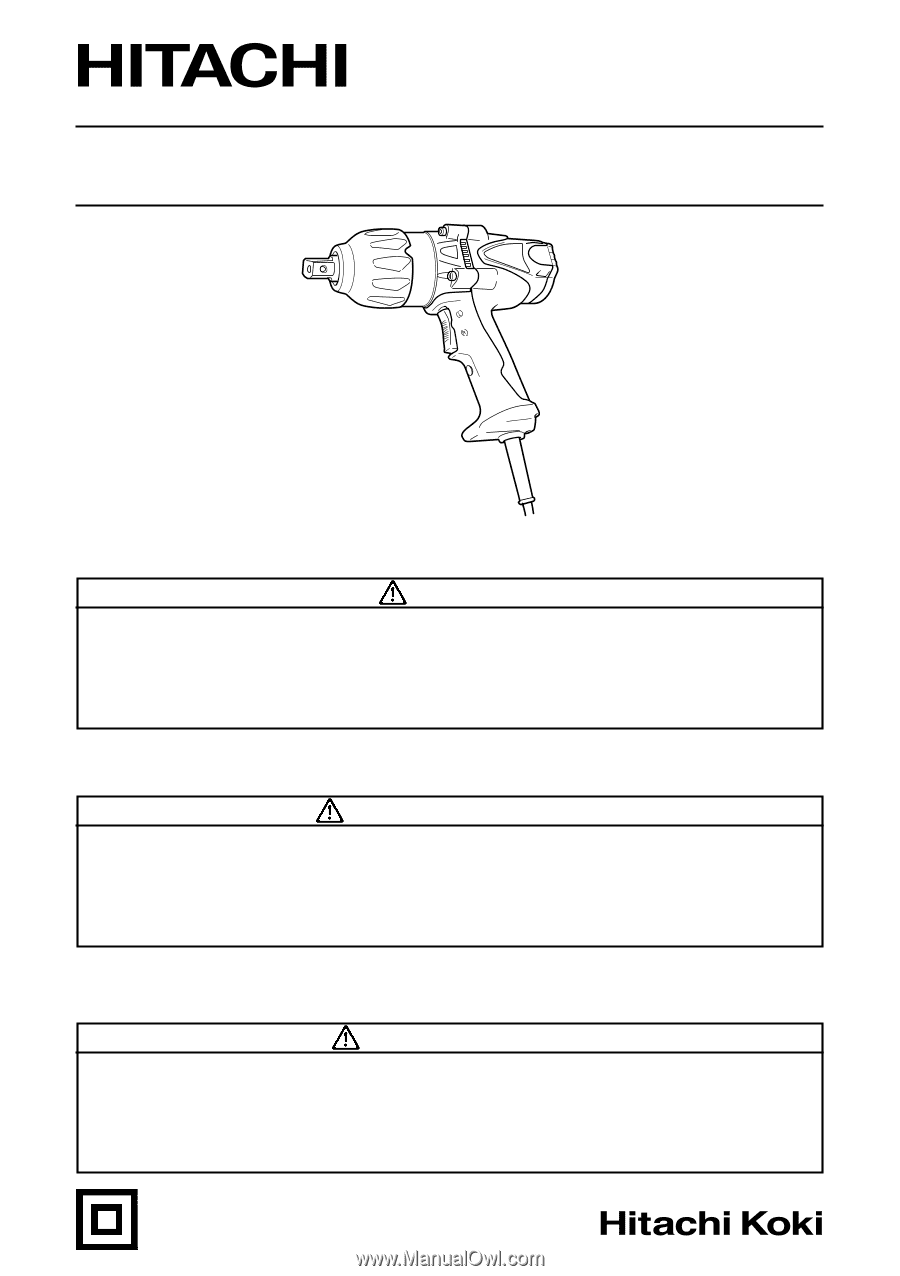
WR 16SA
DOUBLE INSULATION
DOUBLE ISOLATION
AISLAMIENTO DOBLE
MODE D’EMPLOI ET INSTRUCTIONS DE SECURITE
AVERTISSEMENT
Une utilisation incorrecte et dangereuse de cet outil motorisé peut entraîner la
mort ou de sérieuses blessures corporelles!
Ce mode d’emploi contient d’importantes informations à propos de la sécurité
de ce produit. Prière de lire et de comprendre ce mode d’emploi avant d’utiliser
l’outil motorisé. Garder ce mode d’emploi à la disponibilité des autres utilisateurs
avant qu’ils utilisent l’outil motorisé.
INSTRUCTION MANUAL AND SAFETY INSTRUCTIONS
WARNING
Improper and unsafe use of this power tool can result in death or serious bodily
injury!
This manual contains important information about product safety. Please read
and understand this manual before operating the power tool. Please keep this
manual available for others before they use the power tool.
MANUAL DE INSTRUCCIONES E INSTRUCCIONES DE SEGURIDAD
ADVERTENCIA
¡La utilización inapropiada e insegura de esta herramienta eléctrica puede
resultar en lesiones serias o en la muerte!
Este manual contiene información importante sobre la seguridad del producto.
Lea y comprenda este manual antes de utilizar la herramienta eléctrica.
Guarde
este manual para que puedan leerlo otras personas antes de que utilicen la
herramienta eléctrica.
Model
Impact Wrench
Modèle
Clé à choc
Modelo
Llave de impacto