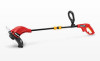
Homelite UT41110 User Manual - Page 13
Maintenance - replacement spool
 |
View all Homelite UT41110 manuals
Add to My Manuals
Save this manual to your list of manuals |
Page 13 highlights
MAINTENANCE GENERAL MAINTENANCE Avoid using solvents when cleaning plastic parts. Most plastics are susceptible to damage from various types of commercial solvents and may be damaged by their use. Use clean cloths to remove dirt, dust, oil, grease, etc. Spool Retainer tABS WARNING: Do not at any time let brake fluids, gasoline, petroleumbased products, penetrating oils, etc., come in contact with plastic parts. Chemicals can damage, weaken or destroy plastic which may result in serious personal injury. Periodically, clean all foreign material from the trimmer head vents. You can often make repairs described here. For other repairs, have the trimmer serviced by an authorized service dealer. SPOOL REPLACEMENT See Figure 12. Use only .065 in. diameter monofilament string. Use original manufacturer's replacement string for best performance. Unplug the string trimmer. Push in tabs on side of spool retainer. Pull spool retainer up to remove. Remove spool. To install the new spool, make sure the two strings are captured in the slots opposite each other on the new spool. Make sure the end of each string is extended approximately 6 in. beyond each slot. Install the new spool so that the strings and slots align with the eyelets in the string head. Thread the strings into the eyelets. Pull the strings extending from the string head so the string releases from the slots in the spool. Reinstall the spool retainer by depressing tabs into slots and pushing down until spool retainer clicks into place. STRING REPLACEMENT See Figures 12 - 13. Unplug the string trimmer. Remove the spool from the string head. NOTE: Remove any old string remaining on the spool. Cut two pieces of string, each being approximately 9 ft. (2.7 m) long. Use only .065 in. (1.65 mm) diameter monofilament string. Insert the first string into the anchor hole in the upper part of the spool. Wind the first string around the upper part of the spool counterclockwise, as shown by the arrows on the spool. Place string in the slot on upper spool flange, leaving about 6 in. (152 mm) extended beyond the slot. Do not overfill. After winding the string, there should be Spool Slots SPOOL Fig. 12 WIND CLOCKWISE Spool HOLE Fig. 13 at least 1/4 in. (6 mm) between the wound string and the outside edge of the spool. Repeat above step with second string, using the bottom part of spool. Do not overfill. Replace the plastic retainer, spool, and the spool retainer. Refer to Spool Replacement earlier in this manual. STORing the trimmer Depress telescoping boom coupler and set at shortest setting. Clean all foreign material from the trimmer. Store it in a place that is inaccessible to children. Keep away from corrosive agents such as garden chemicals and de-icing salts. Page 13 - English
-
 1
1 -
2
-
3
-
4
-
5
-
6
-
7
-
 8
8 -
 9
9 -
 10
10 -
 11
11 -
 12
12 -
 13
13 -
 14
14 -
 15
15 -
 16
16
 |
 |
