Honeywell NS1 User Guide
Honeywell NS1 Manual
 |
View all Honeywell NS1 manuals
Add to My Manuals
Save this manual to your list of manuals |
Honeywell NS1 manual content summary:
- Honeywell NS1 | User Guide - Page 1
of the Master Cards. The programmed steps mentioned in this Quick Guide represent a limited number of programming functions that can be performed on an NS1. Please refer to the NS1 Manage manual (TD0099) for all the possibilities. NS1 LEDS The NS1 is provided with seven LEDs which serve as status - Honeywell NS1 | User Guide - Page 2
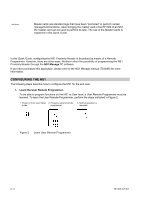
other ways. Northern offers the possibility of programming the NS1 Proximity Reader through the NS1 Manage PC software. If you have purchased this application, please refer to the NS1 Manage manual (TD0099) for more information. CONFIGURING THE NS1 The following steps describe how to configure the - Honeywell NS1 | User Guide - Page 3
option code. 3. Normal operation is resumed. Figure 3 Entering the Protect Option 3. Set NS1 to sleep mode on User level. To proceed with the following steps, the NS1 must be set to User Sleep mode first. To set the NS1 in User sleep mode, perform the steps indicated in Figure 4. 1. Enter Program - Honeywell NS1 | User Guide - Page 4
4, learn the Add Master and present the Program Master 4 times to resume normal Operation. Upon presenting the Program Master, a specific LED of the NS1 will go ON, indicating which Master can be added. 1. Enter program mode by presenting the Program Master. 2. Present Program Master again and the - Honeywell NS1 | User Guide - Page 5
are to be added to the system, they must be programmed in the NS1. An easy way to add cards is by using the Add Master card WITH THE VOID MASTER Using Void Master is an easy way of removing cards from the NS1, provided that the cards that have to be removed are available. Perform the steps indicated - Honeywell NS1 | User Guide - Page 6
void mode . 7. Resume normal operation. Figure 9 Using the User Remote Programmer to Void Cards NOTE: In step 3, tag type must be entered. An overview of the different types is indicated below: NS1 Tag types Description 0 Cross Point (H4201) 9 EM Marin (H4201/H4001) 6 - 8 TD1168 rev1003 - Honeywell NS1 | User Guide - Page 7
use of the Night Lock master is to switch off the Night Lock mode to gain access to a building. For example, present the Night Lock master to the NS1 in the morning to grant Normal Card users access. Figure 11 is this use of the Night Lock master explained. 1. Night Lock mode. 2. Switch - Honeywell NS1 | User Guide - Page 8
Honeywell Access Systems 135 West Forest Hill Avenue Oak Creek, WI 53154 PH: 414-766-1700 FAX: 414-766-1798 www.nciaccessworld.com 8 - 8 TD1168 rev1003
-
 1
1 -
 2
2 -
 3
3 -
 4
4 -
 5
5 -
 6
6 -
 7
7 -
8
 |
 |

TD1168 rev1003
1 - 8
NS1 User Guide
INTRODUCTION
The NS1 Proximity Reader has two operating levels:
•
Installer Level
. On this level the NS1 can be configured by the Installer. This level is also used to do
typical Installer options.
•
User Level.
On this level typical user options can be set, such as adding and voiding user cards,
setting the door open time, etc.
This Quick Guide explains the User settings that are to be taken to configure the NS1 for the end user,
and the use of the Master Cards.
The programmed steps mentioned in this Quick Guide represent a limited number of programming
functions that can be performed on an NS1. Please refer to the NS1 Manage manual (TD0099) for all the
possibilities.
NS1 LEDS
The NS1
is provided with seven LEDs which serve as status indicators. Figure 1 illustrates their function.
Figure 1
NS1 LED Indicators
PROGRAMMING DEVICES
1
2
3
5
6
4
7
8
9
0
*
#
A remote programmer can be used to program function in the NS1 by bringing
the remote programmer into the RF field of the NS1.
A programmed function may look like:
The blank “n” in the function indicates a leading zero. Leading zeroes, however,
do not have to be entered.
Contrary to a remote programmer on Installer level which can program all
NS1 functions, a remote programmer on User level can only program the
user specific functions. Please refer to the master manual for an overview of
the differences.
Led 1 (yellow)
Indicates that a card/remote programmer is within range of the NS1.
Led 2 (green)
Indicates that access is granted or that the NS1 is in Unlock Mode.
Led 3 (red)
Indicates that the door lock is closed.
Led 4 (red)
Indicates that the NS1 is in Night Lock mode.
Led 5 (red)
Indicates that the NS1 is in Add mode, and that cards are added.
Led 6 (red)
Indicates that the NS1 is in Void mode, and that cards are voided.
Led 7 (red)
Indicates that the NS1 is in Program Mode.