Hotpoint RGB508PEHCT Installation Instructions
Hotpoint RGB508PEHCT - HotpointR 30" Gas Range Manual
 |
UPC - 084691085171
View all Hotpoint RGB508PEHCT manuals
Add to My Manuals
Save this manual to your list of manuals |
Hotpoint RGB508PEHCT manual content summary:
- Hotpoint RGB508PEHCT | Installation Instructions - Page 1
Instructions 24-39 Anti-Tip Device . . . . .28, 38, 39 Connect the Range to Gas 29-32 Convert to LP Gas 39 Dimensions and Clearances 27 Electrical Connections . .33, 34 Level the Range 38 Light the Pilots 34-37 Troubleshooting Tips . .40-42 Accessories 45 Consumer Support Consumer Support - Hotpoint RGB508PEHCT | Installation Instructions - Page 2
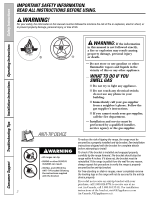
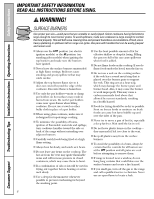
Consumer Support Troubleshooting Tips Installation Instructions Operating Instructions Safety Instructions IMPORTANT SAFETY INFORMATION. READ ALL INSTRUCTIONS BEFORE USING. WARNING! For your safety, the information in this manual must be followed to minimize the risk of fire or explosion, electric - Hotpoint RGB508PEHCT | Installation Instructions - Page 3
with the Installation Instructions. Any adjustment and service should be performed only by qualified gas range installers or service technicians. I Do not attempt to repair or replace any part of your range unless it is specifically recommended in this manual. All other service should be referred - Hotpoint RGB508PEHCT | Installation Instructions - Page 4
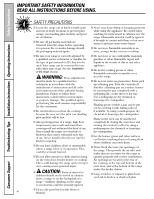
READ ALL INSTRUCTIONS BEFORE USING. Consumer Support Troubleshooting Tips Installation Instructions Operating Instructions Safety Instructions SAFETY PRECAUTIONS I Locate the range out of kitchen traffic path and out of drafty locations to prevent pilot outage (on standing pilot models) and poor - Hotpoint RGB508PEHCT | Installation Instructions - Page 5
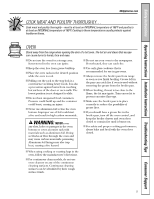
Instructions Operating Instructions Installation Instructions Troubleshooting Tips Consumer Support that is recommended for use in gas ovens. I Always remove the broiler pan from range as soon as you finish the manufacturer's directions. I For continuous clean models, do not use oven cleaners on any - Hotpoint RGB508PEHCT | Installation Instructions - Page 6
IMPORTANT SAFETY INFORMATION. READ ALL INSTRUCTIONS BEFORE USING. Consumer Support Troubleshooting Tips Installation Instructions Operating Instructions Safety Instructions WARNING! SURFACE BURNERS Use proper pan size-avoid pans that are unstable or easily tipped. Select cookware having flat - Hotpoint RGB508PEHCT | Installation Instructions - Page 7
Instructions Troubleshooting Tips Consumer Support GEAppliances.com SURFACE BURNERS (cont.) I Always turn the surface burner controls off before removing cookware. I Do not lift the cooktop on sealed burner models. Lifting the cooktop can lead to damage and improper operation of the range - Hotpoint RGB508PEHCT | Installation Instructions - Page 8
Consumer Support Troubleshooting Tips Installation Instructions Operating Instructions Safety Instructions Using the gas surface burners. Throughout this manual, features and appearance may vary from your model. Before Lighting a Gas Burner I If drip pans are supplied with your range; they should - Hotpoint RGB508PEHCT | Installation Instructions - Page 9
Safety Instructions Operating Instructions Installation Instructions Troubleshooting Tips Consumer Support Use a flat-bottomed . In Case of Power Failure (electric ignition models) In case of a power failure, you can light the gas surface burners on your range with a match. Hold a lit match to - Hotpoint RGB508PEHCT | Installation Instructions - Page 10
Support Troubleshooting Tips Installation Instructions Operating Instructions Safety Instructions Using the clock and timer. Throughout this manual, features and appearance may vary from your model the Clock NOTE: When you first plug in the range or after a power failure, the entire Clock/Timer - Hotpoint RGB508PEHCT | Installation Instructions - Page 11
Instructions Operating Instructions Installation Instructions Troubleshooting Tips Consumer Support low rack position (R) for extra large items, such as a large turkey. Oven Control Your oven is controlled by a single OVEN CONTROL knob. It will normally take 30 range ignition models) . Gas will - Hotpoint RGB508PEHCT | Installation Instructions - Page 12
Consumer Support Troubleshooting Tips Installation Instructions Operating Instructions Safety Instructions Using the oven. The oven has a special low rack To do so, place a small sheet of foil on a lower rack several inches below the food. Never entirely cover a rack with aluminum foil. This will - Hotpoint RGB508PEHCT | Installation Instructions - Page 13
Instructions Troubleshooting Tips Consumer Support How to Set the Oven for Broiling Broiling is cooking food by direct heat from above the food. Most fish and tender cuts of meat can be broiled. Follow these directions to keep spattering and smoking to a minimum. Your range Guide Suggestions Both - Hotpoint RGB508PEHCT | Installation Instructions - Page 14
Consumer Support Troubleshooting Tips Installation Instructions Operating Instructions Safety Instructions Using the oven. Broiling Guide The size, weight, thickness, starting temperature and your preference of doneness will affect broiling times. This guide is based on meats at refrigerator - Hotpoint RGB508PEHCT | Installation Instructions - Page 15
Instructions Operating Instructions Installation Instructions Troubleshooting Tips Consumer Support Adjust the Thermostat Pull the OVEN CONTROL knob off the range and look at the back side. To make an adjustment to contain at least 80% fat by weight. Low fat spreads, on the other hand, contain less - Hotpoint RGB508PEHCT | Installation Instructions - Page 16
Consumer Support Troubleshooting Tips Installation Instructions Operating Instructions Safety Instructions Care and cleaning of the range. Be sure electrical power is off and all surfaces are cool before cleaning any part of the range. WARNING: If your range is removed for cleaning, servicing or - Hotpoint RGB508PEHCT | Installation Instructions - Page 17
Instructions Operating Instructions Installation Instructions Troubleshooting Tips Consumer Support Grate Burner cap Burner head Drip pan (if so equipped) Electrode Cooktop GEAppliances.com Sealed Burner Assemblies (on some models) Turn all controls OFF before removing the burner parts range - Hotpoint RGB508PEHCT | Installation Instructions - Page 18
Support Troubleshooting Tips Installation Instructions Operating Instructions Safety Instructions Care and cleaning of the range for 20-30 minutes. 30 minutes. NOTE: Do not use steel wool or scouring powders to clean the burners. Medium head Small head Front of range range Medium cap Large cap Make - Hotpoint RGB508PEHCT | Installation Instructions - Page 19
Safety Instructions Operating Instructions Installation Instructions Troubleshooting Tips Consumer Support GEAppliances.com NOTE: Do not lift the cooktop on sealed burner models. Lifting the cooktop can lead to damage and improper operation of the range. To raise the cooktop: Be sure the burners - Hotpoint RGB508PEHCT | Installation Instructions - Page 20
Consumer Support Troubleshooting Tips Installation Instructions Operating Instructions Safety Instructions Care and cleaning of the range. Lift the removing and replacing the door. To remove the door, open it a few inches to the special stop position that will hold the door open. Grasp firmly on - Hotpoint RGB508PEHCT | Installation Instructions - Page 21
Instructions Operating Instructions Installation Instructions Troubleshooting Tips Consumer Support inch. Hold the broiler drawer in the raised position as you slide it partway into the range range, under the kick panel or broiler drawer (depending on the model the gas valve . Metal parts can be cleaned - Hotpoint RGB508PEHCT | Installation Instructions - Page 22
Consumer Support Troubleshooting Tips Installation Instructions Operating Instructions Safety Instructions Care and cleaning of the range. I Do not spray oven cleaner on the electrical controls and switches (on some models) because it could cause a short circuit and result in sparking or fire. I - Hotpoint RGB508PEHCT | Installation Instructions - Page 23
Instructions Operating Instructions Installation Instructions Troubleshooting Tips Consumer Support GEAppliances.com Special Care of Continuous-Cleaning Oven Interior (on some models walls. To Clean the Continuous-Cleaning Oven: Let range parts cool before handling. We recommend rubber gloves be - Hotpoint RGB508PEHCT | Installation Instructions - Page 24
Installation Instructions Range Questions? Call 800.GE.CARES (800.432.2737) or visit our Website at: GEAppliances.com In Canada, call 1.800.561.3344 or visit www.GEAppliances.ca IN THE COMMONWEALTH OF MASSACHUSETTS • This product must be installed by a licensed plumber or gas fitter. • When using - Hotpoint RGB508PEHCT | Installation Instructions - Page 25
to gas supply line (3/4″ or 1/2″ NPT x 1/2″ I.D.). • Flare union adapter for connection to pressure regulator on range (1/2″ NPT x 1/2″ I.D.) • Liquid leak detector or soapy water. • Lag bolt or 1/2″ O.D. sleeve anchor (for concrete floors only). • Long matches and/or match holder (for models - Hotpoint RGB508PEHCT | Installation Instructions - Page 26
instructions completely and carefully. Improper installation, adjustment, alteration, service or maintenance can cause injury or property damage. Refer to this manual. For assistance or additional information, consult a qualified installer, service agency, manufacturer (dealer) or the gas supplier - Hotpoint RGB508PEHCT | Installation Instructions - Page 27
. Minimum to cabinets on either side of the range 18″ 30″ 30″ Minimum Maximum depth for cabinets above countertops 1″ To wall on either side, standard burner models 13″ 2″ To wall on either side, sealed burner models Front edge of the range side panel 36″ 1/4″ forward from cabinet 0″ To - Hotpoint RGB508PEHCT | Installation Instructions - Page 28
or servicing. Also, make sure your floor covering will withstand 180°F. (See the Installation Safety Instructions section.) Make sure the wall coverings around your range can withstand the heat generated (up to 200°F) by the range. (See the Installation Safety Instructions section.) MODEL AND - Hotpoint RGB508PEHCT | Installation Instructions - Page 29
around, all male (external) pipe threads. A Install a manual gas line shut-off valve in the gas line in an easily accessed location outside of the range. Make sure everyone operating the range knows where and how to shut off the gas supply to the range. B Install male 1/2″ flare union adapter to the - Hotpoint RGB508PEHCT | Installation Instructions - Page 30
Installation Instructions GAS PIPE AND ELECTRICAL OUTLET LOCATIONS (for models with Sealed Burners) This area allows for flush range installation with through-the-wall connection of pipe stub/shut-off valve and rear wall 120V outlet. Shortest connection from hard pipe stub location to range hookup. - Hotpoint RGB508PEHCT | Installation Instructions - Page 31
Installation Instructions FLEXIBLE CONNECTOR HOOKUP (for models equipped with Sealed Burners) Pressure regulator Adapter Installer: Inform the consumer of the location of the gas shut-off valve. 1/2″ or 3/4″ Gas pipe Gas Flow into Range Flex connector (6 feet maximum) Adapter Gas shut-off valve - Hotpoint RGB508PEHCT | Installation Instructions - Page 32
Instructions FLEXIBLE CONNECTOR HOOKUP (for models equipped with Standard Twin Burners) Pressure regulator Adapter Manifold pipe Installer: Inform the consumer of the location of the gas shut-off valve. Flex connector (6 feet maximum) Adapter 1/2″ or 3/4″ Gas pipe Gas Flow into Range Gas - Hotpoint RGB508PEHCT | Installation Instructions - Page 33
Instructions 's-GFCI's are not required or recommended for gas range receptacles. Ground Fault Circuit Interrupters (GFCI's) manually reset by the consumer. The National Electrical Code requires the use of GFCI's in kitchen receptacles installed to serve countertop surfaces. Performance of the range - Hotpoint RGB508PEHCT | Installation Instructions - Page 34
Part 3280 (formerly the Federal Standard for Mobile Home Construction and Safety, Title 24, HUD, Part range and in the floor under the range when hookups are completed. 5 LIGHT THE PILOTS (For models equipped with standing pilots. If the range is an electric ignition model instructions in Step B. 34 - Hotpoint RGB508PEHCT | Installation Instructions - Page 35
Installation Instructions 5 LIGHT THE attached to the left side of the oven burner. Shield (on some models) Pilot 6. To light the oven pilot, push in and hold the are required for natural gas. If the range is connected to LP gas, contact the person who installed your range or made the conversion. - Hotpoint RGB508PEHCT | Installation Instructions - Page 36
to maintain the oven at the temperature indicated by the OVEN CONTROL knob. Electric ignition models require electrical power to operate. In case of a power outage, the oven burners on these models cannot be lit manually with a match. Gas will not flow unless the glow bar is hot. If the oven is in - Hotpoint RGB508PEHCT | Installation Instructions - Page 37
Installation Instructions 5 LIGHT THE PILOTS (cont.) F Check Ignition of Surface Burners Operation of all cooktop and oven burners should be checked after pilots have been lighted (on some models) and the range and gas supply lines have been carefully checked for leaks. Standing Pilot Models Select - Hotpoint RGB508PEHCT | Installation Instructions - Page 38
Installation Instructions 6 LEVEL THE RANGE A Install the oven racks in the oven and position the range where it will be installed. Raise range Lower range Lower Leg range leveler Raise range (on some models) (on some models) B Check for levelness by placing a spirit level or a cup, - Hotpoint RGB508PEHCT | Installation Instructions - Page 39
air to the range is unobstructed. CONVERT TO LP GAS (or convert back to natural gas from LP) This range leaves the factory set for use with natural gas. If you want to convert to LP gas, the conversion must be performed by a qualified LP gas installer. The conversion instructions and LP orifices - Hotpoint RGB508PEHCT | Installation Instructions - Page 40
Consumer Support Troubleshooting Tips Installation Instructions Operating Instructions Safety Instructions Before you call for service... Troubleshooting Tips Save time and money! Review the charts on the following pages first and you may not need to call for service. Problem Top burners do not - Hotpoint RGB508PEHCT | Installation Instructions - Page 41
Installation Instructions Troubleshooting Tips Consumer Support GEAppliances.com Problem Clock does not work Food does not bake or roast properly Food does not broil properly Oven temperature too hot or too cold Oven light does not work Oven not heating up Possible Causes Plug on range is - Hotpoint RGB508PEHCT | Installation Instructions - Page 42
Consumer Support Troubleshooting Tips Installation Instructions Operating Instructions Safety Instructions Before you call for service... Troubleshooting Tips Problem "Crackling" or "popping" sound Rainbow effect in the oven window (on some models) Power outage, clock flashes Strong odor Fan noise - Hotpoint RGB508PEHCT | Installation Instructions - Page 43
Please place in envelope and mail to: Veuillez mettre dans une enveloppe et envoyez à : OWNERSHIP REGISTRATION P.O. BOX 1780 MISSISSAUGA, ONTARIO L4Y 4G1 (FOR CANADIAN CONSUMERS ONLY) 43 - Hotpoint RGB508PEHCT | Installation Instructions - Page 44
44 - Hotpoint RGB508PEHCT | Installation Instructions - Page 45
Safety Instructions Operating Instructions Installation Instructions Troubleshooting Tips Consumer Support Accessories. Looking For Something More? You can find these accessories and many more at GEAppliances.com, or call 800.626.2002 (during normal business hours). Have your model number ready. - Hotpoint RGB508PEHCT | Installation Instructions - Page 46
Consumer Support Troubleshooting Tips Installation Instructions Operating Instructions Safety Instructions GE Gas Range Warranty. (For customers in the United States) All warranty service provided by our Factory Service Centers or an authorized Customer Care® technician. To schedule service, visit - Hotpoint RGB508PEHCT | Installation Instructions - Page 47
Safety Instructions Operating Instructions Installation Instructions Troubleshooting Tips Consumer Support GE Gas Range Warranty. (For customers in Canada) All warranty service provided by our Factory Service Centres or an authorized Customer Care® technician. To schedule service, visit us on-line - Hotpoint RGB508PEHCT | Installation Instructions - Page 48
Consumer Support. GE Appliances Website In the U.S.: GEAppliances.com Have a question or need assistance with your appliance? Try the GE Appliances Website any day of the year! For greater convenience and faster service, you can now download Owner's Manuals, order parts or even schedule service
-
 1
1 -
 2
2 -
 3
3 -
 4
4 -
 5
5 -
 6
6 -
 7
7 -
8
-
9
-
10
-
11
-
12
-
13
-
14
-
15
-
16
-
17
-
18
-
19
-
20
-
21
-
22
-
23
-
24
-
25
-
26
-
27
-
28
-
29
-
30
-
31
-
32
-
33
-
34
-
35
-
36
-
37
-
38
-
39
-
40
-
41
-
42
-
43
-
44
-
45
-
46
-
47
-
48
 |
 |

Safety Instructions
. . . .2–7, 25
Operating Instructions
Aluminum Foil . . . . . . . . .12, 13
Clock and Timer
. . . . . . . . . .10
Oven
. . . . . . . . . . . . . . . . .10–15
Baking and Roasting . . . . . .12
Broiling . . . . . . . . . . . . . .13, 14
Broiling Guide . . . . . . . . . . .14
Oven Control . . . . . . . . . . . .11
Power Outage . . . . . . . . . . . .11
Preheating
. . . . . . . . . . . . . .12
Surface Cooking
. . . . . . . . .8, 9
Thermostat Adjustment
. . . .15
Care and Cleaning
Air Vents
. . . . . . . . . . . . . . . . .21
Broiler Pan and Grid . . . . . . .21
Burner Assemblies . . . . . .16–18
Burner Caps and Heads . . . .18
Burner Grates . . . . . . . . . . . . .17
Control Panel and Knobs . . .21
Cooktop Surface
. . . . . . . . . .19
Drip Pans . . . . . . . . . . . . . . . . .16
Lift-Off Oven Door
. . . . . . . .20
Lift-Up Cooktop . . . . . . . . . . .19
Oven Bottom
. . . . . . . . . . . . .20
Oven Interior . . . . . . . . . .22, 23
Removable Broiler Drawer . .21
Racks
. . . . . . . . . . . . . . . . . . . .22
Stainless Steel Surfaces . . . . .19
Installation
Instructions
. . . . . . . . . . .24–39
Anti-Tip Device
. . . . .28, 38, 39
Connect the Range
to Gas . . . . . . . . . . . . . . . . .29–32
Convert to LP Gas . . . . . . . . .39
Dimensions and
Clearances . . . . . . . . . . . . . . . .27
Electrical Connections . .33, 34
Level the Range . . . . . . . . . . .38
Light the Pilots . . . . . . . . .34–37
Troubleshooting Tips
. .40–42
Accessories
. . . . . . . . . . . . . . .45
Consumer Support
Consumer
Support . . . . . . . . . .Back Cover
Ownership Registration
for Customers in Canada
only
. . . . . . . . . . . . . . . . . .43, 44
Warranty for Customers
in Canada
. . . . . . . . . . . . . . . .47
Warranty for Customers
in the U.S.A. . . . . . . . . . . . . . .46
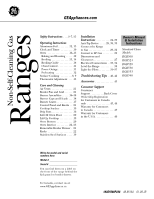
Ranges
183D5580P236
49-85154
01-09 JR
Standard-Clean
Models:
Owner’s Manual
& Installation
Instructions
GEAppliances.com
Write the model and serial
numbers here:
Model #
______________________
Serial #
______________________
You can find them on a label on
the front of the range behind the
kick panel or broiler drawer.
RGB508
RGB524
RGB528
RGB530
RGB533
RGB540
Non-Self-Cleaning Gas
In Canada, contact us at:
www.GEAppliances.ca