Husqvarna YT54LS Owners Manual - Page 26
To Start Engine With A Weak Battery
 |
View all Husqvarna YT54LS manuals
Add to My Manuals
Save this manual to your list of manuals |
Page 26 highlights
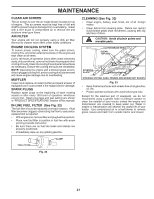
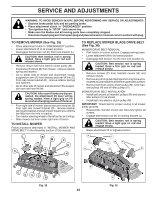
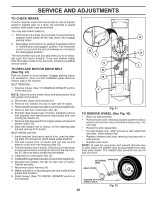
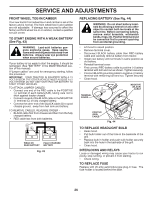
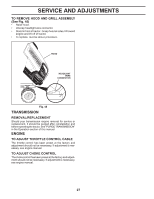
SERVICE AND ADJUSTMENTS FRONT WHEEL TOE-IN/CAMBER Your new tractor front wheel toe-in and camber is set at the factory and is normal. The front wheel toe-in and camber are not adjustable. If damage has occurred to affect the factory set front wheel toe-in or camber, contact a qualified service center. TO START ENGINE WITH A WEAK BATTERY (See Fig. 43) WARNING: Lead-acid batteries generate explosive gases. Keep sparks, flame and smoking materials away from batteries. Always wear eye protection when around batteries. If your battery is too weak to start the engine, it should be recharged. (See "BATTERY" in the MAINTENANCE section of this manual). If "jumper cables" are used for emergency starting, follow this procedure: IMPORTANT: YOUR TRACTOR IS EQUIPPED WITH A 12 VOLT SYSTEM. THE OTHER VEHICLE MUST ALSO BE A 12 VOLT SYSTEM. DO NOT USE YOUR TRACTOR BATTERY TO START OTHER VEHICLES. TO ATTACH JUMPER CABLES • Connect one end of the RED cable to the POSITIVE (+) terminal of each battery(A-B), taking care not to short against tractor chassis. • Connect one end of the BLACK cable to the NEGATIVE (-) terminal (C) of fully charged battery. • Connect the other end of the BLACK cable (D) to good chassis ground, away from fuel tank and battery. TO REMOVE CABLES, REVERSE ORDER • BLACK cable first from chassis and then from the fully charged battery. • RED cable last from both batteries. WEAK OR FULLY CHARGED DEAD BATTERY BATTERY Fig. 43 REPLACING BATTERY (See Fig. 44) WARNING: Do not short battery terminals by allowing a wrench or any other object to contact both terminals at the same time. Before connecting battery, remove metal bracelets, wristwatch bands, rings, etc. Positive terminal must be connected first to prevent sparking from accidental grounding. • Lift hood to raised position. • Remove terminal cover. • Disconnect BLACK battery cable then RED battery cable and carefully remove battery from tractor. • Install new battery with terminals in same position as old battery. • Reinstall terminal cover. • First connect RED battery cable to positive (+) battery terminal with bolt and nut as shown. Tighten securely. • Connect BLACK grounding cable to negative (-) battery terminal with remaining bolt and nut. Tighten securely • Close hood. NEGATIVE (BLACK) CABLE TERMINAL COVER POSITIVE (RED) CABLE Fig. 44 TO REPLACE HEADLIGHT BULB • Raise hood. • Pull bulb holder out of the hole in the backside of the grill. • Replace bulb in holder and push bulb holder securely back into the hole in the backside of the grill. • Close hood. INTERLOCKS AND RELAYS Loose or damaged wiring may cause your tractor to run poorly, stop running, or prevent it from starting. • Check wiring. TO REPLACE FUSE Replace with 20 amp automotive-type plug-in fuse. The fuse holder is located behind the dash. 26
-
 1
1 -
2
-
3
-
4
-
5
-
6
-
7
-
8
-
9
-
10
-
11
-
12
-
13
-
14
-
15
-
16
-
17
-
18
-
19
-
20
-
 21
21 -
 22
22 -
 23
23 -
 24
24 -
 25
25 -
 26
26 -
 27
27 -
 28
28 -
 29
29 -
 30
30 -
 31
31 -
32
-
33
-
34
-
35
-
36
-
37
-
38
-
39
-
40
-
41
-
42
-
43
-
44
-
45
-
46
-
47
-
48
-
49
-
50
-
51
-
52
-
53
-
54
-
55
-
56
-
57
-
58
-
59
-
60
-
61
-
62
-
63
-
64
-
65
-
66
-
67
-
68
-
69
-
70
-
71
-
72
 |
 |
