IBM 86473AX User Manual
IBM 86473AX Manual
 |
View all IBM 86473AX manuals
Add to My Manuals
Save this manual to your list of manuals |
IBM 86473AX manual content summary:
- IBM 86473AX | User Manual - Page 1
LCM NetBAY Advanced Connectivity Technology Local Console Manager Installer and User Guide For 32P1635, 1735-L04 and 32P1644 - IBM 86473AX | User Manual - Page 2
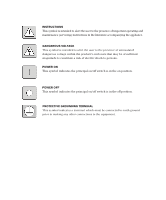
This symbol is intended to alert the user to the presence of important operating and maintenance (servicing) instructions in the literature accompanying the appliance. DANGEROUS VOLTAGE This symbol is intended to alert the user to the presence of uninsulated dangerous voltage within the - IBM 86473AX | User Manual - Page 3
- IBM 86473AX | User Manual - Page 4
damage. • Disconnect the attached power cords, telecommunications systems, networks, and modems before you open the device covers, unless instructed otherwise in the installation and configuration procedures. • Connect and disconnect cables as described in the following table when installing, moving - IBM 86473AX | User Manual - Page 5
LCM Installer and User Guide - IBM 86473AX | User Manual - Page 6
- IBM 86473AX | User Manual - Page 7
Table of Contents Chapter 1: Product Overview Features and Benefits 3 Safety Precautions 4 Chapter 2: Installation Getting Started 9 Installing Your LCM 9 Cabling the LCM 12 Chapter 3: Basic Operations Controlling Your System 21 Viewing and Selecting Ports and Servers 21 Configuring OSCAR 24 - IBM 86473AX | User Manual - Page 8
- IBM 86473AX | User Manual - Page 9
1 Product Overview Contents Features and Benefits 3 Safety Precautions 4 - IBM 86473AX | User Manual - Page 10
- IBM 86473AX | User Manual - Page 11
Product Overview 3 Chapter 1: Product Overview Features and Benefits The IBM® NetBAY™ Local Console Manager (LCM) provides flexible, centralized optimal digital display resolution and video settings. The built-in memory of the CO simplifies configuration by assigning and retaining unique server - IBM 86473AX | User Manual - Page 12
and User Guide Safety Precautions To avoid potential video and/or keyboard problems when using IBM products: • If the building has 3-phase AC power, ensure that the computer and monitor are on the same phase. For best results, they should be on the same circuit. • Use only IBM-supplied cable - IBM 86473AX | User Manual - Page 13
damage. • Disconnect the attached power cords, telecommunications systems, networks, and modems before you open the device covers, unless instructed otherwise in the installation and configuration procedures. • Connect and disconnect cables as described in the following table when installing, moving - IBM 86473AX | User Manual - Page 14
6 LCM Installer and User Guide - IBM 86473AX | User Manual - Page 15
2 Installation Contents Getting Started 9 Installing Your LCM 9 Cabling the LCM 12 - IBM 86473AX | User Manual - Page 16
- IBM 86473AX | User Manual - Page 17
on CD • LCM Quick Installation Guide • One straight-through serial cable Additional items needed • One KCO cable per attached PS/2 server or switch • One UCO cable per attached USB server or switch • One CCO cable per attached IBM C2T server Installing Your LCM Your LCM ships with rack mounting - IBM 86473AX | User Manual - Page 18
10 LCM Installer and User Guide Statement 4: DANGER Electrical current from power, telephone, and communication cables is systems, networks, and modems before you open the device covers, unless instructed otherwise in the installation and configuration procedures. • Connect and disconnect cables - IBM 86473AX | User Manual - Page 19
Chapter 2: Installation 11 NOTE: The mounting holes on the upper and lower side braces in a rack side compartment must be between 50.8 cm (20.0 in.) and 57.3 cm (22.6 in.) apart. If your rack cabinet has movable side braces, refer to your rack documentation for information about relocating side - IBM 86473AX | User Manual - Page 20
and User Guide Figure 2.2: LCM Horizontal Installation Cabling the LCM Figure 2.3 shows one possible configuration for your LCM. Follow the detailed set of procedures following Figure 2.3 to successfully install your LCM. Analog Port LCM Chained C2T Servers CAT 5 CCO CAT 5 ARI Ports IBM NetBAY - IBM 86473AX | User Manual - Page 21
damage. • Disconnect the attached power cords, telecommunications systems, networks, and modems before you open the device covers, unless instructed otherwise in the installation and configuration procedures. • Connect and disconnect cables as described in the following table when installing, moving - IBM 86473AX | User Manual - Page 22
14 LCM Installer and User Guide To adjust the mouse acceleration: Before a server can be connected Acceleration setting to None and the speed setting to the default of 50%. To connect a CCO cable to an IBM C2T server: 1. Locate the CCO cables and CAT 5 cabling for your LCM. 2. Connect the CCO cable - IBM 86473AX | User Manual - Page 23
Chapter 2: Installation 15 LCM CAT 5 cable up to 10 meters (32.8 feet) KCO Cable ARI Port KCO Cable Server 1 KCO Cable Server 2 Terminator Figure 2.4: Chaining Servers Together with KCO Cables Server 3 To chain servers together using UCO cables: 1. Locate the UCO cables and CAT 5 cabling - IBM 86473AX | User Manual - Page 24
16 LCM Installer and User Guide LCM CAT 5 cable up to 10 meters (32.8 feet) UCO Cable UCO Cable Server 1 , each ARI port then accommodates up to 24 servers. LCM KCO Cable Terminator IBM NetBAY Console Switch 1 2 3 4 5 6 7 8 Server 1 Figure 2.6: LCM Configuration with a Legacy KVM - IBM 86473AX | User Manual - Page 25
the other. Analog Workstation Remote Workstation KCO Cable A KCO Cable B Server 1 Server 2 Server 3 Second KCO connects to user port on the front of the switch IBM NetBAY 2x8 Switch KVM Figure 2.7: Cascaded Multi-user Legacy Switch Configuration - IBM 86473AX | User Manual - Page 26
4. On the target server for Microsoft Windows 2000 select Start - Settings - Control Panel - Regional Options. For other operating systems, see the user guide that comes with your system. 5. Verify the language. To synchronize languages with the target server: 1. At the remote station for Microsoft - IBM 86473AX | User Manual - Page 27
3 Basic Operations Contents Controlling Your System 21 Viewing and Selecting Ports and Servers 21 Configuring OSCAR 24 Resetting Your Keyboard and Mouse 32 Displaying Version Information 33 Scanning Your System 34 Broadcasting to Servers 36 - IBM 86473AX | User Manual - Page 28
- IBM 86473AX | User Manual - Page 29
uses the On-Screen Configuration and Activity Reporting interface (OSCAR®) for IBM which has intuitive menus to configure your system and select computers. Viewing and Selecting Ports and Servers Use the OSCAR Main dialog box in any place you see Print Screen throughout this Installer and User Guide. - IBM 86473AX | User Manual - Page 30
22 LCM Installer and User Guide Viewing the status of your LCM system The status of servers in your system is indicated in the far right column of the Main dialog - IBM 86473AX | User Manual - Page 31
Chapter 3: Basic Operations 23 To configure servers for soft switching: 1. Press Print Screen to launch OSCAR. The Main dialog box appears. 2. Click Setup - Menu. The Menu dialog box appears. 3. For delay time, type the number of seconds of delay desired before the Main dialog box is displayed after - IBM 86473AX | User Manual - Page 32
24 LCM Installer and User Guide OSCAR Navigation Basics (continued) This Keystroke Does This Print Screen, Backspace Toggles back to previous selection if no other keystrokes have been typed. Print Screen, - IBM 86473AX | User Manual - Page 33
Chapter 3: Basic Operations 25 Setup Features to Manage Routine Tasks for Your Servers Feature Purpose Menu Change the server listing between numerically by port or eID number and alphabetically by name. Change the delay time before OSCAR displays after pressing Print Screen. Flag Change - IBM 86473AX | User Manual - Page 34
26 LCM Installer and User Guide To assign names to servers: 1. In the Names dialog box, select a name or port number and click Modify. The Name Modify dialog box appears. Figure 3.4: - IBM 86473AX | User Manual - Page 35
, select the desired port number. 2. Click Modify. The Device Modify dialog box appears. Figure 3.6: Device Modify Dialog Box 3. Choose the number of ports supported by your switch and click OK. 4. Repeat steps 1-3 for each port to which you want to assign a device type. 5. Click OK in the Devices - IBM 86473AX | User Manual - Page 36
28 LCM Installer and User Guide NOTE: Changes made in the Device Modify dialog box are not saved until you click OK in the Devices dialog box. Changing the display behavior - IBM 86473AX | User Manual - Page 37
Chapter 3: Basic Operations 29 Controlling the status flag The status flag displays on your desktop and shows the name or eID number of the selected server or the status of the selected port. Use the Flag dialog box to configure the flag to display by server name or eID number, or to change the - IBM 86473AX | User Manual - Page 38
30 LCM Installer and User Guide b. Left-click on the title bar and drag to the desired location. c. Right-click to return to the Flag dialog box. Figure 3.9: Set Position Flag - IBM 86473AX | User Manual - Page 39
Chapter 3: Basic Operations 31 To set or change the password: 1. Single-click and press Enter or double-click in the New text box. 2. Type the new password in the New text box and press Enter. Passwords may be up to 12 characters long and are case sensitive. Legal characters are: A-Z, a-z, Ø-9, - IBM 86473AX | User Manual - Page 40
32 LCM Installer and User Guide -orIf your console is password protected, see the previous procedure, then go to step 2. 2. Select Enable Screen Saver. 3. Type the number of minutes for delay - IBM 86473AX | User Manual - Page 41
Chapter 3: Basic Operations 33 Displaying Version Information OSCAR enables you to display the CO cable firmware versions. For optimum performance, keep your firmware current. For more information, see Appendix A. To display version information: 1. Press Print Screen. The Main dialog box will appear - IBM 86473AX | User Manual - Page 42
34 LCM Installer and User Guide Figure 3.13: CO Version Dialog Box 5. Click X to close the Version dialog box. Scanning Your System In scan mode, the LCM automatically scans from port - IBM 86473AX | User Manual - Page 43
Chapter 3: Basic Operations 35 3. Select the order within the list where you want to add a server. If no servers have been added to the scan list, your cursor will appear in a blank line at the top of the dialog box. -orTo add a server to the end of the list, place your cursor in the last server - IBM 86473AX | User Manual - Page 44
36 LCM Installer and User Guide Figure 3.15: Commands Dialog Box 3. Select Scan Enable in the Commands dialog box. To cancel scan mode: 1. Select a server if OSCAR is open. -orMove the - IBM 86473AX | User Manual - Page 45
Chapter 3: Basic Operations 37 Figure 3.16: Broadcast Dialog Box NOTE: Broadcasting Keystrokes - The keyboard state must be identical for all servers receiving a broadcast to interpret keystrokes identically. Specifically, the Caps Lock and Num Lock modes must be the same on all keyboards. While the - IBM 86473AX | User Manual - Page 46
38 LCM Installer and User Guide - IBM 86473AX | User Manual - Page 47
Appendices Contents Appendix A: FLASH Upgrades 41 Appendix B: Technical Specifications 45 Appendix C: Hardware Maintenance Information . . . .46 Appendix D: Notices 47 - IBM 86473AX | User Manual - Page 48
- IBM 86473AX | User Manual - Page 49
have chosen, then turn on the switch. 2. Go to http://www.ibm.com/pc/support to access the firmware upgrade file. Once the download is complete , do not use your computer for anything else or switch windows. The download requires constant control of your computer, and switching to another window - IBM 86473AX | User Manual - Page 50
42 LCM Installer and User Guide Upgrading the CO cable firmware The CO cables can be upgraded individually or simultaneously. When an upgrade is initiated, you will see a progress bar. As - IBM 86473AX | User Manual - Page 51
Appendices 43 To upgrade CO cable firmware individually: 1. Press Print Screen. The Main dialog box will appear. 2. Click Commands - Display Versions. The Version dialog box appears. Figure A.3: Version Dialog Box 3. Click CO to view individual cable version information. Figure A.4: CO Selection - IBM 86473AX | User Manual - Page 52
44 LCM Installer and User Guide Figure A.5: CO Version Dialog Box 5. Click the Load Firmware button. The CO Load dialog box appears. Figure A.6: CO Load Dialog Box 6. Click OK to initiate the upgrade and return to the CO Status dialog box. - IBM 86473AX | User Manual - Page 53
Appendices 45 Appendix B: Technical Specifications LCM Product Specifications Server Ports Number 4 Types KCO, CCO and UCO intelligent cables Connectors RJ45 Sync Types Separate horizontal and vertical Plug and Play DDC2B Video Resolution Analog Port Maximum 1600 x 1280 @ 75 Hz Confi - IBM 86473AX | User Manual - Page 54
46 LCM Installer and User Guide Appendix C: Hardware Maintenance Information This appendix contains information about IBM Field Replaceable Unit (FRU) availability for the LCM. Troubleshooting and servicing of complex problems should be performed only by trained service personnel. Field Replaceable - IBM 86473AX | User Manual - Page 55
right may be used instead. However, it is the user's responsibility to evaluate and verify the operation of any non-IBM product, program, or service. IBM may have patents or pending patent applications covering subject matter described in this document. The furnishing of this document does not - IBM 86473AX | User Manual - Page 56
disk drive bays with the largest currently supported drives available from IBM. Maximum memory may require replacement of the standard memory with an optional memory module. IBM makes no representation or warranties regarding non-IBM products and services that are ServerProven®, including but not - IBM 86473AX | User Manual - Page 57
and, if not installed and used in accordance with the instruction manual, may cause harmful interference to radio communications. Operation of this and connectors must be used in order to meet FCC emission limits. IBM is not responsible for any radio or television interference caused by using other - IBM 86473AX | User Manual - Page 58
Guide European Union EMC Directive conformance statement This product is in conformity with the protection requirements of EU Council Directive 89/336/EEC on the approximation of the laws of the Member States relating to electromagnetic compatibility. IBM the fitting of non-IBM option cards. This - IBM 86473AX | User Manual - Page 59
Appendices 51 - IBM 86473AX | User Manual - Page 60
59P2157 Rev. C 590247001B
-
 1
1 -
 2
2 -
 3
3 -
 4
4 -
 5
5 -
 6
6 -
 7
7 -
8
-
9
-
10
-
11
-
12
-
13
-
14
-
15
-
16
-
17
-
18
-
19
-
20
-
21
-
22
-
23
-
24
-
25
-
26
-
27
-
28
-
29
-
30
-
31
-
32
-
33
-
34
-
35
-
36
-
37
-
38
-
39
-
40
-
41
-
42
-
43
-
44
-
45
-
46
-
47
-
48
-
49
-
50
-
51
-
52
-
53
-
54
-
55
-
56
-
57
-
58
-
59
-
60
 |
 |

Installer and User Guide
LCM
NetBAY Advanced Connectivity Technology
Local Console Manager
For 32P1635, 1735-L04 and 32P1644