IBM 867661X Hardware Maintenance Manual - Page 60
Memory, technology, transition
 |
View all IBM 867661X manuals
Add to My Manuals
Save this manual to your list of manuals |
Page 60 highlights
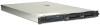
Complete the following steps to install a non-hot-swap hard disk drive: Drive bay 2 Drive bay 1 1. Read "Safety information" on page 119 and "Installation guidelines" on page 37. 2. Turn off the server and all attached peripheral devices. Disconnect all power cords; then, disconnect all external signal cables from the server. 3. Remove the server cover (see "Removing the cover and bezel" on page 44). 4. Press in on the USB option tray to release it and slide the tray out until it stops; then, press the retention clip at the bottom rear of the tray and remove the tray from the server. Press on the bezel retention tabs and pull the bezel directly away from the server. Notes: a. If you have only one non-hot-swap hard disk drive, install it in the right-hand bay (bay 2) with a jumper installed in the cable-selection-enabled position of the jumper block on the rear of the drive. b. If you have two drives and you want the server to determine the master drive and subordinate drive automatically, install jumpers in the cable-selection-enabled position of the jumper block on both drives. c. If you want to assign master and subordinate drives manually, install a jumper in the master position for the drive in bay 2 and install a jumper in the subordinate position for the drive in bay 1. 5. Install the hard disk drive in the drive bay: a. Attach the rails to the sides of the drive using 2 screws for each rail. b. Slide the drive into the bay until the rail latches snap into place. c. Connect the signal and power cables to the rear of the drive. Keep the cables clear of the airflow path of the fan behind the drive bays. 6. If you have other options to install, install them now. Otherwise, go to "Completing the installation" on page 59. Memory technology transition IBM xSeries 335 is making a transition from 128 Mb to 256 Mb memory technology for 256 MB dual inline memory modules (DIMMs). To accommodate this transition, additional xSeries models are now available. These new models come with two 256 MB capacity, 256 Mb technology DIMMs. The Chipkill™ feature that is supported with the 256 MB capacity, 128 Mb technology DIMMs is not supported with the 256 Mb technology DIMMs. If you require DIMMs that support the Chipkill feature, a limited supply of the 256 MB, 128 Mb technology DIMMs will be available for order. In addition, IBM will continue to offer the Chipkill feature with DIMMs that have a capacity of 512 MB or greater. 50 xSeries 335 Type 8676, Type 8830: Hardware Maintenance Manual and Troubleshooting Guide
-
 1
1 -
2
-
3
-
4
-
5
-
6
-
7
-
8
-
9
-
10
-
11
-
12
-
13
-
14
-
15
-
16
-
17
-
18
-
19
-
20
-
21
-
22
-
23
-
24
-
25
-
26
-
27
-
28
-
29
-
30
-
31
-
32
-
33
-
34
-
35
-
36
-
37
-
38
-
39
-
40
-
41
-
42
-
43
-
44
-
45
-
46
-
47
-
48
-
49
-
50
-
51
-
52
-
53
-
54
-
 55
55 -
 56
56 -
 57
57 -
 58
58 -
 59
59 -
 60
60 -
 61
61 -
 62
62 -
 63
63 -
 64
64 -
 65
65 -
66
-
67
-
68
-
69
-
70
-
71
-
72
-
73
-
74
-
75
-
76
-
77
-
78
-
79
-
80
-
81
-
82
-
83
-
84
-
85
-
86
-
87
-
88
-
89
-
90
-
91
-
92
-
93
-
94
-
95
-
96
-
97
-
98
-
99
-
100
-
101
-
102
-
103
-
104
-
105
-
106
-
107
-
108
-
109
-
110
-
111
-
112
-
113
-
114
-
115
-
116
-
117
-
118
-
119
-
120
-
121
-
122
-
123
-
124
-
125
-
126
-
127
-
128
-
129
-
130
-
131
-
132
-
133
-
134
-
135
-
136
-
137
-
138
-
139
-
140
-
141
-
142
-
143
-
144
-
145
-
146
-
147
-
148
-
149
-
150
-
151
-
152
-
153
-
154
-
155
-
156
-
157
-
158
-
159
-
160
-
161
-
162
-
163
-
164
-
165
-
166
-
167
-
168
-
169
-
170
-
171
-
172
 |
 |
