Image Fitness 17.5s Treadmill English Manual
Image Fitness 17.5s Treadmill Manual
 |
View all Image Fitness 17.5s Treadmill manuals
Add to My Manuals
Save this manual to your list of manuals |
Image Fitness 17.5s Treadmill manual content summary:
- Image Fitness 17.5s Treadmill | English Manual - Page 1
No. IMTL49606.0 Serial No. Serial Number Decal USER'S MANUAL QUESTIONS? As a manufacturer, we are committed to providing complete customer satisfaction. If you have questions, or if parts are damaged or missing, PLEASE CONTACT OUR CUSTOMER SERVICE DEPARTMENVT isit our website at DIRECTLY. CALL - Image Fitness 17.5s Treadmill | English Manual - Page 2
12 HOW TO FOLD AND MOVE THE TREADMILL 20 TROUBLESHOOTING 21 CONDITIONING GUIDELINES 23 HOW TO ORDER REPLACEMENT PARTS Back Cover LIMITED WARRANTY Back Cover Note: An EXPLODED DRAWING and a PART LIST are attached in the center of this manual. IMAGE is a registered trademark of ICON IP, Inc - Image Fitness 17.5s Treadmill | English Manual - Page 3
that all users of this treadmill are adequately informed of all warnings and precautions. 2. Use the treadmill only as described. page 12. To purchase a surge suppressor, see your local IMAGE dealer or call the toll-free telephone number on the front cover of this manual and order part number - Image Fitness 17.5s Treadmill | English Manual - Page 4
cord immediately after use, before cleaning the treadmill, and before performing the maintenance and adjustment procedures de- scribed in this manual. Never remove the motor hood unless instructed to do so by an authorized service representative. Servicing other than the procedures in this - Image Fitness 17.5s Treadmill | English Manual - Page 5
for any service needed under warranty, you must register the treadmill at www.iconservice.com/registration. Before reading further, please review the drawing below and familiarize yourself with the labeled parts. Accessory Tray Handrail Key/Clip Storage Latch Walking Belt Fan Console Upright Reset - Image Fitness 17.5s Treadmill | English Manual - Page 6
hire an authorized service technician to assemble the treadmill, call toll-free 1-800-445-2480. Assembly requires two persons. Set the treadmill in a cleared each drawing is the key number of the part, from the PART LIST in the center of the manual. The number following the parentheses is the - Image Fitness 17.5s Treadmill | English Manual - Page 7
Star Washers (39); do not tighten the Upright Bolts yet. Bend 36 48 39 27 39 4. Set the Base (48) near the front of the treadmill, 4 with the Power Cord (13) on the Hood (1) as shown. Cut the small tie (not shown) holding the Upright Wire (28) in a bundle. Wrap the - Image Fitness 17.5s Treadmill | English Manual - Page 8
5. See the left inset drawing. Identify the two Frame 5 Spacers (34). Open the included packet of grease, and apply grease to both sides of both Frame Spacers. Then, identify the outer side of each Frame Spacer. Next, hold a Frame Spacer (34) between the Right Upright (36) and the Lift Frame ( - Image Fitness 17.5s Treadmill | English Manual - Page 9
the ground wire to the Handrail with a Silver Ground Screw (11). Next, set the Handrail (18) on the console assembly. Make sure that no wires are pinched. Finger tighten a Console Bolt (22) with a 1/4" Star Washer (21) into the Handrail, and then start two 3/4" Screws (2) into the Handrail. Tighten - Image Fitness 17.5s Treadmill | English Manual - Page 10
Firmly tighten the Upright Bolts (27) and the Frame Bolts (32) on each side of the treadmill. Do not overtighten the Frame Bolts. 31 Side View 32 27 74 31, 36 View from Above , pull out on the sides of the Base Covers to fit them over the Wheel Bolts (14). 31, 36 90, 91 48 14 10 - Image Fitness 17.5s Treadmill | English Manual - Page 11
Knob Remove the plastic packaging from the bottom of the Belly Pan. 31 30 Spring Collar Pin 14. Make sure that all parts are properly tightened before you use the treadmill. Note: Extra hardware may be included. Keep the included hex keys in a secure place; the large hex key is used to - Image Fitness 17.5s Treadmill | English Manual - Page 12
fit the outlet, have a proper outlet installed by a qualified electrician. Your treadmill treadmill (see drawing 1 at the right). To purchase a surge suppressor, see your local IMAGE dealer or call the toll-free telephone number on the front cover of this manual and order part rating of 400 - Image Fitness 17.5s Treadmill | English Manual - Page 13
CONSOLE DIAGRAM Note: If there are sheets of clear plastic on the console, remove the plastic. Key Clip FEATURES OF THE CONSOLE The treadmill console offers a selection of features designed to make your workouts more effective. When the manual mode of the console is selected, the speed and - Image Fitness 17.5s Treadmill | English Manual - Page 14
setting. Note: After the buttons are pressed, it may take a moment for the treadmill to reach the selected incline setting. 6 Follow your progress with the display. When the manual mode is selected, Track the upper part of the display will show a track that represents 1/4 mile. As you walk - Image Fitness 17.5s Treadmill | English Manual - Page 15
users may also find it helpful to reduce the incline of the treadmill or to increase the speed of the walking belt. IMPORTANT: Always exercise at a pace that is comfortable for you. To reset the display, press the Stop button, remove the key, and then reinsert the key. 7 Measure your heart rate - Image Fitness 17.5s Treadmill | English Manual - Page 16
walking belt will then slow to a stop. 4 Follow your progress with the display. See step 6 on pages 14 and 15. 5 Measure your heart rate if desired. See step 7 on page 15. 6 Turn on the fan if desired. See step 8 on page 15. 7 When you are finished exercising, remove the key from the console - Image Fitness 17.5s Treadmill | English Manual - Page 17
console treadmill with the manual mode selected (see page 14), and note the number of steps that you walk during your workout. Then, round that number up to the nearest 500 steps. This can be a starting goal. As your fitness The walking belt will begin . 5 Measure your heart rate if desired. See step - Image Fitness 17.5s Treadmill | English Manual - Page 18
the console. See belt will then slow to a stop. Important: The calorie goal is an estimate of the number of calories that you will burn during the program. The actual number of calories that you burn will depend on your weight. In addition, if you manually change the speed or incline of treadmill - Image Fitness 17.5s Treadmill | English Manual - Page 19
heart rate if desired. See step 7 on page 15. 7 Turn on the fan if desired. See step 8 on page 15. 8 When the program is completed, remove the key from the console. See step 9 on page 15. THE INFORMATION MODE The console features an information mode that keeps track of treadmill usage information - Image Fitness 17.5s Treadmill | English Manual - Page 20
able to safely lift 45 pounds (20 kg) to raise, lower, or move the treadmill. 1. Hold the metal frame firmly in the location shown by the arrow at the position. 2. Move your right hand to the position shown and hold the treadmill firmly. Using your left hand, pull the latch knob to the left and - Image Fitness 17.5s Treadmill | English Manual - Page 21
for five minutes, and then plug it back in. c. Remove the key from the console. Reinsert the key into the console. d. If the treadmill still will not run, please see the front cover of this manual. PROBLEM: The displays of the console do not function properly SOLUTION: a. Remove the key from the - Image Fitness 17.5s Treadmill | English Manual - Page 22
cord, insert the key, and run the treadmill for a few minutes. Repeat until the walking belt is properly tightened. b 2"-3" Rear Roller Bolts c. If the walking belt still slows when walked on, please see the front cover of this manual. PROBLEM: The walking belt is off-center or slips when walked - Image Fitness 17.5s Treadmill | English Manual - Page 23
. For aerobic exercise, adjust the speed and incline of the treadmill until your heart rate is near the highest number in your training zone. WORKOUT GUIDELINES Each workout should include the following three parts: A Warm-up-Start each workout with 5 to 10 minutes of stretching and light exercise - Image Fitness 17.5s Treadmill | English Manual - Page 24
Drive Motor 10 1 Motor Bracket 11 6 Sliver Ground Screw 12 2 Power Bracket Star Washer 13 1 Power Cord Assembly 14 2 Wheel Bolt 15 2 Foot Rail Decal 16 1 Console Fan Assembly 17 Belt Guide 69 2 Rear Roller Bracket 70 2 Isolator 71 4 Belt Guide Screw 72 1 Walking Belt User's Manual #These parts are - Image Fitness 17.5s Treadmill | English Manual - Page 25
13 39 11 8 12 16 11 5 27 12 95 6 57 56 18 47 46 17 58 60 55 59 47 54 87 29 88 89 54 89 54 90 53 33 41 26 2 17 25 2 2 52 21 22 19 2 20 42 17 87 88 21 30 18 28 31 24 4 76 68 17 34 36 41 32 33 2 91 37 71 4 2 2 51 - Image Fitness 17.5s Treadmill | English Manual - Page 26
of the product (IMAGE 17.5 S treadmill) • the SERIAL NUMBER of the product (see the front cover of this manual) • the KEY NUMBER AND DESCRIPTION OF THE PART(S) (see the EXPLODED DRAWING and PART LIST attached in the center of this manual) LIMITED WARRANTY ICON Health & Fitness, Inc. (ICON) warrants
-
 1
1 -
 2
2 -
 3
3 -
 4
4 -
 5
5 -
 6
6 -
 7
7 -
8
-
9
-
10
-
11
-
12
-
13
-
14
-
15
-
16
-
17
-
18
-
19
-
20
-
21
-
22
-
23
-
24
-
25
-
26
 |
 |
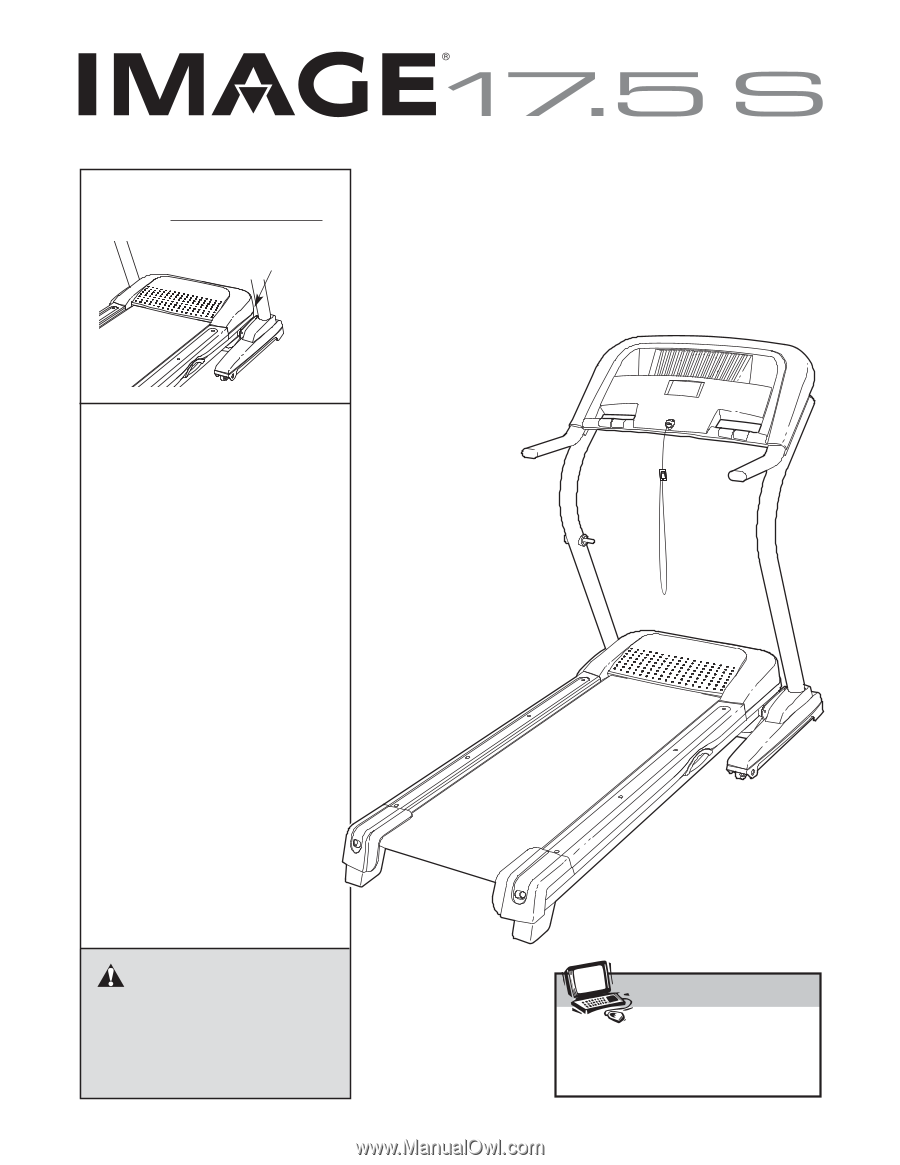
Model No. IMTL49606.0
Serial No.
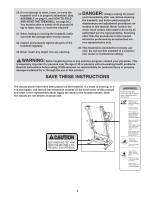
CAUTION
Read all precautions and instruc-
tions in this manual before using
this equipment. Save this manual
for future reference.
Serial Number
Decal
USER'S MANUAL
QUESTIONS?
As a manufacturer, we are com-
mitted to providing complete
customer satisfaction. If you
have questions, or if parts are
damaged or missing, PLEASE
CONTACT OUR CUSTOMER
SERVICE DEPARTMENT
DIRECTLY.
CALL TOLL-FREE:
1-800-753-4645
Mon.–Fri. 6 a.m.–6 p.m. MST
Sat. 8 a.m.–5 p.m. MST
ON THE WEB:
www.iconservice.com
Visit our website at
www.imagefitness.com
new products, prizes,
fitness tips, and much more!