Image Fitness 516 English Manual - Page 9
Bolts, WASHER, Washers
 |
View all Image Fitness 516 manuals
Add to My Manuals
Save this manual to your list of manuals |
Page 9 highlights
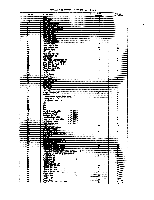
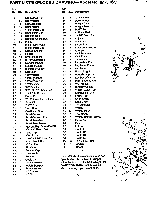
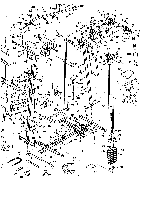
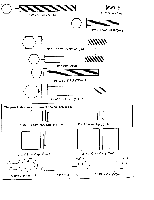
Iivo 1 nut. i IL/IVJ 47 lJ 3/8" x 2" Hex Bolts (67) 3/8" Hex Nut (70) Note: Pulley Wheels shouid be a!tac:bed alter gym is completely assembled. 2 32 3/8" x 2-3/4" HEX BOLT (65) 3/8" WASHER (60) 3/8" EX NUT (70) 1.2 3 3/8" Hex Bolts (66) 3/8" Washers (60) 3/8" Hex Nuts (70) 13 49 3/8" x 3" HEX BOLT (66) 318" (/8" WASHER HEX NUT (60) (70) O 41 - 3/8" x 2-3/4" HEX BOLT (65) 49 3/8" WASHER (60) 3/8" HEX NUT (70) Notes: a) If your Gym is not equipped with a VKR ignore assembly instructions regarding parts 40-46. b) Pulley wheels should not be attached until aftekhe gym is completely assembled.. 1. Attach Main Base (1) to Right Base (1-2) and Left Base (1-3) 2. Attach Left Vertical Beam (3) to Main Base (1). and Left Base (1-3) 3. Attach Right Vertical Beam (2) to Main Base (4 4. Attach VKR Base (41) to Main (Rise (1). 5. Attach Rubber End Caps (49) to each end of Base. Attach 2" x 2" Pipe End (55). 6. Attach Guide Rods (30) through Rubber Dounts (34) into the Base .as shown. Slide each Weight Plate (32) on Guide Rods. Attach Weight Stickers to 4Weights. (Note: Groove for Selector Pin on Weight Plates should face thq. floor.) 7. Attach Guide Pin Top Plate (31) over Guide RaEls and into Weight Stack. 8. Place Weight Selector Insert Pin (50) into the groove under the top plate.
-
 1
1 -
2
-
3
-
 4
4 -
 5
5 -
 6
6 -
 7
7 -
 8
8 -
 9
9 -
 10
10 -
 11
11 -
 12
12 -
 13
13 -
 14
14 -
15
-
16
 |
 |
