InSinkErator Model WX-300 Owners Manual - Page 13
Operating Instructions
 |
View all InSinkErator Model WX-300 manuals
Add to My Manuals
Save this manual to your list of manuals |
Page 13 highlights
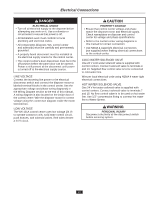
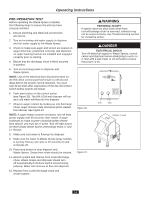
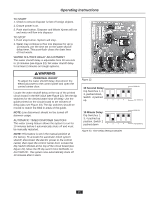
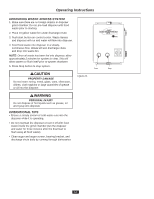
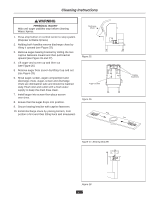
Operating Instructions PRE-OPERATION TEST Before operating the Waste Xpress complete the following steps to ensure the unit has been properly installed. 1. Ensure plumbing and electrical connections are secure. 2. Turn on incoming cold water supply to disposer and hot water supply to the Waste Xpress. 3. Check to make sure auger and screen are seated on auger drive hub, positioned correctly, and fasteners on upper bearing bracket are installed and engaged correctly prior to starting. 4. Ensure that the discharge chute is fitted securely in position. 5. Turn on incoming power to disposer and Waste Xpress. NOTE: Use of the electrical door disconnect knob on the WX-101A control panel will result in a 30 second delay before the system can be restarted. You must wait 30 seconds after reactivation of the line disconnect switch before system will restart. 6. Push start button on the control center (see Figure 20). The WX-101A and disposer will run and cold water will flow into the disposer. 7. Observe auger rotation by looking up into discharge chute; auger should rotate clockwise (when viewed from above). See Figure 21. NOTE: If auger rotates counter-clockwise, turn off main power supply, wait 60 seconds, then restart. If auger continues to rotate counter-clockwise (when viewed from above), unit must be re-wired. Turn off main power. On three phase Waste Xpress interchange leads L1 and L2. Restart. 8. Make sure cold water is flowing into disposer. 9. Make sure hot water to Waste Xpress spray nozzles is cycling. Factory set cycle is 10 seconds on and 2 minutes off. 10. Press stop button to stop disposer and Waste Xpress. Steam from chute should be evident. 11. Restart system and remove front cover/discharge chute. Waste Xpress and disposer should turn off automatically if interlock switch is functioning properly. Water will continue to flow into disposer. 12. Replace front cover/discharge chute and restart system. PERSONAL INJURY If system does not shut down when front cover/discharge chute is removed, interlock may not be wired correctly. See Troubleshooting section for corrective action. ELECTRICAL SHOCK Turn off electrical supply to Waste Xpress, control center and disposer before attempting to work on it. Test with a volt meter or circuit tester to insure that power is off. Figure 20. Start Stop Rotation of Auger Figure 21. 14
-
 1
1 -
2
-
3
-
4
-
5
-
6
-
7
-
 8
8 -
 9
9 -
 10
10 -
 11
11 -
 12
12 -
 13
13 -
 14
14 -
 15
15 -
 16
16 -
 17
17 -
 18
18 -
19
-
20
-
21
-
22
-
23
-
24
-
25
-
26
-
27
-
28
-
29
-
30
 |
 |
