Intermec CK3X Intermec RFID Demo User Guide
Intermec CK3X Manual
 |
View all Intermec CK3X manuals
Add to My Manuals
Save this manual to your list of manuals |
Intermec CK3X manual content summary:
- Intermec CK3X | Intermec RFID Demo User Guide - Page 1
Intermec RFID Demo User Guide - Intermec CK3X | Intermec RFID Demo User Guide - Page 2
, ShopScan, Smart Mobile Computing, SmartSystems, TE 2000, Trakker Antares, and Vista Powered are either trademarks or registered trademarks of Intermec Technologies Corporation. There are U.S. and foreign patents as well as U.S. and foreign patents pending. ii Intermec RFID Demo User Guide - Intermec CK3X | Intermec RFID Demo User Guide - Page 3
Services and Support v Warranty Information v Web Support v Send Feedback v Telephone Support v Who Should Read This Manual vi Related Documents vi 1 Read a Tag 1 About Intermec RFID Demo 2 Supported Computers Inventory 16 Perform a Tag Range Test 17 Intermec RFID Demo User Guide iii - Intermec CK3X | Intermec RFID Demo User Guide - Page 4
a Tag 21 Write the EPC Value 22 Write to the User Memory 24 Write the Access Password 25 Write the Kill Password 26 Protect a Tag 27 Unprotect a Tag 28 3 Troubleshooting 31 Troubleshooting 32 Verify if RFID is enabled 33 About the Write Error Messages 36 iv Intermec RFID Demo User Guide - Intermec CK3X | Intermec RFID Demo User Guide - Page 5
Global Services and Support Warranty Information To understand the warranty for your Intermec product, visit the Intermec website at www.intermec.com and click Support > Returns and Repairs > Warranty. Web Support Visit the Intermec website at www.intermec.com to download our current manuals (in PDF - Intermec CK3X | Intermec RFID Demo User Guide - Page 6
to this list) that you might find useful: • 70 Series Mobile Computer User Manual • BRI Programmer's Reference Manual • IP30 Handheld RFID Reader User Guide The Intermec website at www.intermec.com contains our documents (as .pdf files) that you can download for free. To download documents 1 Visit - Intermec CK3X | Intermec RFID Demo User Guide - Page 7
1 Read a Tag Use this chapter to learn about the following topics: • About Intermec RFID Demo • Configure the Read Settings • How to Read Tags 1 - Intermec CK3X | Intermec RFID Demo User Guide - Page 8
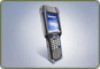
use the Intermec RFID Demo with any Intermec RFIDenabled mobile computer, including mobile computers that use the IP30. You can launch the Intermec RFID Demo from the Start or Home screen of the 70 Series RFID-enabled computers. The Start Screen and the Home Screen 2 Intermec RFID Demo User Guide - Intermec CK3X | Intermec RFID Demo User Guide - Page 9
Chapter 1 - Read a Tag Read and Write Modes The Intermec RFID Demo offers two modes: Read and Write. The Read Mode allows you to select several Scan mode Log data • Enable tag read beep • Enable search sound • Decode tag data • Define data field to read • Use filter Intermec RFID Demo User Guide 3 - Intermec CK3X | Intermec RFID Demo User Guide - Page 10
value of the RF Field Strength is 30 dB. You can change the default setting from the Start screen: Settings > System > Intermec Settings > RFID > Reader 1 > RFID Module. For help, see the mobile computer user manual. To temporarily adjust the level of the RF Field Strength 1 If you already launched - Intermec CK3X | Intermec RFID Demo User Guide - Page 11
data on the tags. To select the tag data format 1 If you already launched the Intermec RFID Demo, continue with Step 2. If not, from the Start or Home screen, tap Intermec RFID Demo. 2 Tap the Read Settings tab. 3 From the Format drop-down menu, select Hex or ASCII. Intermec RFID Demo User Guide 5 - Intermec CK3X | Intermec RFID Demo User Guide - Page 12
Start screen, then tap Program Files > RFIDDemo. To log read tag data 1 If you already launched the Intermec RFID Demo, continue with Step 2. If not, from the Start or Home screen, tap Intermec RFID Demo. 2 Tap the Read Settings tab. 3 Select the Log data check box. 6 Intermec RFID Demo User Guide - Intermec CK3X | Intermec RFID Demo User Guide - Page 13
when reading the RFID tags. The Intermec RFID Demo does not encode tag data on the Write screen. To enable the computer to decode tag data 1 From the Start or Home screen, tap Intermec RFID Demo. 2 Tap the Read Settings tab. 3 Select the Decode tag data check box. Intermec RFID Demo User Guide 7 - Intermec CK3X | Intermec RFID Demo User Guide - Page 14
Start or Home screen, tap Intermec RFID Demo. 2 Tap the Read Settings tab. 3 Select the Define data field to read check box and select a data field type from the drop-down menu. For information about Access or Kill password, see the BRI Programmer Reference Manual. 8 Intermec RFID Demo User Guide - Intermec CK3X | Intermec RFID Demo User Guide - Page 15
, 1abcf wz123(space) To enable the option to use ASCII EPC Filter 1 If you already launched the Intermec RFID Demo, continue with Step 2. If not, from the Start or Home screen, tap Intermec RFID Demo. 2 Tap the Read Settings tab. 3 Select the Use filter check box. Intermec RFID Demo User Guide 9 - Intermec CK3X | Intermec RFID Demo User Guide - Page 16
Chapter 1 - Read a Tag How to Read Tags The Intermec RFID Demo allows you to read RFID tags by selecting various scan modes. There are six options under Scan mode. Scan Mode Options Locates tag with the specified EPC number. Tests the read range of the test tag. 10 Intermec RFID Demo User Guide - Intermec CK3X | Intermec RFID Demo User Guide - Page 17
screen, tap Intermec RFID Demo. 2 From the Scan mode drop-down menu, select Read single tag. 3 Position the computer an inch away from the tag. Note: By default, the system automatically adjusts the power down when the tag, see "View Tag Field Details" on page 12. Intermec RFID Demo User Guide 11 - Intermec CK3X | Intermec RFID Demo User Guide - Page 18
screen, you can view the following information about a tag in any read mode: User definable, TID-4, TID-8, Access password, or Kill password. To view tag field detail 1 Specify which data field you want to view about a specific tag. The Details dialog box appears. 12 Intermec RFID Demo User Guide - Intermec CK3X | Intermec RFID Demo User Guide - Page 19
read a small group of tags 1 If you already launched the Intermec RFID Demo, continue with Step 2. If not, from the Start or Home screen, tap Intermec RFID Demo. 2 From the Scan mode drop-down menu, select tag, see the previous section, "View Tag Field Details." Intermec RFID Demo User Guide 13 - Intermec CK3X | Intermec RFID Demo User Guide - Page 20
Demo, continue with Step 2. If not, from the Start or Home screen, tap Intermec RFID Demo. 2 From the Scan mode drop-down menu, select Locate a tag. 3 Scan a group of tags: • Pull and hold the trigger (IP30) or the scan handle, or • Press and hold the Scan button. 14 Intermec RFID Demo User Guide - Intermec CK3X | Intermec RFID Demo User Guide - Page 21
indicators of the distance between the tag and the computer. • The Far to Near visual indicator shows you the distance the tag is located from the computer. • The value of the Signal Strength changes Steps 1 through 6 and select a different EPC value each time. Intermec RFID Demo User Guide 15 - Intermec CK3X | Intermec RFID Demo User Guide - Page 22
them one time each. By default, the application is set to read a large group of tags (like you are taking inventory). To take inventory 1 If you already launched the Intermec RFID Demo, continue with Step 2. . This avoids the possibility of missing some tags. 16 Intermec RFID Demo User Guide - Intermec CK3X | Intermec RFID Demo User Guide - Page 23
or away from the tag, you can evaluate how far away you can be to read the tag. power level and repeat Steps 1 through 3. For more information, see "Adjust the RF Field Strength" on page 4. 6 (Optional) You can view field detail information of a tag from any read mode. Intermec RFID Demo User Guide - Intermec CK3X | Intermec RFID Demo User Guide - Page 24
Chapter 1 - Read a Tag 18 Intermec RFID Demo User Guide - Intermec CK3X | Intermec RFID Demo User Guide - Page 25
2 Write a Tag Use this chapter to learn about the following topics: • Configure the Write Settings • How to Write to a Tag 19 - Intermec CK3X | Intermec RFID Demo User Guide - Page 26
the Intermec RFID Demo, continue with Step 2. If not, from the Start or Home screen, tap Intermec RFID Demo. 2 Tap Menu > Write. 3 Tap the Write Settings tab. 4 From the Data source drop-down menu, select the encoding method you want to use for writing a tag. 20 Intermec RFID Demo User Guide - Intermec CK3X | Intermec RFID Demo User Guide - Page 27
to a Tag You can use the Intermec RFID Demo to demonstrate how to write to an RFID tag. Types of data you can write to a tag are: • EPC • User Memory • Access Password • Kill Password You can also use the Intermec RFID Demo to protect data that you write to a tag. Intermec RFID Demo User Guide 21 - Intermec CK3X | Intermec RFID Demo User Guide - Page 28
tap Intermec RFID Demo. 2 Tap Menu > Write and then tap the Write Settings tab. Set the encoding method for writing the tag. For help, see "Set the Encoding Method to Write a Tag" on page 20. 3 Tap the Write Mode tab and select EPC from the Program drop-down menu. 22 Intermec RFID Demo User Guide - Intermec CK3X | Intermec RFID Demo User Guide - Page 29
" on page 36. 8 (Optional) To verify that the EPC value was written successfully, read the tag. For help, see "Read a Single Tag" on page 11. Intermec RFID Demo User Guide 23 - Intermec CK3X | Intermec RFID Demo User Guide - Page 30
, a table displays the EPC value of the tag with an error. For a list of errors, see "About the Write Error Messages" on page 36. 24 Intermec RFID Demo User Guide - Intermec CK3X | Intermec RFID Demo User Guide - Page 31
dropdown menu, see "Protect a Tag" on page 27. 6 In the Data field, enter the data for the access password. The user memory must be: • a hex formatted data string • 4-bytes long. 7 Write to a tag: • Pull and hold , see "About the Write Error Messages" on page 36. Intermec RFID Demo User Guide 25 - Intermec CK3X | Intermec RFID Demo User Guide - Page 32
, see "Protect a Tag" on page 27. 5 In the Data field, enter the data for the kill password. The data must be: • a hex formatted data string • 4-bytes long. 6 Scan a tag: • Pull and hold the trigger (IP30) or the scan handle, or • Press and hold the Scan button. 26 Intermec RFID Demo User Guide - Intermec CK3X | Intermec RFID Demo User Guide - Page 33
. 3 From the Program drop-down menu, select one of the following: • EPC • User memory • Access password • Kill password 4 From the drop-down menu, select Protect. 5 In the Data field, enter the access password you recently programmed. The password must be 4 bytes. Intermec RFID Demo User Guide 27 - Intermec CK3X | Intermec RFID Demo User Guide - Page 34
from the Start or Home screen, tap Intermec RFID Demo. 2 Tap Menu > Write. The Write Mode tab appears. 3 From the Program drop-down menu, select one of the following: • EPC • User memory • Access password • Kill password 4 From the drop-down menu, select Unprotect. 28 Intermec RFID Demo User Guide - Intermec CK3X | Intermec RFID Demo User Guide - Page 35
Chapter 2 - Write a Tag 5 In the Data field, enter the password you used to protect the tag data. 6 Scan the tag: • Pull and hold the Write to a Tag" on page 21. If the application can write to the tag without a password, the tag has been successfully unprotected. Intermec RFID Demo User Guide 29 - Intermec CK3X | Intermec RFID Demo User Guide - Page 36
Chapter 2 - Write a Tag 30 Intermec RFID Demo User Guide - Intermec CK3X | Intermec RFID Demo User Guide - Page 37
3 Troubleshooting Use this chapter to learn about the following topics: • Troubleshooting • About the Write Error Messages 31 - Intermec CK3X | Intermec RFID Demo User Guide - Page 38
. Problems Using RFID Demo Application Problem Solution Intermec RFID If the Intermec RFID Demo does not start or connect to the reader, make Demo fails to start. sure you: • verify the IP30 battery is fully charged and properly seated. • verify RFID is enabled. • reboot your mobile computer - Intermec CK3X | Intermec RFID Demo User Guide - Page 39
if RFID is enabled: • Verify if RFID is enabled from the Start screen. Tap Settings > Connections > Wireless Center • Verify if RFID is enabled from the Title bar on the Home screen. a Tap the Wi-Fi connection icon ( ) on the title bar. The system displays more icons. Intermec RFID Demo User Guide - Intermec CK3X | Intermec RFID Demo User Guide - Page 40
Chapter 3 - Troubleshooting b Tap the Connectivity icon ( ) to view the Connectivity screen. c Tap the Wireless Center link to view the Wireless Center screen. 34 Intermec RFID Demo User Guide - Intermec CK3X | Intermec RFID Demo User Guide - Page 41
Chapter 3 - Troubleshooting • Verify if RFID is enabled from the Intermec Settings. a On the Intermec Settings Main Menu screen, tap the vertical bar down to RFID. b For Windows Embedded Handheld 6.5, tap RFID > Enable RFID Service and verify that RFID is enabled. Intermec RFID Demo User Guide 35 - Intermec CK3X | Intermec RFID Demo User Guide - Page 42
because power was too low. Failed to write tag because the tag is password protected. You did not enter a password, or entered an incorrect password. Attempted to write to memory that does not exist in the specified tag. The computer cannot find or read the tag. 36 Intermec RFID Demo User Guide - Intermec CK3X | Intermec RFID Demo User Guide - Page 43
- Intermec CK3X | Intermec RFID Demo User Guide - Page 44
Worldwide Headquarters 6001 36th Avenue West Everett, Washington 98203 U.S.A. tel 425.348.2600 fax 425.355.9551 www.intermec.com © 2013 Intermec Technologies Corporation. All rights reserved. Intermec RFID Demo User Guide *934-068-001* P/N 934-068-001
-
 1
1 -
 2
2 -
 3
3 -
 4
4 -
 5
5 -
 6
6 -
 7
7 -
8
-
9
-
10
-
11
-
12
-
13
-
14
-
15
-
16
-
17
-
18
-
19
-
20
-
21
-
22
-
23
-
24
-
25
-
26
-
27
-
28
-
29
-
30
-
31
-
32
-
33
-
34
-
35
-
36
-
37
-
38
-
39
-
40
-
41
-
42
-
43
-
44
 |
 |

Intermec RFID Demo
User
Guide