JVC GY-DV300U Wired Peer-to-Peer Connections from Streamcorder to Computer - Page 5
You need to perform the following steps only if you have more than one NIC in your computer and are - used
 |
View all JVC GY-DV300U manuals
Add to My Manuals
Save this manual to your list of manuals |
Page 5 highlights
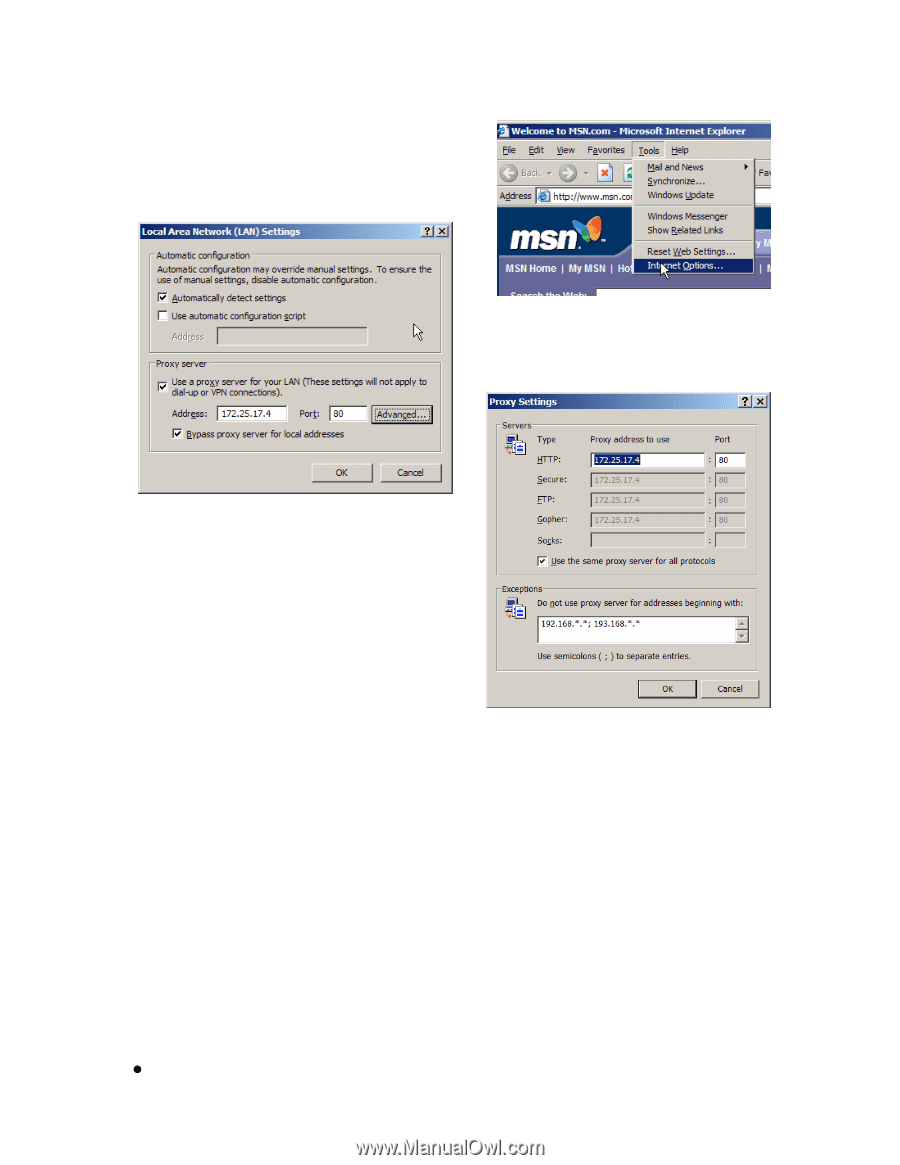
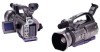
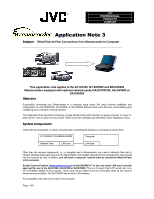
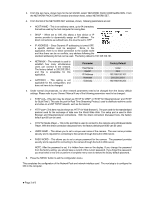
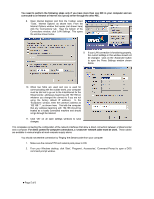
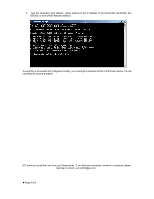
You need to perform the following steps only if you have more than one NIC in your computer and are connected to an Intranet or Internet via a proxy server through the other NIC. 8. Open Internet Explorer and from the Toolbar, select 'Tools', 'Internet Options' as shown here. From the Internet Options window that opens (not shown here) click the 'Connections' tab. Near the bottom of the Connections window, click 'LAN Settings'. This opens the window shown below. 9. If your LAN connection is functioning properly, the current settings in this window should not be changed. Click on the 'Advanced' button to open the Proxy Settings window shown below. 10. When two NICs are used and one is used for communicating with the outside world, your computer must be told not to go out to the Intra/Internet for the Streamcorder, addresses beginning with 192.168 (or whatever you changed the camera to if you are not using the factory default IP address). In the 'Exceptions' window, enter the camera's address as 192.168.*.*, as shown here. This tells the computer that any address beginning with 192.168 should be treated as a locally connected machine and should not go through the Internet. 11. Click 'OK' on all open settings windows to save changes. This completes connecting the configuration of the network interfaces that allow a direct connection between a Streamcorder and a computer. For direct camera-to-computer connections, a 'crossover' network cable must be used. These cables are available in various lengths at most computer supply stores. You should now test the connection by 'Pinging' the Streamcorder from your computer 1. Make sure the camera/VTR and network pack power is ON. 2. From your Windows desktop, click 'Start', 'Programs', Accessories', 'Command Prompt to open a DOS command prompt window. z Page 5 of 6
-
 1
1 -
 2
2 -
 3
3 -
 4
4 -
 5
5 -
 6
6
 |
 |