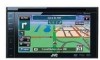
JVC KW-NT1 Instructions
JVC KW-NT1 - Navigation System With DVD player Manual
 |
UPC - 046838037108
View all JVC KW-NT1 manuals
Add to My Manuals
Save this manual to your list of manuals |
JVC KW-NT1 manual content summary:
- JVC KW-NT1 | Instructions - Page 1
SISTEMA DE NAVEGACIÓN GPS SYSTÈME DE NAVIGATION GPS KW-NT1 KW-NT1 KW-NT1 For installation and connections, refer to the separate manual. Para la instalación y las conexiones, refiérase al manual separado. Pour l'installation et les raccordements, se référer au manuel séparé. INSTRUCTIONS MANUAL DE - JVC KW-NT1 | Instructions - Page 2
a JVC product. Please read all instructions carefully before operation, to ensure your complete understanding and to obtain the best possible performance from the unit. IMPORTANT FOR LASER PRODUCTS 1. CLASS 1 LASER PRODUCT 2. CAUTION: Do not open the top cover. There are no user serviceable parts - JVC KW-NT1 | Instructions - Page 3
, wait until the temperature in the car becomes normal before operating the unit. While driving at a speed greater than 6 mi/h (10 km/h), some screens on the navigation menus are not available. WARNINGS: To prevent accidents and damage • DO NOT install any unit or wire any cable in a location where - JVC KW-NT1 | Instructions - Page 4
on the menu 35, 36 43, 44 Street Director Assistant Importing POI information on Google Maps You can import POI information on Google Maps through an SD. For details about Street Director Assistant, visit . • When the SD card is ejected, the imported POI cannot be used - JVC KW-NT1 | Instructions - Page 5
ENGLISH Disc Radio 51-57 49, 50 iPod/iPhone device 60-62 SD card/USB device 58, 59 AV sources Satellite radio 63−65 External component 66 Sound adjustment 67 Settings on the menu 68−70 Bluetooth cellular phone Handsfree talk Settings on the menu 80-84 79 Rear view camera 86 5 - JVC KW-NT1 | Instructions - Page 6
1 How to forcibly eject a disc AV screen [Hold] or Map screen 2 Soft case (supplied) Attaching [Hold] Caution: • Hold work, detach the monitor panel then attach it. How to read this manual: • < > indicates the variable screens/menus/operations/settings that appear on the touch panel. - JVC KW-NT1 | Instructions - Page 7
panel 6 How to forcibly eject a disc 6 Introduction 8 Installation settings 9 Parts identification 10 Basic operations 11 About operating screens 12 Switching screens 14 Navigation System 16 Safety instructions for the Navigation System..........17 Basic operations 18 Registering your home - JVC KW-NT1 | Instructions - Page 8
ENGLISH Introduction 9 Installation settings 10 Parts identification 11 Basic operations Turning on the power 11 Adjusting the audio volume 11 Displaying monitor setting bars 11 12 About operating screens Map screens 12 AV screens 12 14 Switching screens 8 - JVC KW-NT1 | Instructions - Page 9
the system language through . (☞ page 70) ! Display installation settings screen. • If you select [Skip Installation Settings (for Store Display)], the System starts in the navigation demonstration mode for stores. You need to make the installation settings next time you turn on the power - JVC KW-NT1 | Instructions - Page 10
by touching the appropriate part of the touch pad controls. AV MAP/AV OFF button • Switches the screen between the map screen and AV screen AV control bars while the map is displayed. (☞ page 14) • Displays the monitor setting bars. [Hold] (☞ page 11) +/− buttons Adjusts the audio volume. (☞ page 11 - JVC KW-NT1 | Instructions - Page 11
ignition switch is turned off. Adjusting the audio volume Increase Decrease Night Map Mode *1 Screen Off Changes the map to the night color. • Auto: Activates only when the map screen is displayed. *2 The ILLUMINATION CONTROL lead connection is required. (☞ Installation/Connection Manual) 11 - JVC KW-NT1 | Instructions - Page 12
ENGLISH About operating screens Map screens Destination Menu Searches for the destination. AV screens AV Menu Changes or turns off the AV source. Function Menu Shows the information about the navigation system. Settings Changes the detailed settings. Options Changes the detailed settings. 12 - JVC KW-NT1 | Instructions - Page 13
ENGLISH When items on the menu are not available To select folder/track on the list Select a folder (1), then a track (2). Current folder Current track • Non-available items will be shaded. To change the page of menu/list Menu Current page/total menu pages Changes the page List Ex.: Folder/ - JVC KW-NT1 | Instructions - Page 14
as you insert a disc or connecting a USB device or iPod/iPhone. • Operations on the map are not available while the AV control bars are displayed. • You • Press [ ]. • Touch the map area. • Press [ ] to return to the previous screen. • On navigation screens only: press [ ] to display the current - JVC KW-NT1 | Instructions - Page 15
ENGLISH Destination Menu Function Menu AV screen *1 AV Menu Options Settings *2 *2 *1 You can change the source by pressing the AV source icon. *2 Switches the category by pressing the corresponding tab. 15 - JVC KW-NT1 | Instructions - Page 16
System 17 Safety instructions for the Navigation System 18 Basic operations To change the map scale 19 To scroll the map 19 To display your current position 20 To change the map view 20 21 Registering your home/ favorite points Registering your home/favorite points.... 21 Editing registration - JVC KW-NT1 | Instructions - Page 17
ENGLISH Safety instructions for the Navigation System SAFETY INSTRUCTIONS Use of the Navigation System is only permitted if the traffic conditions are suitable and you are absolutely sure that no risk, obstruction or inconvenience will be incurred to you, your passengers or other road users. The - JVC KW-NT1 | Instructions - Page 18
POI (Point Of Interest) (☞ page 46) Current time Direction Scale Zoom buttons (☞ page 19) Shows the navigation menu (☞ page 14) Current street Speed limit on the current street • The information on the map (such as street name, the POI information, and speed limit) may not be always displayed - JVC KW-NT1 | Instructions - Page 19
Zoom out * You can also select a scale directly by pressing one of the scale buttons. The map scrolls to the direction you are touching and holding. • Touch and hold the map to keep scrolling the map. • The scrolling speed varies depending on the position you are touching and holding: - Inner area - JVC KW-NT1 | Instructions - Page 20
Basic operations To display your current position To change the map view 2D Heading Up or The map rotates so that you are always displayed heading "upwards." • The icon shows the direction of north. 3D Map The three dimensional map is displayed in "heading up." • The icon shows the direction - JVC KW-NT1 | Instructions - Page 21
position is saved as home and the home is marked with icon on the map. • When the home is already registered, you are asked if you want as a favorite point and the favorite point is marked with icon on the map. (You cannot save the selected position if 100 favorite points are already registered - JVC KW-NT1 | Instructions - Page 22
ENGLISH Registering your home/favorite points Editing registration 1 Select a registered point you want to edit. To select your home A To edit the name • You can use up to 30 characters. To select a favorite point B To edit the phone number • For details about input screen, ☞ page 23. To - JVC KW-NT1 | Instructions - Page 23
ENGLISH Searching for a place About search screens and input screens Read through the following instructions for using search screens and input screens before using . To enter names, addresses, or numbers Number of matches*1 State/Province selecting screen You - JVC KW-NT1 | Instructions - Page 24
ENGLISH Searching for a place Setting a destination on the map 1 Touch the position where you want to select as a for POIs (Point Of Interest) around your current position, the position selected on the map, the destination, or the route you are taking (☞ page 28) POI Name Searches from - JVC KW-NT1 | Instructions - Page 25
ENGLISH To go home When you have registered your home (☞ page 21), you can easily get guided to home. While not guided... By address 1 2 Enter the city name, then select from the list (☞ page 23). Changes State or Province Specifies the zip code (☞ "To specify the - JVC KW-NT1 | Instructions - Page 26
ENGLISH Searching for a place 3 Enter the street name, then select from the list (☞ page 23). To select the center of the street or inter section on the street Specifies the crossing street to select intersection on the street Selects the center of the city (Then, go to step 5.) Selects the - JVC KW-NT1 | Instructions - Page 27
ENGLISH By telephone number 1 By coordinates 1 2 Enter the telephone number, then select from the list (☞ page 23). Changes country 2 Enter the latitude and the longitude. • For details about the information screen, ☞ page 34. • To start guidance, ☞ page 33. • To set the - JVC KW-NT1 | Instructions - Page 28
, etc. You can search for a POI around the place where you are now. While guided, you can also search for a POI near the destination or along the route. 1 3 12.5 mi (20 km) of your current position or the position selected on the map. If no POI is found in this area, the System expands the area to - JVC KW-NT1 | Instructions - Page 29
ENGLISH From the list of POI 1 2 Enter the POI name, then select from the list (☞ page 23). Changes State or Province Lists from the nearest Lists in alphabetical order Specifies the category and sub-category (☞ "To specify the category and sub-category" below) To specify the category - JVC KW-NT1 | Instructions - Page 30
ENGLISH Searching for a place From your favorites • For registering your favorite points, ☞ page 21. 1 From previous destinations You can select a place from the last 50 destinations and via points. 1 2 Select a favorite point from the list. 2 Select a place from the list - JVC KW-NT1 | Instructions - Page 31
registered category within about 12.5 mi (20 km) around your current position (180 mi (300 km) along the route you are taking while guided). To register a category to the buttons 1 Select one of the [Quick Search] buttons to register the category. Registered category 2 Select a category, then - JVC KW-NT1 | Instructions - Page 32
ENGLISH Searching for a place To change a category assigned to the Quick Search button 1 Select one of the [Quick Search] buttons whose category you want to change. To use Quick Search 1 Press one of the [Quick Search] buttons to start searching. "Searching..." 2 Select a POI from the list. or • - JVC KW-NT1 | Instructions - Page 33
ENGLISH Starting guidance Starting guidance to the destination 1 Select a destination. (☞ pages 23 to 32) 2 Changing route options 1 Select a destination. (☞ pages 23 to 32) 2 The System starts calculating the route to the selected destination, and guidance starts. 3 Set options. Cancels the - JVC KW-NT1 | Instructions - Page 34
map screen, you can do various operations by pressing one of the buttons on the information screen. Available buttons vary according to the type of the selected position and the navigation map of selected area on whole screen by touching the map part once. (If you press more than once, the map - JVC KW-NT1 | Instructions - Page 35
ENGLISH Arranging your route Adding places to stop by After selecting your destination, you can select up to four places ("via points") to stop by. To add via points After guidance has started... 1 Select a place you want to stop by. (☞ pages 23 to 32) 2 To change the sequence of the destination/ - JVC KW-NT1 | Instructions - Page 36
destination/via points. To optimize the sequence Avoiding a congestion ahead If you realize a congestion exists ahead... While being guided... 1 2 To rearrange the sequence manually 3 Select the distance to avoid. [ ]: Moves up the order of selected point [ ]: Moves down the order of selected - JVC KW-NT1 | Instructions - Page 37
ENGLISH How you are guided Screen while guided Name of the next street Lanes to take* • Yellow: remaining time. * Appears when coming within 3 mi (5 km) of it. • The information on the map (such as street name, the POI information, and speed limit) may not be always displayed depending on - JVC KW-NT1 | Instructions - Page 38
by touching the map part on the right side of the screen. What if I miss a turn? Don't worry. The System calculates a new route quickly and guides you to the destination. • When you reach the area approximately within 120 ft (40 m) around the destination/via point, the Navigation System considers - JVC KW-NT1 | Instructions - Page 39
ENGLISH Getting information on your route and places To check the entire route To confirm how your trip will go 1 2 Drive simulation starts. To check the information on the destination and via points 1 2 Shows the simulation just before the next turn Changes the speed of the drive simulation - JVC KW-NT1 | Instructions - Page 40
you are guided Customizing how you are guided To adjust the volume of the voice guidance Adjust the volume level on . • About the adjustable volume range, ☞ page 68. Adjusting the vehicle position If you find your current position is displayed on a wrong place on the map, use this - JVC KW-NT1 | Instructions - Page 41
the car 3 Latitude and longitude of your current position 4 Altitude of your current position 5 Date/Local time • When the System cannot receive the GPS signals, the value of each item above are shown as "- -." 6 p 7 q 8 w 9 6 Name of the unit 7 Version of the software 8 Version of the map - JVC KW-NT1 | Instructions - Page 42
home. Deletes all favorite points. Deletes all the places in the list of previous destinations/via points. The settings you have made in navigation menus and Quick Search registration are initialized. A confirmation message appears. Press [Yes] to confirm the operation. Press [No] to cancel. 42 - JVC KW-NT1 | Instructions - Page 43
ENGLISH Navigation menu items Function Menu-Options Menu items Priority Freeway Selectable settings Fastest, Shortest (☞ page 33) Use, Avoid (☞ page 33) Initial: Underlined Route Toll Road Ferry - JVC KW-NT1 | Instructions - Page 44
ENGLISH Others Display Navigation menu items Menu items Magnified View Guidance in AV mode Speed Limit Sign Current Street Name One Way Vehicle Icon Scale Unit Vehicle Position Clear User Memory Restore Navi Settings Initial: Underlined Selectable settings On, Off (☞ page 40) Map, Voice (☞ page - JVC KW-NT1 | Instructions - Page 45
you are guided • If GPS signal reception is poor, navigation guidance may not be correct. • The System may not receive GPS signals in the a broad road - when starting your car shortly after starting the engine - when driving for the first time after installing the unit - after driving on areas - JVC KW-NT1 | Instructions - Page 46
Video Borders Crate & Barrel Hollywood Video Ground Golf Course Recreation Facility Ski Resort Tourist Attraction Travel Agency Zoo Entertainment Art Galleries Casino Museum Nightlife Theater Travel Airport Rest Area Car Rental Car Dealer & Service Motorcycle Dealer Used Car Dealer Auto Service - JVC KW-NT1 | Instructions - Page 47
types 52 Selecting playback modes 56 Settings for the disc playback 57 58 SD/USB operations 60 Listening to the iPod/iPhone Selecting a track/video from menu on the iPod/iPhone 62 63 Listening to the satellite radio Tuning in to a channel you want 64 Storing channels in memory 65 Selecting - JVC KW-NT1 | Instructions - Page 48
device (☞ pages 58 and 59) iPod* Plays an iPod/iPhone (☞ pages 60 to 62) Front Switches to an external ) AV-IN Switches to an external component connected to VIDEO IN/LINE IN jacks on the rear panel (☞ page instead of "USB" when an iPod/iPhone is connected. or [Hold] AV source is turned off. • - JVC KW-NT1 | Instructions - Page 49
Preset list ~ Select "TUNER" as the source. Ÿ Select the band. ! Search for a station. Auto search: Search mode ("Auto Search" or "Manual Search") Manual search: [Hold] • The ST indicator lights up when receiving an FM stereo broadcast with sufficient signal strength. Reducing the interference - JVC KW-NT1 | Instructions - Page 50
radio Storing stations in memory You can preset six channels for each band. Automatic presetting-SSM (Strong-station Sequential Memory) (For FM only) 1 Manual presetting 1 Tune in to a station you want to preset. (☞ page 49) Band The station frequency you want to preset 2 2 Select a preset number - JVC KW-NT1 | Instructions - Page 51
. (☞ also page 75) To eject a disc To prohibit disc ejection 1 • You can eject a disc when playing other AV source. 2 Press and hold AV MAP and any part of the screen. On + [Hold] [Hold] A confirmation message appears. Press [Yes] to confirm the operation. Press [No] to cancel. To - JVC KW-NT1 | Instructions - Page 52
Dual Disc DVD side Non-DVD side CD/VCD Audio CD/CD Text (CD-DA) VCD (Video CD) DTS-CD SVCD (Super Video CD) CD-ROM CD-I (CD-I Ready) CD back finalized +R/+RW (Video format only) discs. "DVD" is selected as its disc type when a +R/+RW disc is loaded. +RW double layer discs are not playable - JVC KW-NT1 | Instructions - Page 53
Press: Selects chapter Hold: Reverse/forward search*2 Selects aspect ratio - Full, Regular and Auto (☞ page 74) Selects view angle Selects audio language Using the menu selecting screen [Subtitle] Selects subtitle language [Menu] [Top M] Displays the disc menu [] Displays the menu selecting - JVC KW-NT1 | Instructions - Page 54
screen. The operating buttons and playback information disappear by pressing DISP or when no operation is done for about 5 seconds. Playback mode Audio format Sound mode (☞ page 67) Disc type *1 Program no. (or Playlist no.)/Chapter no. (or file no.)/Playing time [3 / 8] Starts playback/pauses - JVC KW-NT1 | Instructions - Page 55
only when the disc is CD text.*2 [ ][ ] [Mode] Selects playback modes (☞ page 56) Changes the settings for disc playback (☞ page 57) Playback mode Audio format (MP3/WAV) Sound mode (☞ page 67) Disc type Folder no./Track no./ Playing time While playing, "Jacket picture" is shown if the file has - JVC KW-NT1 | Instructions - Page 56
ENGLISH Disc operations Selecting playback modes For DVD/DVD-VR 1 For CD/MP3/WAV 2 Select Repeat mode. • For DVD: Chapter Repeats current chapter. Title Repeats current title. • For DVD-VR Chapter Repeats current chapter. Program Repeats current program (not available for Playlist playback - JVC KW-NT1 | Instructions - Page 57
Language Audio Language Subtitle Language Video Output Format Monitor Type 16:9 4:3LB 4:3PS D. Range Compres. D. Audio Output a low volume level while playing Dolby Digital software. Auto : Select to apply the effect to multi-channel encoded software. On : Select to always use this function - JVC KW-NT1 | Instructions - Page 58
You can connect a USB mass storage class device such as a USB memory, Digital Audio Player, etc. to the unit. • You cannot connect a computer or portable the USB device if it might hinder your safety driving. • Do not start the car engine if a USB device is connected. • Do not pull out and attach - JVC KW-NT1 | Instructions - Page 59
ENGLISH Playback mode Audio format (MP3) Source type ("SD" or "USB") Folder no./Track no./ Playing time While playing, "Jacket picture" is shown if the file has the tag - JVC KW-NT1 | Instructions - Page 60
terminal on the monitor panel by using USB 2.0 cable (accessory of the iPod/iPhone). • To watch the video: Connect the iPod/iPhone by using USB Audio and Video cable for iPod/iPhone- KS-U29 (not supplied). ☞ Installation/Connection Manual (separate volume) - Select "iPod" as the source when watching - JVC KW-NT1 | Instructions - Page 61
[4] [¢] Press: Selects track/video Hold: Reverse/forward search [Menu] Displays the Music/Video menu on the iPod/iPhone (☞ page 62) [Aspect]*2 speed of audio books (☞ page 60). Playback starts automatically. Ÿ Select a track/video. • You cannot resume playback for video sources under - JVC KW-NT1 | Instructions - Page 62
to the iPod/iPhone Selecting a track/video from menu on the iPod/iPhone 1 Searching items in the selected category by alphabet and number: 1 Select the alphabet or number of the beginning of the item's title you want to search. 2 Select the menu (Music or Video) (1), a category (2), then - JVC KW-NT1 | Instructions - Page 63
) to the satellite unit connector on the rear of this unit. • JVC SIRIUS Satellite Radio System, SC-C1 and KS-SRA100, PnP, SC-VDOC1 SAT" as the source. The SIRIUS Satellite radio starts updating all the SIRIUS channels. (☞ "GCI update" column below.) • Once completed, SIRIUS Satellite radio - JVC KW-NT1 | Instructions - Page 64
ENGLISH Listening to the satellite radio Tuning in to a channel you want Preset no. Band Signal Reception indicator Channel no./ Channel name Only for SIRIUS : Shows the SIRIUS ID. For SIRIUS Radio ~ Select "SAT" as the source. Only for SIRIUS Selects a channel directly (☞ page 65) Displays - JVC KW-NT1 | Instructions - Page 65
ENGLISH Storing channels in memory You can preset six channels for each band. 1 Tune in to a channel you want to preset. (☞ page 64) Selecting preset channels 2 Display the Preset List. 3 Select a preset number. [Hold] • You can also select a preset channel from Preset List. Perform steps 1 and - JVC KW-NT1 | Instructions - Page 66
. (☞ page 69) Front AV-IN ~ Connect an external component. AV-IN You can connect an external component to the LINE IN/VIDEO IN jacks. (☞ Installation/Connection Manual) ~ Select "AV-IN" as the source. AV mini cord (supplied) Ÿ Select "Front AV-IN" as the source. Ÿ Turn on the connected - JVC KW-NT1 | Instructions - Page 67
Sound equalization ENGLISH ~ Ÿ ! Select a sound mode. • For preset values of each sound mode, ☞ page 75. Storing your own adjustments You can store your adjustments into , , and . 1 Repeat steps ~ and Ÿ, then in step !... 2 Adjust (1), then store (2). Also adjusts the - JVC KW-NT1 | Instructions - Page 68
: VOL 0 to 15 (for guidance)/VOL 00 to 30 (for audio) (Select this if the peak power of the speakers is less than 50 W.) Off: Deactivates the built-in amplifier (VOL 0 to 20 for guidance/VOL 00 to 50 for audio.) *1 The TEL MUTING lead connection is required. (☞ Installation/Connection Manual) 68 - JVC KW-NT1 | Instructions - Page 69
VIDEO IN jacks. (☞ page 66) AV: Select when connecting an AV component such as a camcorder. Audio: Select when connecting an audio component such as a portable audio connection is required. (☞ Installation/Connection Manual) *5 The setting varies depending on the installation settings (☞page 9). For - JVC KW-NT1 | Instructions - Page 70
9) Initialize all settings you have made. Press [Restore] to initialize the settings. • When restoring the settings, adjust the settings on installation setting screen (☞ page 9). *1 The setting varies depending on the installation settings (☞page 9). *2 For entering the characters, ☞ page 23. 70 - JVC KW-NT1 | Instructions - Page 71
this manual, words "track" and "file" are interchangeably used. • This unit can only play back audio CD (CD-DA) files if different type of audio files • For details about DVD-VR format and Playlist, refer to the instructions supplied with the recording equipment. Disc Setup • When you select - JVC KW-NT1 | Instructions - Page 72
and connection ports, some USB devices may not be attached properly or the connection might be loose. • When connecting a USB device, refer also to its instructions. • Connect only one USB device to the unit at a time. Do not use a USB hub. • This unit may not recognize a memory card inserted into - JVC KW-NT1 | Instructions - Page 73
ENGLISH Disc/file information shown on the external monitor The following screens appear only on the external monitor. • CD Track Information Album Four seasons Artist Robert M. Smith Title Rain T. RPT TIME 00:14 Track : 6 / 14 Cloudy Fair Fog Hail Indian summer Rain Shower Snow Thunder Typhoon - JVC KW-NT1 | Instructions - Page 74
iPod/ iPhone using USB Audio and Video cable (KS-U29, not supplied). *2 The picture displayed on the screen of iPod/iPhone while playing back a track. Notice: When operating an iPod/iPhone, some operations may not be performed correctly or as intended. In this case, visit the following JVC web site - JVC KW-NT1 | Instructions - Page 75
multi-channel sources to this terminal. • DTS sound cannot be emitted. Playback disc Output signals DVD 48 kHz, 16 bits stereo Linear PCM with MPEG Audio MPEG bitstream 48 kHz, 16 bits stereo Linear PCM Audio CD 44.1 kHz, 16 bits stereo Linear PCM - JVC KW-NT1 | Instructions - Page 76
ENGLISH Additional information Language codes (for DVD language selection) Code Language Code Language AA Afar FA Persian AB Abkhazian FI Finnish AF Afrikaans FJ Fiji AM Ameharic FO Faroese AR Arabic FY Frisian AS Assamese GA Irish AY Aymara GD Scots Gaelic AZ Azerbaijani GL - JVC KW-NT1 | Instructions - Page 77
Switching between handsfree mode and phone mode 82 Making a call 83 Switching the calls on call waiting 84 Disconnecting a Bluetooth cellular phone 84 Deleting a registered Bluetooth cellular phone 84 85 Editing the phone number memory Copying the phone book 85 Deleting the memory in the - JVC KW-NT1 | Instructions - Page 78
device supports the function you have tried. "Memory full." You have tried to copy a 101st phone book entry. Delete unwanted names before copying. Bluetooth Information: If you wish to receive more information about Bluetooth, visit the following JVC web site: - JVC KW-NT1 | Instructions - Page 79
ENGLISH Bluetooth cellular phone settings 1 3 2 Menu items : ☞ page 84 ☞ page 84 Shows the device name to be shown on the cellular phone - "KW-NT1." Displays the PIN code of the unit. • To change the PIN code, press [Change], enter new calls automatically. Answer the calls manually. 79 - JVC KW-NT1 | Instructions - Page 80
you skip changing PIN code, go to step 4. To check the connection status of a Bluetooth cellular phone Blue: Connected White: Not connected PIN code (initial: 0000) 4 When a call comes in/making a call On map screen: The cellular phone control bars appear. On AV screen: AV source is turned off - JVC KW-NT1 | Instructions - Page 81
ENGLISH 5 Registered devices 6 Operate the Bluetooth cellular phone to connect. To connect a registered cellular phone 1 2 3 Select the device you want to connect. Cancel PIN code (initial: 0000) "Connected" appears. Press [OK] - JVC KW-NT1 | Instructions - Page 82
ENGLISH Using Bluetooth® cellular phone Ending the call/stopping ringing (canceling the outgoing call) Switching between handsfree mode and phone mode You can switch the talking method between - JVC KW-NT1 | Instructions - Page 83
ENGLISH Making a call • On the map screen, display the AV control bars by pressing DISP. Using From dialed calls From received calls • You can enter up to 32 numbers. Making a call while operating on the navigation system From phone book • For copying the phone book, ☞ page 85. or - JVC KW-NT1 | Instructions - Page 84
phone Switching the calls on call waiting You can switch the call to talk when another call comes in while you are talking. Deleting a registered Bluetooth cellular phone 1 When a call comes in while talking... 2 The call is switched. • To switch the call again, press the same button or end the - JVC KW-NT1 | Instructions - Page 85
ENGLISH Editing the phone number memory Copying the phone book You can copy the phone book memory of a cellular phone into the unit (up to 100 memories). 1 Display . (☞ page 83) 2 Deleting the memory in the 1 Display . (☞ page 83) 2 3 Operate the target cellular - JVC KW-NT1 | Instructions - Page 86
camera, the REVERSE GEAR SIGNAL lead connection is required. For connecting a rear view camera, ☞ Installation/Connection Manual. Activating/deactivating the rear Checking the rear view view camera 1 On map screen 1 On AV screen 2 2 On Select when connecting a rear view camera to the CAMERA - JVC KW-NT1 | Instructions - Page 87
ENGLISH References 88 Maintenance 89 Troubleshooting 95 Specifications 87 - JVC KW-NT1 | Instructions - Page 88
, etc. Moisture condensation Moisture may condense on the lens inside the unit in the following cases: • After starting the heater in the car. • If it becomes very humid inside the car. Should this occur, the unit may malfunction. In this case, eject the disc and leave the unit turned on for a few - JVC KW-NT1 | Instructions - Page 89
ENGLISH Troubleshooting What appears to be trouble is not always serious. Check the following points before calling a service center. • For operations with the external components, refer also to the instructions supplied with the adapters used for the connections (as well as the instructions - JVC KW-NT1 | Instructions - Page 90
selected city/state. The current position displayed on the map remains wrong for more than 30 minutes. Check the connection of the GPS antenna. "Check GPS Antenna" Check the connection of the GPS antenna. "Acquiring GPS Signal" "Route calculation failed." "Route calculation is aborted because - JVC KW-NT1 | Instructions - Page 91
manually. (☞ page 50) Static noise while listening to the radio. Connect the antenna again. • The format of files is not supported by the unit. Sound and pictures are sometimes interrupted (☞ Installation/Connection Manual) No picture appears on the external monitor. • Connect the video cord - JVC KW-NT1 | Instructions - Page 92
ENGLISH Troubleshooting MP3/WAV Symptoms Disc cannot be played back. Noise is generated. Tracks are not played back as you have intended them to play. Elapsed playing - JVC KW-NT1 | Instructions - Page 93
this unit or the iPod/iPhone. The headphones are disconnected during playback with set to . Restart playback. It takes a long time to loading an artwork. Operate the unit after the artwork is loaded. (☞ page 74) Check the connection of USB Audio and Video cable (KSU29, not - JVC KW-NT1 | Instructions - Page 94
Troubleshooting "No Signal" Symptoms Remedies/Causes • Turn on the video component if it is not on. • Connect the video component correctly. • Check whether or setting is correct. (☞ page 69) Bluetooth Bluetooth and the Bluetooth cellular phone. • Move the car to - JVC KW-NT1 | Instructions - Page 95
NAVIGATION SYSTEM System & Service Reception System Reception Frequency Sensitivity Update Rate GPS Antenna /PAL 1 Vp-p/75 Ω USB ( ), Front AV-IN, LINE IN, VIDEO IN, CAMERA IN, Antenna input, MIC IN VIDEO OUT OE REMOTE, DIGITAL OUT, Satellite unit connector AMPLIFIER Continued on the next page 95 - JVC KW-NT1 | Instructions - Page 96
Rate Compatible Device: Compatible File System: Max. Current: Version Output Power Service Area Profile FM (with channel interval set to 100 kHz or 200 1.5 Mbps Mass storage class FAT 32/16/12 DC 5 V 500 mA Bluetooth 1.2 certified +4 dBm Max. (Power class 2) Within 10 m (10.9 yd) HFP - JVC KW-NT1 | Instructions - Page 97
and logos are owned by the Bluetooth SIG, Inc. and any use of such marks by Victor Company of Japan, Limited (JVC) is under license. Other trademarks and trade names are those of their respective owners. • "Made for iPod" means that an electronic accessory has been designed to connect specifically - JVC KW-NT1 | Instructions - Page 98
the Queen in Right of Canada, © Queen's Printer for Ontario, © Canada Post Corporation, GeoBase ®. NT holds a non-exclusive license from the United States Postal Service ® to publish and sell ZIP+4 ® information. © United States Postal Service ® 2009. Prices are not established, controlled or - JVC KW-NT1 | Instructions - Page 99
You agree not to export from anywhere any part of the Data provided to you or any direct United Nations Convention for Contracts for the International Sale of Goods, which is explicitly excluded. You agree the Data provided to you hereunder. Government End Users. If the Data is being acquired by or - JVC KW-NT1 | Instructions - Page 100
gracias por la compra de un producto JVC. Como primer paso, por favor lea detenidamente este manual para comprender a fondo todas las instrucciones con las normas establecidas para dispositivos de Clase B, de conformidad con la Parte 15 de las reglas de la FCC (Comisión Federal de Comunicaciones). - JVC KW-NT1 | Instructions - Page 101
los menús de navegación no están disponibles. ADVERTENCIAS: Para evitar daños y accidentes • NO instale ningún receptor o tienda ningún cable en una ubicación donde; - puede obstaculizar las maniobras del volante incorporado al automóvil (refiérase al Manual de instalación/conexión). 3 - JVC KW-NT1 | Instructions - Page 102
ón de la ruta 21, 22 Ajustes en el menú 35, 36 43, 44 Asistente de direcciones Cómo importar información de puntos POI en Google Maps Puede importar información de puntos POI en Google Maps por medio de una tarjeta SD. Si desea información sobre el Asistente de direcciones, visite - JVC KW-NT1 | Instructions - Page 103
ESPAÑOL Disco Radio 51-57 49, 50 Dispositivo iPod/iPhone 60-62 Tarjeta SD/dispositivo USB 58, 59 Fuentes AV Radio satelital 63−65 Componente externo 66 Ajustes del sonido 67 Ajustes en el menú 68−70 Teléfono celular Bluetooth Conversación con manos libres Ajustes en el menú 80-84 79 - JVC KW-NT1 | Instructions - Page 104
• Tenga cuidado de no dejar caer el disco al ser expulsado. • Si esto no funciona, desenganche el panel del monitor, y luego fíjelo. Cómo leer este manual: • < > indica las diversas pantallas/menús/operaciones/ajustes que aparecen en el panel táctil. • [ ] indica los botones del panel táctil. 6 - JVC KW-NT1 | Instructions - Page 105
Ajustes de instalación 9 Identificación de las partes 10 Operaciones básicas 11 Acerca de las SD/USB 58 Para escuchar el iPod/iPhone 60 Para escuchar la radio satelital 63 Uso de retrovisión ...... 77 Uso de un teléfono celular Bluetooth 78 Edición de la memoria de números telefónicos - JVC KW-NT1 | Instructions - Page 106
ESPAÑOL Introducción 9 Ajustes de instalación 10 Identificación de las partes 11 Operaciones básicas Conexión de la alimentación 11 Ajuste del volumen de audio 11 Visualización de las barras de ajuste del monitor 11 12 Acerca de las pantallas de operación Pantallas del mapa 12 Pantallas AV 12 - JVC KW-NT1 | Instructions - Page 107
panel del monitor (luego vuélvalo a colocar). • Cuando selecciona [Iniciar ajustes instal.], se ajusta a . (☞ página 69) ⁄ de residencia para que el reloj se ajuste automáticamente con la señal GPS. Horario de Seleccione si se aplica verano*1 el horario de verano - JVC KW-NT1 | Instructions - Page 108
táctil Puede controlar la unidad tocando la parte apropiada de los controles de la almohadilla táctil. Botón AV MAP/AV OFF • Cambia entre la pantalla del del monitor. [Sostener] (☞ página 11) Botones +/− Ajusta el volumen de audio. (☞ página 11) Terminal de entrada ("USB,""iPod"y"Front AV-IN") • Si - JVC KW-NT1 | Instructions - Page 109
el interruptor de encendido, la unidad se apaga. Ajuste del volumen de audio Aumentar Disminuir Modo • Acerca del rango de volumen, ☞ página pantalla, realice una de las siguientes operaciones: - Pulse AV MAP. - Pulse y mantenga pulsado DISP. - Toque la pantalla. Manual de Instalación/Conexión) 11 - JVC KW-NT1 | Instructions - Page 110
Icono de POI Vista post. Ruta Desvío Simulac. Opciones Cancelar ruta Ajustes Cambia los ajustes detallados. Ajustes Audio Fader/Balance Ecualizador Subwoofer/HPF Volumen adaptable Silenc. Teléfono Pantalla Teléfono Sistema Flat Entrar Medio Muting1 Muting2 Desactivar Opciones Cambia - JVC KW-NT1 | Instructions - Page 111
ESPAÑOL Cuando las opciones del menú no están disponibles Menú de destino Menú de función Casa Previos Favoritos Dirección Alrededor Nombr. POI Búsq. ráp. 1 Teléfono Búsq. ráp. 2 Coordenadas Búsq. ráp. 3 Para seleccionar una carpeta/pista de la lista Seleccione una carpeta (1), luego - JVC KW-NT1 | Instructions - Page 112
Cambio de pantallas Botón AV MAP Botón DISP Pantalla del mapa ESPAÑOL Pantalla del mapa con barras de control AV *1 • Las barras de control AV también se visualizan cuando inserta un disco o conecta un dispositivo USB o iPod/iPhone. • Mientras se visualizan las barras de control AV no pueden - JVC KW-NT1 | Instructions - Page 113
Carretera de peaje Ferry *2 Sonido Pantalla Otros + rápido Usar + corta Evitar Usar Usar Evitar Evitar Ajustes Ajustes Audio Fader/Balance Ecualizador Subwoofer/HPF Volumen adaptable Silenc. Teléfono *2 Pantalla Teléfono Sistema Flat Entrar Medio Muting1 Muting2 Desactivar *1 Puede - JVC KW-NT1 | Instructions - Page 114
Sistema de navegación ESPAÑOL 17 Instrucciones de 33 Iniciando la guía seguridad para el Sistema Inicio de la guía hacia el destino 33 de navegación Para cancelar la guía 33 18 Operaciones básicas Cambio de opciones de ruta 33 Para cambiar la escala del mapa 19 35 Ordenación de su ruta - JVC KW-NT1 | Instructions - Page 115
le autoriza para conceder sublicencias. El uso de los datos está permitido solamente para este sistema JVC específico. Se prohíbe la extracción o uso adicional de partes significantes del contenido de la base de datos, o copiar, modificar, adaptar, traducir, analizar, descompilar o aplicar ingenier - JVC KW-NT1 | Instructions - Page 116
Operaciones básicas Su posición se encuentra siempre en el centro del mapa. Puntos favoritos (☞ páginas 21 y 30) Su posición Casa (☞ páginas 21 y 25) POI (Punto de interés) (☞ página 46) Hora actual Dirección Escala Botones de zoom (☞ página 19) ESPAÑOL Muestra el menú de navegación (☞ página - JVC KW-NT1 | Instructions - Page 117
ESPAÑOL Para cambiar la escala del mapa Para desplazar el mapa 1 Visualice los botones de zoom y de escala. La posición que ha tocado aparecerá centrado en el mapa. 2 Zoom de acercamiento Selecc. Botones de escala* Reducción * También puede seleccionar una escala directamente, pulsando uno de - JVC KW-NT1 | Instructions - Page 118
ESPAÑOL Operaciones básicas Para mostrar su posición actual Para cambiar la vista del mapa Selecc. o Opciones Ruta Prioridad Autopista Carretera de peaje Ferry Sonido Pantalla Otros + rápido Usar + corta Evitar Usar Usar Evitar Evitar Rumbo hacia arriba en 2D El mapa gira para que su - JVC KW-NT1 | Instructions - Page 119
ESPAÑOL Registrar su casa/sus puntos favoritos Registrar su casa/sus puntos favoritos Usted puede registrar un punto como su casa y 100 puntos favoritos. 4 Registre como su casa o su punto favorito. Guardar ubicación 1 Toque la posición que desea seleccionar como un destino. (☞ página 19) • - JVC KW-NT1 | Instructions - Page 120
ESPAÑOL Registrar su casa/sus puntos favoritos Edición de registros 1 Seleccione el punto registrado que desea editar. Para seleccionar su casa Menú de destino Menú de función Casa Previos Favoritos Dirección Alrededor Nombr. POI Búsq. ráp. 1 Teléfono Coordenadas Búsq. ráp. 2 Búsq. - JVC KW-NT1 | Instructions - Page 121
Alaska Alberta Arizona Arkansas British Columbia California Colorado Connecticut Delaware Introduce un espacio Visualiza otros teclados *2 Pulse: Borra el último carácter Sostener: Borra todos los caracteres Lista de coincidencias Cuando pulsa [Lista], en la pantalla de entrada, aparece una - JVC KW-NT1 | Instructions - Page 122
ESPAÑOL Búsqueda de un lugar Cómo definir un destino directamente sobre el mapa 1 Toque la posición que desea seleccionar como un destino. (☞ página 19) 2 Cómo definir un destino usando el Menú de destino 1 2 Menú de destino Menú de función Selecc. • Si hubiesen varios puntos POI en la posici - JVC KW-NT1 | Instructions - Page 123
ESPAÑOL Para ir a casa Si ha registrado su casa (☞ página 21), podrá ser guiado fácilmente hasta su casa. Mientras no se efectúa la guía... Casa Por dirección 1 Dirección 2 Introduzca el nombre de la ciudad, y luego seleccione de la lista. (☞ página 23) Cambia el estado o la provincia - JVC KW-NT1 | Instructions - Page 124
ESPAÑOL Búsqueda de un lugar 3 Introduzca el nombre de la calle, y luego seleccione de la lista. (☞ página 23) < Introduzca calle > Centro de la ciudad Para seleccionar el centro de la calle o la intersección de la calle Especifica la calle transversal para seleccionar la intersección de una calle - JVC KW-NT1 | Instructions - Page 125
ESPAÑOL Por número de teléfono 1 Teléfono 2 Introduzca el número de teléfono, y luego seleccione de la lista. (☞ página 23) Cambia los países < Introduzca Nº teléfono > United States Por coordenadas 1 Coordenadas 2 Ingrese la latitud y la longitud. OK United States - JVC KW-NT1 | Instructions - Page 126
ESPAÑOL Búsqueda de un lugar POI cerca de un lugar/ruta El sistema cuenta con una extensa base de datos de POI (Point Of Interest, o punto de interés), como restaurantes, estaciones de servicio, hospitales, etc. Puede efectuar la búsqueda de un POI cerca del sitio en que se encuentra - JVC KW-NT1 | Instructions - Page 127
ESPAÑOL Desde la lista de POI 1 Nombr. POI 2 Introduzca el nombre del POI, y luego seleccione de la lista. (☞ página 23) Cambia el estado o la provincia < Introduzca un nombre > Seleccionar categoría Maryland Ordena la lista desde el más cercano. Ordena la lista alfabéticamente - JVC KW-NT1 | Instructions - Page 128
ESPAÑOL Búsqueda de un lugar Desde sus favoritos • Para registrar su puntos favoritos, ☞ página 21. 1 Favoritos 2 Seleccione un punto favorito en la lista. Favoritos Desde destinos anteriores Puede seleccionar un lugar entre los últimos 50 destinos y puntos de vía. 1 Previos - JVC KW-NT1 | Instructions - Page 129
ESPAÑOL Búsqueda rápida Existen tres botones [Búsq. ráp.] en . Puede asignar una categoría de POI a cada botón. Cuando pulsa uno de los botones, el sistema busca un POI de la categoría registrada dentro de un radio de aproximadamente 12,5 millas (20 km) desde su posición actual ( - JVC KW-NT1 | Instructions - Page 130
ESPAÑOL Búsqueda de un lugar Para cambiar una categoría asignada al botón de Búsq. ráp. 1 Seleccione uno de los botones [Búsq. ráp.], para la categoría que desea cambiar. Menú de destino Menú de función Casa Previos Favoritos Dirección Alrededor Nombr. POI Teléfono Coordenadas Aparcamiento - JVC KW-NT1 | Instructions - Page 131
Iniciando la guía Inicio de la guía hacia el destino Cambio de opciones de ruta 1 Seleccione un destino. (☞ páginas 23 a 32) 2 1 Seleccione un destino. (☞ páginas 23 a 32) 2 ESPAÑOL Ir Guardar Añadir Opciones Ir Guardar Añadir Opciones El sistema inicia el cálculo de la ruta a seguir hasta - JVC KW-NT1 | Instructions - Page 132
del mapa pulsando los botones de zoom. (☞ página 19) • Si desea visualizar el mapa del área seleccionada en pantalla completa, toque una vez la parte del mapa. (El mapa se desplazará si pulsa más de una vez.) Para volver a visualizar la pantalla de información, pulse [Selecc.]. • La pantalla de - JVC KW-NT1 | Instructions - Page 133
ESPAÑOL Ordenación de su ruta Cómo añadir lugares de parada Después de seleccionar su destino, podrá seleccionar hasta cuatro lugares ("puntos intermedios") de parada. Para agregar puntos de vía Después que se inicie la guía... 1 Seleccione un punto de parada. (☞ páginas 23 a 32) 2 Para cambiar a - JVC KW-NT1 | Instructions - Page 134
ESPAÑOL Ordenación de su ruta 4 Cambie la secuencia del destino/puntos intermedios. Para optimizar la secuencia Ruta Detalle Editar Optimizar Recalcular Para reorganizar manualmente la secuencia Ruta Detalle Editar Borrar Optimizar Recalcular [ ]: El orden del punto seleccionado se - JVC KW-NT1 | Instructions - Page 135
ESPAÑOL Cómo se efectuará la guía Pantalla durante la guía Nombre de la calle siguiente Caminos a tomar* • Amarillo: Camino recomendado • Blanco: El camino que lleva al destino • Gris: Camino que no lleva al destino Calle actual Ruta a tomar (verde) Límite de velocidad en la calle actual - JVC KW-NT1 | Instructions - Page 136
sólo a través de los altavoces delanteros (y los jacks FRONT OUT en la parte trasera). La voz lo guía varias veces a medida que se aproxima al giro. és de . (☞ página 44) • Puede eliminar el mapa ampliando tocando la parte del mapa, en el lado derecho de la pantalla. ¿Qué pasa si no hago - JVC KW-NT1 | Instructions - Page 137
ESPAÑOL Obtener información sobre su ruta y los lugares Para verificar la ruta completa Para confirmar cómo será su viaje 1 Menú de función 2 Menú de destino Menú de función Info. vehículo Icono de POI Vista post. Ruta Desvío Simulac. Opciones Cancelar ruta Comienza la simulación de - JVC KW-NT1 | Instructions - Page 138
ESPAÑOL Cómo se efectuará la guía Personalizar el método de guía Ajuste de la posición del vehículo Para ajustar el volumen de la guía de voz Ajuste el nivel de volumen en . • Acerca del rango de volumen, ☞ página 68. Menú de destino Menú de función Info. vehículo Icono de POI - JVC KW-NT1 | Instructions - Page 139
, el valor de cada una de las opciones anteriores aparece como "- -". Sistema Información del vehículo GPS Sistema Información del vehículo 6 Nom. unid. 7 Software 8 Mapa 9 Voz GPS Iluminación Freno de Mano Señal inversa Sistema p Borrador q Borrador w Desactivar 6 Nombre de la unidad 7 Versi - JVC KW-NT1 | Instructions - Page 140
ESPAÑOL Inicialización de las memorias/ajustes de navegación 1 Menú de función Opciones 2 Opciones Ruta Sonido Pantalla Otros Prioridad + rápido + corta Autopista Usar Evitar Carretera de peaje Usar Evitar Ferry Usar Evitar Memorias de casa, puntos favoritos o destino/puntos - JVC KW-NT1 | Instructions - Page 141
ESPAÑOL Opciones del menú de navegación Menú de función-Opciones Menú de destino Menú de función Info. vehículo Icono de POI Vista post. Ruta Desvío Simulac. Opciones Cancelar ruta Opciones Ruta Prioridad Autopista Carretera de peaje Ferry Sonido Pantalla Otros + rápido Usar + - JVC KW-NT1 | Instructions - Page 142
ESPAÑOL Opciones del menú de navegación Pantalla Opciones del menú Lupa Guia en modo AV Señal de límite de velocidad Nombre de la calle actual Un sentido Icon coche Unidad de escala Pos. vehículo Borrar memoria de usuario Rest. ajustes Navi Inicial: Subrayado Ajustes seleccionables Borrador, - JVC KW-NT1 | Instructions - Page 143
de girar en estacionamientos subterráneos o del tipo de torre - después de paradas y arranques frecuentes en un atasco - cuando la precisión del GPS ha sido alterada intencionalmente - cuando conduce en una carretera recién construida • La ruta calculada por el sistema es una de las posibles rutas - JVC KW-NT1 | Instructions - Page 144
Noble Booksellers Bed Bath & Beyond Big5 Blockbuster Video Borders Crate & Barrel Hollywood Video Home Depot IKEA Lowe's Movie Gallery Office Depot Viajes Aeropuerto Área De Servicio Alquiler De Vehículos Conces. y servic. Venta motos Coches de segunda mano Servicios automóvil Banco Farmacia Mé - JVC KW-NT1 | Instructions - Page 145
modos de reproducción 56 Ajustes de la reproducción de discos 57 58 Operaciones SD/USB 60 Para escuchar el iPod/iPhone Selección de una pista/vídeo del menú del iPod/iPhone .......... 62 63 Para escuchar la radio satelital Sintonice el canal que desee 64 Cómo almacenar canales en la memoria 65 - JVC KW-NT1 | Instructions - Page 146
USB (☞ páginas 58 y 59) iPod* Reproduce un iPod/iPhone (☞ páginas 60 a 62) Front Cambia a un componente Cambia a un componente externo conectado a los jacks VIDEO IN/LINE IN en el panel trasero (☞ página 66 ginas 63 a 65) * Cuando se conecta un iPod/iPhone, se visualiza "iPod" como fuente, en lugar de - JVC KW-NT1 | Instructions - Page 147
de preajustes ~ Seleccione "TUNER" como fuente. Ÿ Selecciona la banda. Banda ! Busque una emisora. Búsqueda Auto: Búsqueda Manual: Modo de búsqueda ("Búsqueda Auto" o "Búsqueda Manual") Búsqueda Auto [Sostener] • El indicador ST se enciende al recibir una radiodifusión FM estéreo con una - JVC KW-NT1 | Instructions - Page 148
ESPAÑOL Para escuchar la radio Cómo almacenar emisoras en la memoria Se pueden preajustar seis canales para cada banda. Preajuste manual Preajuste automático-SSM (Memoria secuencial de las emisoras más fuertes) (Sólo para FM) 1 1 Sintonice la emisora que desea preajustar. (☞ página 49) Banda - JVC KW-NT1 | Instructions - Page 149
un disco Para impedir la expulsión de un disco 1 Modo • Puede expulsar un disco cuando reproduce otra fuente AV. 2 Pulse y mantenga pulsado AV MAP y cualquier sector de la pantalla. En Menú AV + [Sostener] [Sostener] Ajustes Desactivar AV Aparece un mensaje de confirmación. Pulse - JVC KW-NT1 | Instructions - Page 150
se puede reproducir ni emitir desde esta unidad. DVD Vídeo (Códigos regionales: 1)*1 DVD Audio DVD-ROM DVD Grabable/reescribible (DVD-R/-RW*2, +R/+RW*3) • DVD Vídeo: Puente +VR DVD-RAM Dual Disc Lado DVD Lado no-DVD CD/VCD CD de audio/CD Text (CD-DA) VCD (Vídeo CD) DTS-CD SVCD (Súper Ví - JVC KW-NT1 | Instructions - Page 151
hacia atrás/ adelante *2 Selecciona la relación de aspecto: Completa, Normal, Auto (☞ página 74) Selecciona el ángulo de visión Selecciona el idioma de audio Uso de la pantalla de selección de menús Volver Entrar [Subtítulos] Selecciona el idioma de los subtítulos [Menú] [M. sup.] Visualiza el - JVC KW-NT1 | Instructions - Page 152
la información de reproducción desaparecen pulsando DISP, o cuando no se realiza ninguna operación durante aproximadamente 5 segundos. Modo de reproducción Formato de audio Modo de sonido (☞ página 67) Tipo de disco *1 Nº de programa (o Nº de lista de reproducción)/Nº de capítulo (o Nº de archivo - JVC KW-NT1 | Instructions - Page 153
] Selecciona los modos de reproducción (☞ página 56) Cambia los ajustes de reproducción de discos (☞ página 57) Modo de reproducción Formato de audio (MP3/WAV) Modo de sonido (☞ página 67) Tipo de disco Nº de carpeta/Nº de pista/ tiempo de reproducción Durante la reproducción, aparecerá "Jacket - JVC KW-NT1 | Instructions - Page 154
ESPAÑOL Operaciones de los discos Selección de los modos de reproducción Para DVD/DVD-VR Para CD/MP3/WAV 1 Modo Aspecto Ángulo Audio Subtítulos Menú M. sup. 2 Seleccione el modo de repetición. Modo Repetir Config. Disco Capítulo Título Desactivar Entrar Modo Selecciona el modo - JVC KW-NT1 | Instructions - Page 155
genes en la pantalla. Compres. D. Range Sal. de Audio D. Podrá disfrutar de un sonido potente a bajos niveles de volumen mientras se reproduce un software Dolby Digital. Auto : Selecciónelo para aplicar el efecto al software codificado multicanal. Borrador : Selecciónelo para utilizar siempre esta - JVC KW-NT1 | Instructions - Page 156
Conexión de un dispositivo USB Puede conectar a la unidad, un dispositivo de clase de almacenamiento masivo USB tal como una memoria USB, reproductor de audio digital, etc. • No es posible conectar un computador o un HDD (disco duro) portátil al terminal ( ) USB de la unidad. ESPAÑOL Ÿ Inserte una - JVC KW-NT1 | Instructions - Page 157
ón Durante la reproducción, aparecerá "Jacket picture" si el archivo cuenta con datos de etiqueta que incluyan "Jacket picture". Formato de audio (MP3) Modo de sonido (☞ página 67) *1 Los datos de etiqueta aparecen solamente cuando están Lista grabados.*2 *3 [3 / 8] Comienza la reproducci - JVC KW-NT1 | Instructions - Page 158
panel del monitor por medio de un cable USB 2.0 (accesorio del iPod/iPhone). • Para ver vídeo: Conecte el iPod/iPhone por medio del cable USB Audio y Vídeo para iPod/iPhone - KS-U29 (no suministrado). ☞ Manual de instalación/ conexión (volumen separado) - Cuando mire vídeo, seleccione "iPod" como - JVC KW-NT1 | Instructions - Page 159
se mostrará la ilustración (la imagen visualizada en la pantalla del iPod/iPhone) si la Modo Menú canción contiene una ilustración. * Aspecto 2 de los audio libros. (☞ página 60) ~ Seleccione "iPod" como fuente. La reproducción se inicia automáticamente. Ÿ Seleccione una pista/video. • Bajo - JVC KW-NT1 | Instructions - Page 160
Selección de una pista/vídeo del menú del iPod/iPhone 1 Búsqueda alfabética o numérica de elementos en la categoría seleccionada: Modo Menú 2 Seleccione el menú (Música o Video) (1), una categoría (2), a continuación, la opción deseada (3). Menú de música: Seleccione la opción en la capa - JVC KW-NT1 | Instructions - Page 161
separadamente) al conector de la unidad satelital en la parte trasera de esta unidad. • Sistema de radio satelital JVC SIRIUS, SC-C1 y KS-SRA100, PnP, (7474). Una vez que haya finalizado su suscripción, aparecerá "Subscription Updated Press Any Key to Continue" en el monitor. El sintonizador XM* - JVC KW-NT1 | Instructions - Page 162
ESPAÑOL Para escuchar la radio satelital Sintonice el canal que desee N° de preajuste Banda Indicador de recepción de la señal Nº de canal/ Nombre del canal Sólo para SIRIUS : Modo Muestra SIRIUS ID. Para la radio SIRIUS ~ Seleccione "SAT" como fuente. Sólo para SIRIUS Lista 10 Key - JVC KW-NT1 | Instructions - Page 163
ESPAÑOL Cómo almacenar canales en la memoria Se pueden preajustar seis canales para cada banda. 1 Sintonice el canal que desea preajustar. (☞ página 64) Selección de los canales de preajuste Modo Lista 10 Key Banda Modo Lista 10 Key Banda 2 Visualice la lista de preajustes. 3 Seleccione - JVC KW-NT1 | Instructions - Page 164
69) Front AV-IN ~ Conexión de un componente externo. AV-IN Puede conectar un componente externo a los jacks LINE IN/VIDEO IN. (☞ Manual de Instalación/Conexión) ~ Seleccione "AV-IN" como fuente. Ÿ Encienda el componente conectado y comience a reproducir la fuente. Mini cable AV (suministrado - JVC KW-NT1 | Instructions - Page 165
ESPAÑOL Ecualización de sonido Ecualizador Editar ~ Ajustes Ÿ Ajustes Audio Fader/Balance Ecualizador Subwoofer/HPF Volumen adaptable Silenc. Teléfono Pantalla Teléfono Sistema Flat Entrar Medio Muting1 Muting2 Desactivar ! Seleccione un modo de sonido. Ecualizador Editar • Para los - JVC KW-NT1 | Instructions - Page 166
está conectado. de Paso : Selecciónelo cuando el subwoofer no está conectado. Volumen adaptable Al activar esta función, el sistema aumenta automáticamente el nivel del volumen (tanto de guía como de audio) conforme aumenta la velocidad del automóvil. Desactivar, Minimo, Medio, Maximo Silenc - JVC KW-NT1 | Instructions - Page 167
VIDEO IN. (☞ página 66) AV: Selecciónelo al conectar un componente AV, como una videocámara. Audio: Selecciónelo al conectar un componente de audio, como un reproductor de audio requiere la conexión del conductor ILLUMINATION CONTROL. (☞ Manual de Instalación/Conexión) *5 El ajuste varía dependiendo - JVC KW-NT1 | Instructions - Page 168
ESPAÑOL Opciones del menú AV Inicial: Subrayado Sistema Opciones del menú Idioma *1 Formato Tiempo Horario de verano*1 Zona Horaria*1 Área sintonizador Beep Mensaje de bienvenida Mensaje de apagado Polarid. señal inver.*1 Rest. ajust. predet. Ajustes seleccionables Selecciona el idioma - JVC KW-NT1 | Instructions - Page 169
ESPAÑOL Información adicional Disc General • En este manual, las palabras "pista" y "archivo" se utilizan indistintamente. • Este receptor sólo podrá reproducir archivos de CD de audio (CD-DA) si hay diferentes tipos de archivos de audio (MP3/WAV) grabados en el mismo disco. • Esta unidad puede - JVC KW-NT1 | Instructions - Page 170
ESPAÑOL Información adicional USB • Esta unidad no puede reconocer ningún dispositivo USB que tenga un régimen distinto de 5 V y que exceda de 500 mA. • Mientras se reproduce desde un dispositivo USB, el orden de reproducción puede ser diferente de otros reproductores. • Puede suceder que esta - JVC KW-NT1 | Instructions - Page 171
ESPAÑOL Información del disco/archivo mostrado en el monitor externo Las pantallas siguientes aparecen sólo en el monitor externo. • CD Track Information Album Four seasons Artist Robert M. Smith Title Rain T. RPT TIME 00:14 Track : 6 / 14 Cloudy Fair Fog Hail Indian summer Rain Shower Snow - JVC KW-NT1 | Instructions - Page 172
Audio y Video (KS-U29, no suministrado). *2 Imagen visualizada en la pantalla del iPod/iPhone mientras se reproduce una pista. Nota: Cuando opera un iPod/iPhone, algunas operaciones pueden no funcionar correctamente o como se desea. En tal caso, visite el siguiente sitio web de JVC: - JVC KW-NT1 | Instructions - Page 173
multicanal a este terminal. • El sonido DTS no se puede emitir. Disco de reproducción Señales de salida DVD 16 bit estéreo PCM Lineal con MPEG Audio MPEG bitstream 48 kHz, 16 bit estéreo PCM Lineal CD de audio 44,1 kHz, 16 bit estéreo PCM - JVC KW-NT1 | Instructions - Page 174
ESPAÑOL Información adicional Códigos de idiomas (para selección del idioma de DVD) Código Idioma Código Idioma AA Afar FA Persa AB Abkasiano FI Finlandés AF Afrikaans FJ Islas Fiji AM Amearico FO Faroés AR Arabe FY Frisón AS Asamés GA Irlandés AY Aimara GD Escocés Gaélico AZ - JVC KW-NT1 | Instructions - Page 175
teléfono 82 Cómo hacer una llamada 83 Cambio de llamada con llamada en espera 84 Desconexión de un teléfono celular Bluetooth 84 Eliminación de un teléfono celular Bluetooth registrado .......... 84 85 Edición de la memoria de números telefónicos Copia de la guía telefónica 85 Eliminación de la - JVC KW-NT1 | Instructions - Page 176
llena." Ha intentado copiar la 101º entrada de la guía telefónica. Antes de copiar, borre los nombres que ya no necesita. Información Bluetooth: Si desea obtener más información sobre Bluetooth, visite el siguiente sitio web de JVC: (solamente en inglés) 78 - JVC KW-NT1 | Instructions - Page 177
Bluetooth 1 Modo 3 Ajustes Audio Pantalla Teléfono Sistema Fader/Balance Ecualizador Flat Subwoofer/HPF Entrar Volumen adaptable Medio Silenc. Teléfono Muting1 Muting2 Desactivar 2 Menú AV Ajustes Desactivar AV Ajustes Audio el teléfono celular - "KW-NT1". Visualiza el código PIN de - JVC KW-NT1 | Instructions - Page 178
• Para utilizar la función Bluetooth, deberá activar la función Bluetooth del teléfono celular. 1 Active la función Bluetooth del teléfono celular. 2 Ajustes Teléfono 3 Cambie el código PIN. • Si omite el cambio del código PIN, vaya al paso 4. Ajustes Audio Conexión Borrar Vínculo Nombre - JVC KW-NT1 | Instructions - Page 179
] Para conectar un teléfono celular registrado 1 Ajustes Teléfono Dispositivos registrados 6 Opere el teléfono celular Bluetooth para conectarlo. 2 Ajustes Audio Pantalla Teléfono Sistema Conexión Conectar Desconecte Borrar Vínculo Borrar Nombre dispositivo Código PIN Cambiar Direcci - JVC KW-NT1 | Instructions - Page 180
ESPAÑOL Uso de un teléfono celular Bluetooth® Finalización de una llamada/ detención del timbre (cancelación de la llamada saliente) Hablando... Cambio entre el modo manos libres y el modo teléfono Puede cambiar - JVC KW-NT1 | Instructions - Page 181
ESPAÑOL Cómo hacer una llamada • En la pantalla del mapa, visualice las barras de control AV pulsando DISP. Modo Uso de A partir de llamadas marcadas Menú Llamadas Llamadas realizadas Llamadas recibidas Agenda Borrar Menú Llamadas • Puede ingresar un máximo de 32 números. Cómo - JVC KW-NT1 | Instructions - Page 182
nuevamente, pulse el mismo botón o finalice la llamada actual pulsando [ ]. Desconexión de un teléfono celular Bluetooth 1 Ajustes Teléfono 2 Ajustes Audio Pantalla Teléfono Sistema Conexión Conectar Desconecte Borrar Vínculo Borrar Nombre dispositivo Código PIN Cambiar Direcci - JVC KW-NT1 | Instructions - Page 183
ESPAÑOL Edición de la memoria de números telefónicos Copia de la guía telefónica Puede copiar, a esta unidad, la memoria de la guía telefónica de un teléfono celular (hasta 100 memorias). 1 Visualice . (☞ página 83) 2 Menú Llamadas Añadir Borrar Llamadas realizadas Llamadas - JVC KW-NT1 | Instructions - Page 184
. Para conectar una cámara de retrovisión, ☞ Manual de Instalación/Conexión Activación/desactivación de la cá del mapa Menú de función 2 Ajustes Audio Pantalla Teléfono Sistema Atenuador Ilum. Auto Tiempo - Press [ ] o [ ]. - Pulse AV MAP. - Cambio de marcha a una posición distinta de marcha - JVC KW-NT1 | Instructions - Page 185
ESPAÑOL Referencias 88 Mantenimiento 89 Localización de averías 95 Especificaciones 87 - JVC KW-NT1 | Instructions - Page 186
, insértelo suavemente alrededor del sujetador central (con la superficie impresa hacia arriba). • Asegúrese de guardar los discos en sus estuches después del uso. Partes transparente o semitransparentes en el área de grabación 88 - JVC KW-NT1 | Instructions - Page 187
ESPAÑOL General Síntomas No sale sonido de los altavoces. La pantalla al jack AV-IN en el panel del monitor o los jacks VIDEO IN/LINE IN en el panel trasero. • Inspeccione los cables y algunas funciones limitadas de la fuente actual. Pulse AV MAP y opere la fuente en la pantalla AV. El cá - JVC KW-NT1 | Instructions - Page 188
altavoces. Ajústelo al nivel óptimo. (☞ página 40) La guía de voz no sale del altavoz del lado del Cambie el ajuste . (☞ página 43) conductor. A veces antena GPS. siendo incorrecta durante más de 30 minutos. "Compr. antena GPS" Compruebe la conexión de la antena GPS. "Señal de GPS - JVC KW-NT1 | Instructions - Page 189
la reproducción mientras conduce por caminos accidentados. • Cambie el disco. El cable del freno de estacionamiento no está correctamente conectado. (☞ Manual de Instalación/Conexión) • Conecte correctamente el cable de vídeo. • Seleccione una entrada correcta en el monitor externo. • El disco est - JVC KW-NT1 | Instructions - Page 190
ESPAÑOL MP3/WAV Localización de averías Síntomas Soluciones/Causas No se puede reproducir el disco. • Cambie el disco. • Grabe las pistas en los discos apropiados, utilizando una aplicación compatible. (☞ página 52) • Añada códigos de extensión apropiados a los nombres de archivos. Se generan - JVC KW-NT1 | Instructions - Page 191
ANTENNA" (XM) • "Invalid Channel" (SIRIUS) • "CHANNEL - -" (XM) "OFF AIR" (XM) "Reiniciar08" Soluciones/Causas • Compruebe la conexión. • Cargue la pila. • Verifique si se ha seleccionado correctamente o . (☞ página 60) • Reinicialice el iPod/iPhone cable USB Audio y Video (KS- - JVC KW-NT1 | Instructions - Page 192
el cambio en la posición de marcha atrás (R). "No hay Señal" Esta unidad sólo se puede conectar con un teléfono celular Bluetooth a la vez. Mientras está conectado a un dispositivo, esta unidad no puede ser detectada por otro dispositivo. Desconecte el dispositivo conectado actualmente y repita la - JVC KW-NT1 | Instructions - Page 193
actualización 1/segundo, continua Antena GPS Polarización Polarización circular derecha Audio Nivel/impedancia salida línea: LINE OUT (FRONT/REAR), Impedancia de salida: SUBWOOFER AV-IN, LINE IN, VIDEO IN, CAMERA IN, entrada de antena, MIC IN VIDEO OUT OE REMOTE, DIGITAL OUT, conector de - JVC KW-NT1 | Instructions - Page 194
kHz/96 kHz: 16 Hz a 22 000 Hz CD: 16 Hz a 20 000 Hz Gama dinámica: 93 dB Relación señal a ruido: 95 dB Lloro y trémolo: Inferior al compatible: FAT 32/16/12 Corriente máx.: CC 5 V 500 mA Versión Bluetooth 1.2 certified Potencia de salida Máx. +4 dBm (Clase de potencia 2) Área de - JVC KW-NT1 | Instructions - Page 195
Bluetooth y sus logotipos son propiedad de Bluetooth SIG, Inc., y cualquier uso de los mismos por Victor Company of Japan, Limited (JVC) Apple Inc., registrada en los EE.UU. y otros países. • iPhone es una marca comercial de Apple Inc. • Este producto incorpora tecnología car audio más cercana. 97 - JVC KW-NT1 | Instructions - Page 196
AIS Merci pour avoir acheté un produit JVC. Veuillez lire attentivement toutes les instructions avant d'utiliser l'appareil afin de bien comprendre invisible si l'appareil est ouvert. Ne regardez pas le rayon. (Pour le Canada) Rayonnement laser visible et/ou invisible de classe 1 M une fois ouvert. - JVC KW-NT1 | Instructions - Page 197
tels environnements. Pour sécurité... • N'augmentez pas trop le volume car cela bloquerait les sons de l'extérieur rendant la conduite dangereuse. mi/h (10 km/h) , certains écrans des menus de navigation ne sont pas disponibles. FRANÇAIS AVERTISSEMENTS: Pour éviter installation/ raccordement). 3 - JVC KW-NT1 | Instructions - Page 198
FRANÇAIS Caractéristiques Système de navigation Recherche d'une destination/étape Adresse etc. Numéro de téléphone SD. Pour en savoir plus sur Street Director Assistant, consultez le site . • Quand la carte SD est éjectée, le Point d'intérêt importé ne peut pas être - JVC KW-NT1 | Instructions - Page 199
FRANÇAIS Disque Radio 51-57 49, 50 Appareil iPod/iPhone 60-62 Carte SD/périphérique USB 58, 59 Sources AV Radio satellite 63−65 Appareil extérieur 66 Ajustements sonores 67 Réglages sur le menu 68−70 Téléphones portables Bluetooth Conversation mains libre Réglages sur le menu 80-84 79 - JVC KW-NT1 | Instructions - Page 200
Retrait/fixation du panneau du moniteur Détachement 1 2 Étui souple (fourni) Comment forcer l'éjection d'un disque Écran AV Mode ou Écran de carte [Maintenez pressée la touche] Attachement [Maintenez pressée la touche] FRANÇAIS Attention: • Tenez solidement le panneau du moniteur de façon à - JVC KW-NT1 | Instructions - Page 201
moniteur 6 Comment forcer l'éjection d'un disque 6 Introduction 8 Réglages d'installation 9 Identification des parties 10 Fonctionnement de base 11 À propos des écrans de fonctionnement 12 Commutation d'écrans 14 Système de navigation......... 16 Instructions de sécurité pour le système de - JVC KW-NT1 | Instructions - Page 202
FRANÇAIS Introduction 9 Réglages d'installation 10 Identification des parties 11 Fonctionnement de base Mise sous tension de l'appareil 11 Réglage du volume audio 11 Affichage des barres de réglage du moniteur 11 12 À propos des écrans de fonctionnement Écrans de carte 12 Écrans AV 12 14 - JVC KW-NT1 | Instructions - Page 203
installation. Paramètres d'installation Début paramètres installation Ignorer Paramètres d'installation (version Démo) • Si vous choisissez [Ignorer Paramètres d'installation (version Démo)], le système démarre en mode de démonstration de navigation horloge avec le signal GPS. Heure d'été *1 - JVC KW-NT1 | Instructions - Page 204
Panneau tactile Vous pouvez commander l'appareil en touchant la partie appropriée du panneau tactile. Touche AV MAP/AV OFF • Commute entre l'écran de carte et l'écran AV (☞ page 14) • Met sous/hors service la fonction AV. [Maintenez pressé] (☞ page 48) Touche DISP • Affiche les barres de commande AV - JVC KW-NT1 | Instructions - Page 205
le contact de la voiture est coupé. Réglage du volume audio Plus fort Moins fort Affichage des barres de réglage du moniteur Met l'écran hors service. • Pour mettre en service l'écran, réalisez une des actions suivantes: - Appuyez sur AV MAP. - Maintenez press Manuel d'installation/Raccordement) 11 - JVC KW-NT1 | Instructions - Page 206
ou met hors service la source AV Menu Audio-Video Domicile Précéd. Favoris Adresse Voisinage Nom Pnt intérêt Téléphone Coordon. Rech Rapide 1 Rech Rapide 2 Rech Rapide 3 Paramètres Désactiver AV Menu Fonctions Affiche les informations sur le système de navigation. Menu Destination Menu - JVC KW-NT1 | Instructions - Page 207
FRANÇAIS Quand les articles sur le menu ne sont pas disponibles Menu Destination Menu Fonctions Domicile Précéd. Favoris Adresse Voisinage Nom Pnt intérêt Téléphone Coordon. Rech Rapide 1 Rech Rapide 2 Rech Rapide 3 • Les articles non disponibles sont affichés en gris. Pour changer la - JVC KW-NT1 | Instructions - Page 208
quand l'écran est hors service. Pour cacher les barres de commande AV, réalisez une des actions suivantes: • Appuyez sur DISP. • Appuyez sur [ ]. • Touchez la zone de la carte. • Appuyez sur [ ] pour retourner à l'écran précédent. • Sur les écrans de navigation uniquement: appuyez sur [ 14 - JVC KW-NT1 | Instructions - Page 209
Favoris Adresse Voisinage Nom Pnt intérêt Téléphone Coordon. Rech Rapide 1 Rech Rapide 2 Rech Rapide 3 Menu Fonctions Mode Menu Audio-Video Menu Audio-Video Menu Fonctions Menu Destination Menu Fonctions Infos Véhicule IcônePointIntérêt Vue AR Paramètres Désactiver AV Paramètres Itin - JVC KW-NT1 | Instructions - Page 210
ème de navigation FRANÇAIS 17 Instructions de sécurité 33 Démarrage du guidage pour le système de navigation Démarrage du ... 27 Par coordonnées - JVC KW-NT1 | Instructions - Page 211
navigation sert uniquement d'aide à la navigation. Il ne dispense pas les conducteurs de leur devoir de conduire attentivement et d'avoir leur propre jugement sur le trafic routier. Des instructions données est permise uniquement dans ce système JVC spécifique. Il est interdit d'extraire ou d' - JVC KW-NT1 | Instructions - Page 212
Direction Échelle Touches Zoom (☞ page 19) FRANÇAIS Affiche le menu de navigation (☞ page 14) Rue actuelle Limitation de vitesse dans la rue actuelle • Les terrain de golf dans la catégorie des loisirs - Icônes de station-service • Les icônes de POI peuvent ne pas être affichées correctement - JVC KW-NT1 | Instructions - Page 213
FRANÇAIS Pour changer l'échelle de la carte Pour faire défiler la carte 1 Affiche les touches de zoom et les touches de l'échelle. La position que vous avez touchée est centrée sur la carte. 2 Zoom avant Choisir Touches d'échelle* Zoom arrière * Vous pouvez aussi choisir une échelle directement - JVC KW-NT1 | Instructions - Page 214
FRANÇAIS Fonctionnement de base Pour afficher votre position actuelle Pour changer la vue de la carte Choisir ou Options Priorité Autoroute Route à péage Ferry Itinéraire Son Affichage Autres + Rapide Util. + Court Éviter Util. Éviter Util. Éviter 2D Destination vers le haut La carte - JVC KW-NT1 | Instructions - Page 215
FRANÇAIS Enregistrement de votre domicile/vos points favoris Enregistrement de votre domicile/vos points favoris Vous pouvez enregistrer un point comme votre domicile 4 Enregistrer comme domicile ou comme point ainsi que 100 points favoris. favori. 1 Touchez la position que vous souhaitez - JVC KW-NT1 | Instructions - Page 216
Enregistrement de votre domicile/vos points favoris Modification de l'enregistrement 1 Choisissez le point enregistré que vous souhaitez éditer. Pour choisir votre domicile Menu Destination Menu Fonctions A Pour modifier le nom • Vous pouvez utiliser un maximum de 30 caractères. Domicile Pr - JVC KW-NT1 | Instructions - Page 217
Recherche d'un lieu À propos des écrans de recherche et des écrans d'entrée Lisez attentivement les instructions suivantes pour utiliser les écrans de recherche et les écrans de saisie avant d'utiliser . Pour entrer des noms, des adresses ou des nombres - JVC KW-NT1 | Instructions - Page 218
Recherche d'un lieu Réglage d'une destination sur la carte 1 Touchez la position que vous souhaitez choisir comme destination. (☞ page 19) 2 Réglage d'une destination en utilisant le Menu Destination 1 FRANÇAIS Choisir 2 Menu Destination Menu Fonctions Domicile Précéd. Favoris Adresse • S' - JVC KW-NT1 | Instructions - Page 219
FRANÇAIS Pour aller à votre domicile Si vous avez enregistré votre domicile (☞ page 21), vous pouvez facilement être guidé jusqu'à votre domicile. Quand le guidage n'est pas en cours... Domicile Par adresse 1 Adresse 2 Entrez le nom de la ville, puis choisissez la destination - JVC KW-NT1 | Instructions - Page 220
FRANÇAIS Recherche d'un lieu 3 Entrez le nom de la rue, puis choisissez la destination dans la liste (☞ page 23). < Saisie Rue > Centre Ville Pour choisir le centre de la rue ou une intersection dans la rue Spécifie la rue d'intersection pour choisir l'intersection de la rue < Saisie N° Immeuble - JVC KW-NT1 | Instructions - Page 221
Par numéro de téléphone 1 Téléphone 2 Entrez le numéro de téléphone, puis choisissez la destination dans la liste (☞ page 23). Change le pays < Saisie N° Téléphone > United States Par coordonnées 1 Coordon. 2 Entrez la latitude et la longitude. OK FRANÇAIS United States - JVC KW-NT1 | Instructions - Page 222
une route Le système possède une immense base de données de POIs (points d'intérêt), tels que des restaurants, des stations services, des hôpitals, etc. Vous pouvez rechercher un POI près de l'endroit où vous vous trouvez actuellement. Pendant le guidage, vous pouvez aussi rechercher un - JVC KW-NT1 | Instructions - Page 223
catégorie Annule la catégorie choisie Permet d'effectuer une recherche parmi toutes les sous-catégories Choisir la Catégorie Station-Service Parking Hôtel Restaurant Chaîne restauration Annule Tous Américain Asiatique Barbecue/Sud Chinois Calculer Enregistrer Ajouter Options • Pour en savoir - JVC KW-NT1 | Instructions - Page 224
Recherche d'un lieu À partir des favoris • Pour l'enregistrement de vos points favoris, ☞ page 21. 1 Favoris 2 Choisissez un point favori dans la liste. Favoris À partir des destinations précédentes Vous pouvez choisir un lieu parmi les 50 dernières destinations et étapes. 1 Pr - JVC KW-NT1 | Instructions - Page 225
et une sous- catégorie pour le POI. Permet d'effectuer une recherche parmi toutes les sous-catégories Choisir la Catégorie Station-Service Parking Hôtel Restaurant Chaîne restauration Tous Parking D'échange Parking Couvert 3 Recherche rapide Catégorie enregistrée Parking Menu Destination Menu - JVC KW-NT1 | Instructions - Page 226
la catégorie. Menu Destination Menu Fonctions Domicile Précéd. Favoris Adresse Voisinage Nom Pnt intérêt Téléphone Parking Restaurant Coordon. Station-Service Pour utiliser la recherche rapide 1 Appuyez sur une des touches de [Rech Rapide] pour démarrer la recherche. Menu Destination - JVC KW-NT1 | Instructions - Page 227
Démarrage du guidage Démarrage du guidage jusqu'à la destination 1 Choisissez une destination. (☞ pages 23 à 32) 2 Changement des options de la route 1 Choisissez une destination. (☞ pages 23 à 32) 2 Calculer Enregistrer Ajouter Options Calculer Enregistrer Ajouter Options Le système démarre - JVC KW-NT1 | Instructions - Page 228
une des touches de l'écran d'information. Les touches disponibles varient en fonction du type de la position choisie et de l'état de navigation. Informations sur la position indiquée par le curseur [Calculer]: Démarre le guidage jusqu'à une position. (☞ page 33) [Remplacer]: Change la destination - JVC KW-NT1 | Instructions - Page 229
FRANÇAIS Préparation de votre route Ajout d'une étape Après avoir choisi votre destination, vous pouvez choisir un maximum de quatre lieux (étapes) où vous arrêter. Pour ajouter des étapes Une fois que le guidage a commencé... 1 Choisissez un endroit où vous souhaitez vous arrêter. (☞ pages 23 à - JVC KW-NT1 | Instructions - Page 230
FRANÇAIS Préparation de votre route 4 Changez l'ordre de la destination et des étapes. Pour optimiser l'ordre Itinéraire Détails Éditer Optimiser Recalculer Déviation pour éviter un encombrement plus loin sur la route Si vous réalisez qu'il y a un encombrement plus loin sur la route... Quand - JVC KW-NT1 | Instructions - Page 231
FRANÇAIS Comment fonctionne le guidage Écran pendant le guidage Nom de la rue suivante Voies à prendre* • Jaune: Voie recommandée • Blanc: La voie conduisant à votre destination • Gris: Voie ne conduisant pas à votre destination Rue actuelle Route à prendre (vert) Limitation de vitesse dans la - JVC KW-NT1 | Instructions - Page 232
avant (et les prises FRONT OUT à l'arrière). La voie vous guide plusieurs fois quand vous approchez du changement de direction. À un endroit proche guide jusqu'à la destination. • Quand vous atteignez une zone à environ 120 pieds (40 m) de la destination ou d'une étape, le système de navigation - JVC KW-NT1 | Instructions - Page 233
FRANÇAIS Obtention d'informations sur votre route et vos lieus Pour vérifier la route entière Pour vérifier comment votre voyage se présente 1 Menu Fonctions 2 Menu Destination Menu Fonctions Infos Véhicule IcônePointIntérêt Vue AR Itinéraire Détour Simulation Annuler Itinéraire Options - JVC KW-NT1 | Instructions - Page 234
FRANÇAIS Comment fonctionne le guidage Personnalisation du guidage Pour ajuster le volume du guidage vocal Ajustez le niveau de volume sur . • À propos de la plage de réglage du volume, ☞ page 68. Menu Destination Menu Fonctions Infos Véhicule IcônePointIntérêt Vue AR Réglage - JVC KW-NT1 | Instructions - Page 235
du système de navigation 1 2 Menu Fonctions Menu Destination Menu Fonctions Infos Véhicule IcônePointIntérêt Vue AR FRANÇAIS GPS Informations Véhicule GPS Système Vitesse 1 Cap 2 Lat. 3 Lon. Alt. 4 5 Satellites (Vert): Réception des signaux GPS et leur utilisation pour - JVC KW-NT1 | Instructions - Page 236
Supprime tous les endroits dans la liste des destinations/étapes précédentes Les réglages que vous avez réalisés dans les menus de navigation et l'enregistrement de la Recherche rapide sont initialisés. Un message de confirmation apparaît. Appuyez sur [Oui] pour confirmer l'opération. Appuyez sur - JVC KW-NT1 | Instructions - Page 237
FRANÇAIS Options du menu de navigation Menu Fonctions-Options Menu Destination Menu Fonctions Infos Véhicule IcônePointIntérêt Vue AR Itinéraire Détour Simulation Annuler Itinéraire Options Options Priorité Autoroute Route à pé - JVC KW-NT1 | Instructions - Page 238
FRANÇAIS Affichage Options du menu de navigation Articles du menu Loupe Guidage en mode AV Affichage vitesse limite Nom Rue Actuel Sens Unique Icône Véhic. Unité Échelle Posit. Véhicule Vider Mémoire - JVC KW-NT1 | Instructions - Page 239
GPS est mauvaise, le guidage de navigation peut ne pas être correct. • Le système peut ne pas recevoir les signaux GPS conduisez pour la première fois après avoir installé l'appareil - après avoir roulé dans une ème fonctionne correctement... - Vous pouvez être guidé sur une route fermée ou une route - JVC KW-NT1 | Instructions - Page 240
& Noble Booksellers Bed Bath & Beyond Big5 Blockbuster Video Borders Crate & Barrel Hollywood Video Home Depot IKEA Lowe's Movie Gallery Office Depot Office d'occasion Services automobiles Banque Pharmacie Centre médical Dentiste Urgences Hôpital/Polyclinique Services médicaux Services socio- - JVC KW-NT1 | Instructions - Page 241
sur les écrans AV Sélection de la source de lecture 48 Mise hors service la source AV 48 49 Écoute de la radio Réduction des interfé 58 Opérations SD/USB 60 Écoute de iPod/iPhone Sélection d'un plage/séquence vidéo à partir du menu de l'iPod/ iPhone 62 63 Écoute de la radio satellite Accord d'un - JVC KW-NT1 | Instructions - Page 242
des supports que vous avez attachés et des réglages ou que vous avez faits (☞ page 69). Vous pouvez aussi changer la source en appuyant répétitivement sur l'icône de la source actuelle sur l'écran AV. Menu Audio-Video Paramètres Désactiver AV Mise hors service la - JVC KW-NT1 | Instructions - Page 243
FRANÇAIS Écoute de la radio Nom de préréglage La fréquence de la station actuellement accordée Bande Indicateur ST Mode sonore (☞ page 67) Liste des préréglages Mode Bande ~ Choisissez "TUNER" comme source. Ÿ Choisissez la bande. Bande ! Recherchez une station. Recherche Auto: Recherche - JVC KW-NT1 | Instructions - Page 244
FRANÇAIS Écoute de la radio Mémorisation des stations Vous pouvez prérégler six canaux pour chaque bande. Préréglage automatique-SSM (Strongstation Sequential Memory) (Pour FM uniquement) 1 Préréglage manuel 1 Accordez la station que vous souhaitez prérégler. (☞ page 49) La fréquence de la station - JVC KW-NT1 | Instructions - Page 245
Vous pouvez éjecter un disque lors de la lecture d'une autre source AV. 2 Maintenez pressée AV MAP et n'importe quelle partie de l'écran. Au le Menu Audio-Video + [Maintenez pressée] Paramètres [Maintenez pressée] Désactiver AV Un message de confirmation apparaît. Appuyez sur - JVC KW-NT1 | Instructions - Page 246
Niveau 1, Niveau 2, Romeo et Joliet Dual Disc DVD Vidéo (Code de région: 1)*1 DVD Audio DVD-ROM DVD Vidéo DVD-VR *4 MP3/WAV JPEG WMA/AAC DivX/MPEG1/MPEG2/MPEG4 DVD+ quand un disque +R/+RW est mis en place. Les disques +RW à double couche ne peuvent pas être reproduits. *4 Cet appareil ne peut pas - JVC KW-NT1 | Instructions - Page 247
Entrer *1 État de lecture (8: pause/7: arrêt) *2 Vitesse de recherche: x2 ] x10 Précautions pour la lecture de disques à double face La face non DVD d'un disque à"DualDisc"n'est pas compatible avec le standard"Compact Disc Digital Audio". Par conséquent, l'utilisation de la face non DVD d'un disque - JVC KW-NT1 | Instructions - Page 248
commande et les informations de lecture disparaissent en appuyant sur DIPS ou quand aucune opération n'est réalisée pendant environ 5 secondes. Mode de lecture Format audio Mode sonore (☞ page 67) Type de disque *1 No de programme (ou No de liste de lecture)/No de chapitre (ou No de fichier)/dur - JVC KW-NT1 | Instructions - Page 249
[ ][ ] [Mode] Choisie les modes de lecture (☞ page 56) Change les réglages pour la lecture de disque (☞ page 57) FRANÇAIS Mode de lecture Format audio (MP3/WAV) Mode sonore (☞ page 67) Type de disque No. de dossier/Non. de plage/Durée de lecture Pendant la lecture, "Jacket picture"apparaît si - JVC KW-NT1 | Instructions - Page 250
la touche jusqu'à ce que le mode de lecture souhaité soit choisi. • Vous ne pouvez pas mettre en service le mode de répétition et le mode de lecture aléatoire en même temps. • CD audio : TRACK DISC Répète la plage actuelle. Reproduit aléatoirement toutes les plages. • Pour MP3/WAV: TRACK FOLDER - JVC KW-NT1 | Instructions - Page 251
aux illustrations ci-à gauche pour savoir comment les images apparaissent sur l'écran. Compres. P. Dyna Sortie Audio Num Vous pouvez profiter d'un son puissant à un faible niveau de volume lors de la lecture d'un support Dolby Digital. Auto : Choisissez ce réglage pour appliquer les effets aux - JVC KW-NT1 | Instructions - Page 252
du moniteur. Connexion d'un périphérique USB Vous pouvez connecter un périphérique USB à mémoire de grande capacité tel qu'une mémoire USB, un lecteur audio numérique, etc. à cet appareil. • Vous ne pouvez pas connecter un ordinateur ou un disque dur portable à la prise USB ( ) de l'appareil. FRAN - JVC KW-NT1 | Instructions - Page 253
possède des données de balise comprenant "Jacket picture". Mode de lecture Format audio (MP3) Liste Mode sonore (☞ page 67) *1 Les données de la touche jusqu'à ce que l'indication disparaisse. *6 Vous ne pouvez pas mettre en service le mode de répétition et le mode de lecture aléatoire en même - JVC KW-NT1 | Instructions - Page 254
moniteur en utilisant le câble USB 2.0 (accessoire de l'iPod/ iPhone). • Pour regarder une séquence vidéo: Connectez l'iPod/iPhone en utilisant le câble USB Audio et Vidéo pour iPod/iPhone-KS-U29 (non fourni). ☞ Manuel d'installation/raccordement (volume séparé) - Choisissez "iPod" comme source pour - JVC KW-NT1 | Instructions - Page 255
arrière/vers l'avant [Menu] Affiche le menu musical/vidéo sur l'iPod/iPhone (☞ page 62) [Form. Img]*2 Choisissez le format d'image - Complet et "Répéter Tous". Change le mode de commande iPod ou la vitesse des livres audio (☞ page 60). ~ Choisissez "iPod" comme source. La lecture démarre - JVC KW-NT1 | Instructions - Page 256
/séquence vidéo à partir du menu de l'iPod/ iPhone 1 Recherche d'éléments dans la catégorie choisie par alphabet • Pour le menu musique: ListesLecture*, Artistes*, Albums*, Morceaux*, Genres*, Compositeurs, Livres audio, Podcasts • Pour le menu vidéo: Listes de lecture vidéo, Films, Clips musicaux - JVC KW-NT1 | Instructions - Page 257
) au connecteur satellite à l'arrière de cet appareil. • Système de radio satellite JVC SIRIUS, SC-C1 et KS-SRA100, PnP, SC-VDOC1 et KS-SRA100, pour l'écoute le numéro vert SIRIUS au 1-888-539-SIRIUS (7474). "Subscription Updated. Press Any Key to Continue." (Inscription mise à jour. Appuyez sur - JVC KW-NT1 | Instructions - Page 258
Écoute de la radio satellite Accord d'un canal souhaité Nom de préréglage Bande Indicateur de réception de signal No de canal/nom du canal Uniquement Mode pour SIRIUS Affiche le numéro d'identification SIRIUS. Pour la radio SIRIUS ~ Choisissez "SAT" comme source. Liste 10 Key Bande Pour - JVC KW-NT1 | Instructions - Page 259
FRANÇAIS Mémorisation des canaux Vous pouvez prérégler six canaux pour chaque bande. 1 Accordez le canal que vous souhaitez prérégler. (☞ page 64) Sélection d'un canal préréglé Mode Liste 10 Key Bande Mode Liste 10 Key Bande 2 Affichez la liste des préréglages. 3 Choisissez un numéro de - JVC KW-NT1 | Instructions - Page 260
) Front AV-IN ~ Connectez un appareil extérieur. AV-IN Vous pouvez connecter un appareil extérieur aux prises LINE IN/VIDEO IN. (☞ Manuel d'installation/ Raccordement) ~ Choisissez "AV-IN" comme source. Ÿ Mettez l'appareil connecté sous tension et démarrez la lecture de la source. Mini cordon AV - JVC KW-NT1 | Instructions - Page 261
FRANÇAIS Égalisation du son Égaliseur Éditer ~ Paramètres Ÿ Paramètres Audio Fader/Balance Égaliseur Caisson basses/HPF Adaptation Volume Sourd. Téléphon. Affichage Téléphone Système Flat Entrer Moyen Sourdine 1 Sourdine 2 Arrêt ! Choisissez un mode sonore. Égaliseur É - JVC KW-NT1 | Instructions - Page 262
VOL 00 à 30 (pour l'audio) (Choisissez ce réglage si la crête maximum des enceintes est inférieure à 50 W.) Arrêt: Met hors service l'amplificateur intégré (VOL 0 à 20 pour le guidage/VOL 00 à 50 pour l'audio) *1 La connexion du fil TEL MUTING est requise. (☞ Manuel d'installation/Raccordement) 68 - JVC KW-NT1 | Instructions - Page 263
VIDEO IN. (☞ page 66) AV: Choisissez ce réglage quand un appareil audio/vidéo tel qu'un caméscope est connecté. Audio: Choisissez ce réglage quand un appareil audio tel qu'un lecteur audio de mise en/hors service du gradateur. Marche, Arrêt (☞ page 86) Marche : Met en service la démonstration sur l'é - JVC KW-NT1 | Instructions - Page 264
kHz. L'intervalle AM est réglé sur 10 kHz. Marche : Met en service la tonalité sonore des touches. Arrêt: Annulation. Modifiez le message vocal du démarrage sur l'écran des paramètres d'installation (☞ page 9). *1 Le réglage varie en fonction des paramètres d'installation (☞page 9). *2 Pour entrer - JVC KW-NT1 | Instructions - Page 265
de façon interchangeable. • Cet appareil peut uniquement reproduire les fichiers CD audio (CD-DA) si différents types de fichier (MP3/ WAV) sont le format DVD-VR et la liste de lecture, référez-vous aux instructions fournies avec l'appareil d'enregistrement. Réglage Disque • Si vous choisissez - JVC KW-NT1 | Instructions - Page 266
USB ne puissent pas être connectés correctement ou que la connexion soit lâche. • Lors de la connexion d'un périphérique USB, référezvous aussi à ses instructions. • Connectez uniquement un périphérique USB à la fois à cet appareil. N'utilisez pas de nœud de raccordement USB. • Il se peut que cet - JVC KW-NT1 | Instructions - Page 267
FRANÇAIS Informations sur le disque/fichier apparaissant sur le moniteur extérieur Les écrans suivants apparaissent uniquement sur le moniteur extérieur. • CD • MP3/WAV*1 *2 Track Information Album Four seasons Artist Robert M. Smith Title Rain T. RPT TIME 00:14 Track : 6 / 14 Cloudy Fair Fog - JVC KW-NT1 | Instructions - Page 268
lecture d'une plage. Avis: Lors de l'utilisation de iPod/iPhone, certaines opérations peuvent ne pas être réalisées correctement ou comme prévues. Dans ce cas, consultez le site Web JVC suivant: (Page web en anglais uniquement) Utilisation de la radio satellite - JVC KW-NT1 | Instructions - Page 269
exemple, connectez à cette prise un amplificateur ou un décodeur compatible avec ces sources multicanaux. • Le son DTS ne peut pas être sorti. FRANÇAIS Signaux de sortie Disque de lecture DVD 48 kHz, 16/20/24 bits Linear PCM 48 kHz, 16 bits st - JVC KW-NT1 | Instructions - Page 270
FRANÇAIS Informations complémentaires Codes de langue (pour la sélection de la langue des DVD) Code Langue AA Afar AB Abkhazien AF Afrikaans AM Amharique AR Arabe AS Assamais AY Aymara AZ Azerbaïdjanais BA Bashkir BE Biélorusse BG Bulgare BH Bihari BI Bislama BN Bengali, Bangladais BO Tibétain BR - JVC KW-NT1 | Instructions - Page 271
84 Suppression d'un téléphone portable Bluetooth 84 85 Modification de la mémoire des numéros de téléphone Copie du répertoire téléphonique 85 Suppression de la mémoire dans le - JVC KW-NT1 | Instructions - Page 272
pertoire téléphonique. Supprimez les noms inutiles avant de faire la copie. Informations sur le système Bluetooth: Si vous souhaitez recevoir plus d'informations sur le système Bluetooth, consultez le site web de JVC suivant: (Page web en anglais uniquement) 78 - JVC KW-NT1 | Instructions - Page 273
Bluetooth 1 Mode 3 Paramètres Audio Affichage Téléphone Système Fader/Balance Égaliseur Flat Caisson basses/HPF Entrer Adaptation Volume Moyen Sourd. Téléphon. Sourdine 1 Sourdine 2 Arrêt 2 Menu Audio-Video Paramètres Désactiver AV Paramètres Audio portable - "KW-NT1". Affiche le - JVC KW-NT1 | Instructions - Page 274
téléphone portable. 1 Utilisez le téléphone portable Bluetooth pour mettre en service sa fonction Bluetooth. 2 Paramètres Téléphone 3 Changez le code PIN. • Si vous ne souhaitez pas changer le code PIN, allez à l'étape 4. Paramètres Audio Connexion Supprimer Liais. Nom Périphérique Code - JVC KW-NT1 | Instructions - Page 275
enregistrés 6 Utilisez le téléphone portable Bluetooth pour vous connecter. 2 Paramètres Audio Affichage Téléphone Système Connexion Connecter après que vous le déconnectez. Utilisez (ou mettez en service ) pour connecter le même téléphone portable la prochaine fois. - JVC KW-NT1 | Instructions - Page 276
FRANÇAIS Utilisation d'un téléphone portable Bluetooth® Terminer un appel/Arrêter la sonnerie (annulation d'un appel entrant) Appel en Cours... Commutation entre le mode mains libres et le mode téléphone Vous - JVC KW-NT1 | Instructions - Page 277
reçus Annuaire Supprim. • Vous pouvez entrer un maximum de 32 nombres. Pour faire un appel lors de l'utilisation du système de navigation À partir du répertoire téléphonique Menu Appel Appels émis Appels reçus Annuaire Ajouter Supprim. Calculer Enregistrer Ajouter Options Itinéraire ou - JVC KW-NT1 | Instructions - Page 278
vous parlez. Quand un appel arrive pendant que vous parlez... Appel entrant... Suppression d'un téléphone portable Bluetooth 1 Paramètres Téléphone 2 Paramètres Audio Affichage Téléphone Système Connexion Connecter Débrancher Supprimer Liais. Supprim. Nom Périphérique Code PIN Changer - JVC KW-NT1 | Instructions - Page 279
FRANÇAIS Modification de la mémoire des numéros de téléphone Copie du répertoire téléphonique Vous pouvez copier la mémoire du répertoire téléphonique d'un téléphone portable dans cet appareil (100 mémoires maximum). 1 Affichez le . (☞ page 83) 2 Menu Appel Ajouter Supprim. - JVC KW-NT1 | Instructions - Page 280
recul, ☞ Manuel d'installation/connexion. Mise en/hors service de la Vérification de la vue arrière caméra de recul 1 Sur l'écran AV 1 Sur l'écran de carte Menu Fonctions Paramètres Affichage 2 Paramètres Audio MAP. - Changer le levier de vitesse sur une autre - JVC KW-NT1 | Instructions - Page 281
FRANÇAIS Références 88 Entretien 89 Dépannage 95 Spécifications 87 - JVC KW-NT1 | Instructions - Page 282
Pour garder les disques propres Si le disque est sale, sa lecture risque d'être déformée. Si un disque est sale, essuyez-le avec un chiffon doux, en remettre un disque dans sa boîte, insérez-le délicatement sur le support central (avec la surface imprimée dirigée vers le haut). • Conservez les - JVC KW-NT1 | Instructions - Page 283
service. • Pour les opérations des appareils extérieurs, référez-vous aussi aux modes d'emploi fournis avec les adaptateurs utilisés pour les connexion (de même qu'aux instructions le panneau du moniteur ou les prises VIDEO IN/LINE IN sur le panneau arriè Appuyez sur AV MAP et commandes la source - JVC KW-NT1 | Instructions - Page 284
la navigation n'est pas connecté. Connectez-les correctement (☞ Manuel d'installation/ raccordement-volume séparé). Un POI trouvé GPS. incorrecte pendant plus de 30 minutes. "Vérifier antenne GPS" Vérifiez la connexion de l'antenne GPS. "Obtention d'un signal GPS" • Acquisition des signaux GPS - JVC KW-NT1 | Instructions - Page 285
vous conduisez sur une route accidentée. • Changez le disque. Le fil de frein de stationnement n'est pas connecté correctement. (☞ Manuel d'installation/Raccordement) • Connectez le cordon vidéo correctement. • Choisissez l'entrée correcte sur le moniteur extérieur. • Un disque est inséré à l'envers - JVC KW-NT1 | Instructions - Page 286
FRANÇAIS MP3/WAV Dépannage Symptôme Remèdes/Causes Le disque ne peut pas être reproduit. • Changez le disque. • Enregistrez les plages en utilisant une application compatible sur les disques appropriés. (☞ page 52) • Ajoutez le code d'extension approprié pour les noms des fichiers. Du bruit - JVC KW-NT1 | Instructions - Page 287
ANTENNA" (XM) • "Invalid Channel" (SIRIUS) • "CHANNEL - -" (XM) "OFF AIR" (XM) "Réinitialisation 08" Remèdes/Causes • Vérifiez la connexion. • Chargez de la batterie. • Vérifiez si ou est correctement sélectionné. (☞ page 60) • Réinitialisez iPod/iPhone. Mettez hors service - JVC KW-NT1 | Instructions - Page 288
quand le levier de vitesse est mis sur la position de marche arrière (R). "Aucun Signal" Cet autoradio peut être connecté à un téléphone portable Bluetooth en même temps. Pendant la connexion à un périphérique, cet appareil ne peut pas être détecté par un autre périphérique. Déconnectez l'appareil - JVC KW-NT1 | Instructions - Page 289
NAVIGATION Système & Service Système de réception Fréquence de réception Sensibilité Vitesse de mise à jour Antenne GPS Audio Niveau de sortie de ligne/Impédance: LINE OUT (FRONT/REAR), Impédance de sortie: SUBWOOFER VIDEO IN, CAMERA IN, entrée d'antenne, MIC IN VIDEO OUT OE REMOTE, DIGITAL OUT, - JVC KW-NT1 | Instructions - Page 290
ériques compatibles: à mémoire de grande capacité Système de fichiers compatible: FAT 32/16/12 Courant maximum: CC 5 V 500 mA Version Bluetooth 1.2 certifié Puissance de sortie +4 dBm Max. (Classe d'alimentation 2) Zone de fonctionnement À moins de 10 m (10,9 yd) Profile HFP (Hands-Free - JVC KW-NT1 | Instructions - Page 291
(L × H × P): Taille d'installation • Avec la plaque (approx.): de Dolby"et le sigle double D sont des marques Bluetooth sont la propriété de Bluetooth SIG, Inc. et toute utilisation de ces marques par Victor Company of Japan, Limited (JVC dans les autres pays. • iPhone est une marque de commerce de - JVC KW-NT1 | Instructions - Page 292
Having TROUBLE with operation? Please detach the monitor panel, then attach it Still having trouble?? USA ONLY Call 1-800-252-5722 http://www.jvc.com We can help you! EN, SP, FR © 2009 Victor Company of Japan, Limited 0309NSMMDWJEIN - JVC KW-NT1 | Instructions - Page 293
Instructions GPS NAVIGATION SYSTEM KW-NT1
-
 1
1 -
 2
2 -
 3
3 -
 4
4 -
 5
5 -
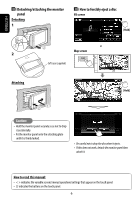 6
6 -
 7
7 -
8
-
9
-
10
-
11
-
12
-
13
-
14
-
15
-
16
-
17
-
18
-
19
-
20
-
21
-
22
-
23
-
24
-
25
-
26
-
27
-
28
-
29
-
30
-
31
-
32
-
33
-
34
-
35
-
36
-
37
-
38
-
39
-
40
-
41
-
42
-
43
-
44
-
45
-
46
-
47
-
48
-
49
-
50
-
51
-
52
-
53
-
54
-
55
-
56
-
57
-
58
-
59
-
60
-
61
-
62
-
63
-
64
-
65
-
66
-
67
-
68
-
69
-
70
-
71
-
72
-
73
-
74
-
75
-
76
-
77
-
78
-
79
-
80
-
81
-
82
-
83
-
84
-
85
-
86
-
87
-
88
-
89
-
90
-
91
-
92
-
93
-
94
-
95
-
96
-
97
-
98
-
99
-
100
-
101
-
102
-
103
-
104
-
105
-
106
-
107
-
108
-
109
-
110
-
111
-
112
-
113
-
114
-
115
-
116
-
117
-
118
-
119
-
120
-
121
-
122
-
123
-
124
-
125
-
126
-
127
-
128
-
129
-
130
-
131
-
132
-
133
-
134
-
135
-
136
-
137
-
138
-
139
-
140
-
141
-
142
-
143
-
144
-
145
-
146
-
147
-
148
-
149
-
150
-
151
-
152
-
153
-
154
-
155
-
156
-
157
-
158
-
159
-
160
-
161
-
162
-
163
-
164
-
165
-
166
-
167
-
168
-
169
-
170
-
171
-
172
-
173
-
174
-
175
-
176
-
177
-
178
-
179
-
180
-
181
-
182
-
183
-
184
-
185
-
186
-
187
-
188
-
189
-
190
-
191
-
192
-
193
-
194
-
195
-
196
-
197
-
198
-
199
-
200
-
201
-
202
-
203
-
204
-
205
-
206
-
207
-
208
-
209
-
210
-
211
-
212
-
213
-
214
-
215
-
216
-
217
-
218
-
219
-
220
-
221
-
222
-
223
-
224
-
225
-
226
-
227
-
228
-
229
-
230
-
231
-
232
-
233
-
234
-
235
-
236
-
237
-
238
-
239
-
240
-
241
-
242
-
243
-
244
-
245
-
246
-
247
-
248
-
249
-
250
-
251
-
252
-
253
-
254
-
255
-
256
-
257
-
258
-
259
-
260
-
261
-
262
-
263
-
264
-
265
-
266
-
267
-
268
-
269
-
270
-
271
-
272
-
273
-
274
-
275
-
276
-
277
-
278
-
279
-
280
-
281
-
282
-
283
-
284
-
285
-
286
-
287
-
288
-
289
-
290
-
291
-
292
-
293
 |
 |

For installation and connections, refer to the separate manual.
Para la instalación y las conexiones, refiérase al manual separado.
Pour l’installation et les raccordements, se référer au manuel séparé.
INSTRUCTIONS
MANUAL DE INSTRUCCIONES
MANUEL D’INSTRUCTIONS
GPS NAVIGATION SYSTEM
KW-NT1
For customer Use:
Enter below the Model No.
and Serial No. which are
located on the top or bottom
of the cabinet. Retain this
information for future
reference.
Model No.
Serial No.
SISTEMA DE NAVEGACIÓN GPS
LVT1982-001A
[J]
KW-NT1
KW-NT1
ENGLISH
ESPAÑOL
FRANÇAIS
SYSTÈME DE NAVIGATION GPS