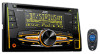
JVC KW-R925BTS Instruction Manual - Page 30
References - firmware update
 |
View all JVC KW-R925BTS manuals
Add to My Manuals
Save this manual to your list of manuals |
Page 30 highlights
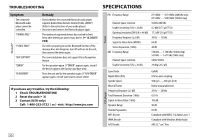
REFERENCES Change the display information Each time you press , the display information changes. • If the information is unavailable or not recorded, "NO TEXT", "NO NAME", or other information (eg. station name) appears. FM or AM Frequency Day/Clock (For FM Radio Broadcast Data System stations only) Station name (PS) Frequency Program type (PTY) Radio text+ Day/Clock Level meter Level meter with color synchronisation* (back to the beginning) CD or USB / USB FRONT / USB REAR (For CD-DA) Playing time Day/Clock Disc name Track title Level meter Level meter with color synchronisation* (back to the beginning) (For MP3/WMA/AAC/WAV/FLAC files) Playing time Day/Clock Album title/Artist Track title Folder/file name Level meter Level meter with color synchronisation* (back to the beginning) USB-IPOD / IPOD FRONT / Playing time Day/Clock Album title/Artist Track title IPOD REAR or ANDROID / Level meter Level meter with color synchronisation* ANDROID-F / ANDROID-R (back to the beginning) PANDORA / PANDORA-F / Station name Shared/Radio Album title Artist Track PANDORA-R title Playing time Day/Clock Level meter Level meter with color synchronisation* (back to the beginning) IHEARTRADIO / IHEART FRONT / IHEART REAR Station name Track title Track Artist Day/Clock Level meter Level meter with color synchronisation* (back to the beginning) SIRIUS XM Channel no./Channel name Artist Song title Content information Category name Day/Clock Level meter Level meter with color synchronisation* (back to the beginning) AUX AUX Day/Clock Level meter Level meter with color synchronisation* (back to the beginning) BT AUDIO Playing time Day/Clock Album title/Artist Track title Level meter Level meter with color synchronisation* (back to the beginning) * The color of the button illumination and display illumination changes and synchronises with the sound level. Maintenance Cleaning the unit Wipe off dirt on the faceplate with a dry silicone or soft cloth. Handling discs: • Do not touch the recording surface of the disc. • Do not stick tape etc. on the disc, or use a disc with tape stuck on it. • Do not use any accessories for the disc. • Clean from the center of the disc and move outward. • Clean the disc with a dry silicone or soft cloth. Do not use any solvents. • When removing discs from this unit, pull them out horizontally. • Remove burrs from the center hole and disc edge before inserting a disc. More information Visit also the following website for: - Latest firmware updates and latest compatible item list - Android™ application JVC MUSIC PLAY - Any other latest information General • This unit can only play the following CDs: • DualDisc playback: The Non-DVD side of a "DualDisc" does not comply with the "Compact Disc Digital Audio" standard. Therefore, the use of Non-DVD side of a DualDisc on this product cannot be recommended. 26
-
 1
1 -
2
-
3
-
4
-
5
-
6
-
7
-
8
-
9
-
10
-
11
-
12
-
13
-
14
-
15
-
16
-
17
-
18
-
19
-
20
-
21
-
22
-
23
-
24
-
 25
25 -
 26
26 -
 27
27 -
 28
28 -
 29
29 -
 30
30 -
 31
31 -
 32
32 -
 33
33 -
 34
34 -
 35
35 -
36
-
37
-
38
-
39
-
40
-
41
-
42
-
43
-
44
-
45
-
46
-
47
-
48
-
49
-
50
-
51
-
52
-
53
-
54
-
55
-
56
-
57
-
58
-
59
-
60
-
61
-
62
-
63
-
64
-
65
-
66
-
67
-
68
-
69
-
70
-
71
-
72
-
73
-
74
-
75
-
76
-
77
-
78
-
79
-
80
-
81
-
82
-
83
-
84
-
85
-
86
-
87
-
88
-
89
-
90
-
91
-
92
-
93
-
94
-
95
-
96
-
97
-
98
-
99
-
100
-
101
-
102
-
103
-
104
 |
 |
