JVC LT-42X899 Instructions
JVC LT-42X899 - 42" LCD TV Manual
 |
UPC - 046838033971
View all JVC LT-42X899 manuals
Add to My Manuals
Save this manual to your list of manuals |
JVC LT-42X899 manual content summary:
- JVC LT-42X899 | Instructions - Page 1
LCD Television Users Guide LT-42X899 LT-47X899 1080p HDTV MENU POWER MODE TV STB VCR DVD AUDIO INPUT V1 V2 V3 V4 V5 1 2 3 4 5 6 7 8 9 RETURN + TUNE 0 TV - CH + - VOL + LIGHT MUTING BACK F OK AVORITE DVR STATUS SOUND VIDEO ASPECT GUIDE SUB CH TV/VCR C.C. SUB T. DISPLAY - JVC LT-42X899 | Instructions - Page 2
V-Chip 29 Set US TV Ratings 29 Set Movie Control with HDMI 42 Video-1 Audio 42 Video Input Label 42 Key Items 43 Favorite 43 Guide 43 Display 43 Sleep Timer 43 Multi Language/MTS 44 Photo Viewer 45 Connecting Your Devices . . . . . 48 Programming Your Remote . . . . 55 Troubleshooting - JVC LT-42X899 | Instructions - Page 3
and maintenance (servicing) instructions in the event of trouble, unplug the unit and call a service technician. Do not attempt to repair it yourself or remove the rear cover. Changes or modifications not approved by JVC could void the warranty. * When you don't use this TV - JVC LT-42X899 | Instructions - Page 4
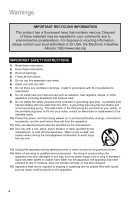
INSTRUCTIONS 1) Read these instructions. 2) Keep these instructions. 3) Heed all warnings. 4) Follow all instructions your outlet, consult an electrician for replacement of the obsolete outlet. 10) . 14) Refer all servicing to qualified service personnel. Servicing is required when the apparatus - JVC LT-42X899 | Instructions - Page 5
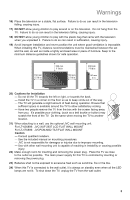
same when moving the TV to another location. 21) When attaching to a wall, use the optional JVC wall mounting unit. For LT-42X899: JVC-XUF-2637 LCD FLAT WALL MOUNT For LT-47X899: JVCPCM-MS2 TILT/FLAT WALL MOUNT Caution - Consult qualified installers. - See the included manual on mounting procedures - JVC LT-42X899 | Instructions - Page 6
accordance with the instructions, may cause JVC TV remote control to select channels. Once you run the Auto Tuner Setup (which detects and programs all the channels your TV is receiving through the RF input), every channel number available from your cable company will appear in your television - JVC LT-42X899 | Instructions - Page 7
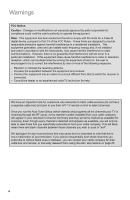
the following: • Stock-market report bars • Shopping channel logos and pricing displays • Video game patterns or scoreboards • Bright station logos • Broadcast, cable, satellite channels or digital television tuners/converters TV on For example... XYZ TV off XYZ Caring for the Cabinet Normally, - JVC LT-42X899 | Instructions - Page 8
tidy is attached to the back of the stand. Install your TV To prevent the TV from falling, thread the belt through the hole on the back of the standand secure it to the TV rack. Hole Disconnecting the stand 1) Place the TV face down on a soft cloth on a table. 2) Remove the five screws - JVC LT-42X899 | Instructions - Page 9
sure you have the following. Television x 1 Remote Control x 1 POWER MODE TV STB VCR DVD AUDIO INPUT V1 V2 V3 V4 V5 1 2 3 4 5 6 7 8 9 RETURN + TUNE 0 TV - CH + - VOL + LIGHT MUTING OK AVORITE DVR STATUS SOUND VIDEO ASPECT GUIDE SUB CH TV/VCR C.C. SUB T. DISPLAY TWIN SLEEP - JVC LT-42X899 | Instructions - Page 10
description of each button's function. For more detailed information on the remote control buttons, see pages 20 - 23. This remote can also control up to four other devices. See page 55 - 61. MENU MENU POWER Turns the TV on or off. MODE TV STB VCR DVD AUDIO INPUT V1 V2 V3 V4 V5 Switch between - JVC LT-42X899 | Instructions - Page 11
Remote Control BACK F F AVORITE DVR ASPECT STAT SOUND ATUS VIDEO GUIDE SUB CH TV/VCR C.C. SUB T. DISPLAY TWIN Save your favorite channels. See page 20. Change the aspect ratio of the image on your TV screen. See page 20. Change the sound mode of the MaxxAudio function. See page 21. Choose - JVC LT-42X899 | Instructions - Page 12
TV Basic Controls Before you connect your television to another device, please refer to the proper diagrams for your specific TV and remote. These will help assist you in understanding how to connect your television to another device, as well as use the remote to set up your television. Some of the - JVC LT-42X899 | Instructions - Page 13
TV Basic Controls RS-232C INPUT 5 INPUT 4 INPUT 3 FOR HDMI 1 AUDIO OUT VIDEO R - AUDIO - L Y PR PR VIDEO R - AUDIO - L Y PR PR S-VIDEO VIDEO R - AUDIO - L R - AUDIO - L R - AUDIO - L DIGITAL AUDIO OPTICAL - JVC LT-42X899 | Instructions - Page 14
TV Basic Controls Best Device Side A HDMI With Cables HDMI Cable TV Side INPUT 1, 2 or 5 B DVI + Audio DVI - HDMI Cable, Audio Cable INPUT 1 + HDMI ANALOG AUDIO VIDEO and AUDIO Good Best Good AUDIO C Component Video + Audio D S-Video + - JVC LT-42X899 | Instructions - Page 15
TV Basic Controls Compatible Signal Input • HDMI (Digital) SD: 480i, 480p HD: 1080/60p / 1080/30p / 1080/24p / 1080i / 720p Audio L/R (Digital) Input • DVI (Digital) SD: 480i, 480p - JVC LT-42X899 | Instructions - Page 16
TV Basic Controls PC Device Side With Cables TV Side I D-SUB + Audio (3.5 mm stereo mini jack) D-sub (15 pin) Cable + Audio Cable PC IN (D-SUB) PC IN (D-SUB) + INPUT 5 AUDIO Input USB Device Side J USB With Cables USB Cable TV Side PHOTO VIEWER 16 - JVC LT-42X899 | Instructions - Page 17
second (120Hz) in the same time a conventional LCD TV displayes 60 frames (60Hz). You will be prediction techniques. Real 12bit Driver - JVC's new bit extention technology takes 47 to 51. x 3 x 2 x 1 HDMI CEC (see page 42) 5 Aspect mode will show every pixel you are getting in High Definition - JVC LT-42X899 | Instructions - Page 18
9 RETURN + TUNE 0 TV - CH + - VOL + LIGHT MUTING BACK F OK AVORITE DVR STATUS SOUND VIDEO ASPECT GUIDE SUB CH TV/VCR C.C. SUB T. DISPLAY Interactive Plug-In Menu Manual - - -- : -- -- Pacific Off Start Clock Select Operate Back BACK Exit MENU RM-C1430 TV 1 Select a language OK - JVC LT-42X899 | Instructions - Page 19
(Continued) MENU BACK F - CH + LIGHT - VOL + MUTING OK AVORITE DVR STATUS SOUND VIDEO ASPECT GUIDE SUB CH TV/VCR C.C. SUB T. DISPLAY TWIN SLEEP ML/MTS SWAP SELECT RM-C1430 TV 4) Set TV attribute Interactive Plug-In Menu > Auto Tuner Setup Tuner Mode Scan Mode Cable Auto Start - JVC LT-42X899 | Instructions - Page 20
Remote Control Functions RETURN + TV RETURN+ TV Has three functions. Return - Returns to the channel viewed just before the channel currently onscreen. Return+ - Lets you program a specific channel to return to while - JVC LT-42X899 | Instructions - Page 21
Remote Control Functions DVR STATU SOUND SUB CH SOUND Change the sound mode of the MaxxAudio information will not be displayed. • The GUIDE will not show the correct time and date depending on the Time Zone and D.S.T. settings. See page 43. SUB CH TV/VCR TWIN SUB CH Digital broadcast sometimes - JVC LT-42X899 | Instructions - Page 22
TWIN on the remote control. The channel (or input) you were watching before pressing TWIN will appear on the left, the new channel will appear on the right. To turn split-screen off and return to normal television viewing, press TWIN again or press the BACK button. At first, select TV mode to use - JVC LT-42X899 | Instructions - Page 23
Remote Control Functions SLEEP SELECT SLEEP Allows you to choose how long the TV will stay on before turning off. Notes: • You can change the interval by pressing the π† buttons and press OK. • You can set the interval at 0, 15, 30, 45, 60, 90, 120 and 180 minutes. • 60 seconds before the TV - JVC LT-42X899 | Instructions - Page 24
STB VCR DVD AUDIO INPUT V1 V2 V3 V4 V5 1 2 3 4 5 6 7 8 9 RETURN + TUNE 0 TV - CH + - VOL + LIGHT MUTING OK AVORITE DVR STATUS SOUND VIDEO ASPECT GUIDE SUB CH TV/VCR C.C. SUB T. DISPLAY TWIN SLEEP ML/MTS SWAP SELECT 2) Display the desired menu Initial Setup Language Tuner - JVC LT-42X899 | Instructions - Page 25
Select Operate Back BACK Exit MENU Language Allows you to change the TV's onscreen menu languages to English, French or Spanish. Tuner Setup Auto summary allows you to customize the line-up of channels received by your TV. Regarding analog channels, you can add or delete channels from the line - JVC LT-42X899 | Instructions - Page 26
Customizing your TV Initial setup (Continued) Channel Summary (Continued) >> Station Channel Antenna Level This is a bar graph displaying the state of the Digital Antenna Level. Tuner Diagnostic (Service Use Only) Set Clock The set clock function is described on page 18 as the Interactive Plug In - JVC LT-42X899 | Instructions - Page 27
by a four-digit lock code. Your TV comes preset with a lock code of "0000 TV's features to you. Notes: • Please complete the Initial Setup menu first. The Auto Demo mode will start automatically when the Interactive Plug-In Menu is completed. • If you press any button on the television or remote - JVC LT-42X899 | Instructions - Page 28
DVD players, Blu-ray or camcorders connected to the TV. • (For Canadian viewers only): V-CHIP is Press the "0" button four times on your remote to access the V-Chip menu for the can lock or unlock ratings as shown below. > Set US TV RATINGS TV TV TV TV MA 14 PG G TV TV Y7 Y V/FV S L D 1 2 3 4 - JVC LT-42X899 | Instructions - Page 29
channels or content that you deem inappropriate for children. On / Off Set US TV Ratings This setting is based on the US ratings system. TV Y - Appropriate for all children. Intended for all children 2 - 6 years old. TV Y7 - Appropriate for older children. Intended for children 7 years or older - JVC LT-42X899 | Instructions - Page 30
Customizing your TV V-Chip (continued) Set Movie Ratings This setting is based on the US Motion Picture Association of America (MPAA) ratings system. NR - Not Rated. Any type - JVC LT-42X899 | Instructions - Page 31
For instructions on "Set Canadian Ratings French", please see page 31 in the French user's guide. Unrated television stations which do not broadcast rating signals will be placed in the "Unrated Programming" category. Examples of Unrated programs: • Emergency Bulletins • News • Public Service - JVC LT-42X899 | Instructions - Page 32
Type Analog Service Digital Service Appearance Mode Font Size Font Style Page 1/2 Off Auto CC1 1 Auto Auto Auto Select Operate Back BACK Exit MENU Closed Caption Allows you to select the mode of the closed caption. First you must set the MODE to either TV, STB or VCR on your remote. On - JVC LT-42X899 | Instructions - Page 33
Customizing your TV On/Off Timer Aa Mode On Time Off Time Channel On Volume On/Off Timer No / Once / Everyday On Time You can set the time you want the television to turn itself on. Off Time You can set the time you want the television to turn itself off. Channel You can set the channel of when On - JVC LT-42X899 | Instructions - Page 34
lit room. Game - Used for when you are playing video games connected to your TV. Memory-1 / Memory 2 - You can memorize your favorite picture settings (Tint, Color your television. Tint Allows you to adjust the levels of red and green on your TV. Color Allows you to make all the colors on your TV - JVC LT-42X899 | Instructions - Page 35
Customizing your TV Picture Adjust Natural Cinema Allows you to compensate -1 or Memory 2. It adjusts the detailed picture settings. Theater Pro II Menu DSD Detail H.Sharp V.Sharp DSD Noise Control Color Temp. (High, Low) Color Balance *Color Mngmt. (Red, Yellow, Green, Cyan) Axis *Color Mngmt. - JVC LT-42X899 | Instructions - Page 36
effect. Smart Sensor This function automatically adjusts the brightness on your TV according to the amount of light in the room. Display / On / Off - Display - "Leaf" icon will appear on your TV screen when Smart Sensor brightness adjustment occurs. The leaf icon will appear a - JVC LT-42X899 | Instructions - Page 37
you to change and adjust the four sound features on your television. MaxxBass - Compensates for low frequencies and widens the frequency band USA, Japan and other countries. Balance Adjust the level of sound between the TV's left and right speakers with the balance setting. Turn On Volume Turn On - JVC LT-42X899 | Instructions - Page 38
Adjust (continued) Optical Out You can select the optical digital sound output as PCM or DOLBY DIGITAL when your TV is connected to an amplifier that has a DOLBY DIGITAL decoder. If you select DOLBY DIGITAL, you can enjoy listening to 5.1ch sound when watching digital - JVC LT-42X899 | Instructions - Page 39
not work while you are receiving a signal, even though there is no TV operation for 10 minutes. On / Off Note: • If the channel that within 10 minutes, the TV shuts itself off. Quick Start-up This allows you to quickly start the TV by skipping over the JVC logo on the TV screen when you press the - JVC LT-42X899 | Instructions - Page 40
When watching a 4:3 aspect picture, it is stretched to fit the dimensions of the TV. When watching a 16:9 aspect picture, it displays 95% of ). • If the television receives a 16:9 signal from your HDMI device, the aspect mode will turn to Full automatically. If the television receives a 4:3 signal - JVC LT-42X899 | Instructions - Page 41
you adjust the brightness of the illumination on the front of the TV. High / Low / Off Power Indicator Allows you adjust the brightness of the POWER LED on the front only when the signal is 480p for HDMI. When you select Auto, the television will select "Size1" or "Size2" automatically. 41 - JVC LT-42X899 | Instructions - Page 42
CEC enabled device you are viewing. • For operating instructions of the device, refer to the device's manual. - Control the HDMI CEC enabled device using the TV - • Turn off the operating device by turning off the TV. • Some device may not support this function. For more details refer to the device - JVC LT-42X899 | Instructions - Page 43
• The GUIDE will not show the correct time and date if you have not performed the set clock function on your television. • When / Short Banner / Off Sleep Timer Allows you to choose how long the TV will stay on before turning off. First set the MODE to TV. 0 min. / 15 min. / 30 min. / 45 min. / - JVC LT-42X899 | Instructions - Page 44
the MODE to TV on your remote. Notes: • TV in stereo mode to get the best sound quality. The sound will work in stereo mode even if a certain broadcast is in mono sound only. • Choose the mono setting to reduce excessive noise on a certain channel or broadcast. • MTS unavailable if your television - JVC LT-42X899 | Instructions - Page 45
jvc.com/support for information and notes regarding your devices you wish to connect. • Supported file formats are ".jpg" or ".JPG". • All your stored data should be backed up first as a precaution before connecting to the TV Viewer > Multi Screen Date: Dimensions: Page: 1/1 1 Select OK Page Jump - JVC LT-42X899 | Instructions - Page 46
Change the screen of control help and detailed information by pressing DISPLAY button several times. Preview Guide You can display control help screen when you But if you disconnected the USB Mass Storage Class device or you turn TV off, rotation settings are reset to default settings. • Zoom in, - JVC LT-42X899 | Instructions - Page 47
Customizing your TV Photo Viewer (continued) Slide Show Transition Allows you to choose display you to change Slide Show interval. 1-10 / 15 / 20 / 30 / 45 / 60 / 90 / 120 / Manual - Manual - You can slide the picture by pressing the √ ® buttons. Note: • Slide Show may take extra time more than - JVC LT-42X899 | Instructions - Page 48
The following connection diagrams are examples on connecting some of the most common devices to your TV. Please refer to your device's instruction manual on other connection methods or for devices not shown here in this instruction book. • When you are finished connecting your devices, turn on your - JVC LT-42X899 | Instructions - Page 49
models may vary in color. • To watch your DVD player, make sure your TV is displaying INPUT 3 or INPUT 4 by pressing the V3 or V4 button on your remote control. Connect a Camcorder Camcorder INPUT 4 INPUT 5 TV Rear Panel R - AUDIO -(ILNPUT 4) Y PR PB VIDEO R - AUDIO - L Note: • To watch video - JVC LT-42X899 | Instructions - Page 50
Speaker Speaker Note: • Refer to your amplifier's or Home Theater System's manual for more information. Connect an Amplifier using the DIGITAL AUDIO OPTICAL OUT Amplifier (with DIGITAL AUDIO OPTICAL INPUT) Speaker Speaker TV Rear Panel (DIGITAL AUDIO OPTICAL OUT) DIGITAL AUDIO OPTICAL OUT PC - JVC LT-42X899 | Instructions - Page 51
your Digital TV device, make sure your TV is displaying INPUT 1 by pressing the V1 button on your remote control. • This TV can accept 480i, 480p, 720p, 1080i and 1080p signals via HDMI. Connect a IR IN Device In Out IR Device (set career to "Off") Note: • Refer to your IR Device's manual for more - JVC LT-42X899 | Instructions - Page 52
remote control. • Some decoders may not respond depending on the equipment that is connected to the HDMI. • This TV can accept 480i, 480p, 720p, 1080i and 1080p signals via HDMI. • This JVC television may fail to detect this TV as a 1080p device. If this occurs, manually select 1080p on the HDMI - JVC LT-42X899 | Instructions - Page 53
up the other input connections so you can connect more devices to your TV. Notes: • Refer to your AV Receiver's manual for more information on connecting your speakers and other devices. • Use your AV Receiver's remote to switch to the different devices you have connected. • Some AV Receivers may - JVC LT-42X899 | Instructions - Page 54
Panel (INPUT 5) INPUT 4 INPUT 5 VIDEO R - AUDIO - L Y PR PB VIDEO R - AUDIO - L Notes: • Make sure your TV is displaying INPUT 5 by pressing the V5 button on your remote control. • When you do the above connection, set "Video-5 Input" in the Features menu to "D-Sub". See page 39. • Use a D-SUB - JVC LT-42X899 | Instructions - Page 55
You can program your remote control to operate your external devices, using the instructions and codes on pages 55 - 61. How to set the codes 1) Manually turn on the device. 2) Change the remote control mode according to the device by pressing the MODE button. Refer to the following list for - JVC LT-42X899 | Instructions - Page 56
TV JVC brand only STB Cable Set Top Boxes, Cable/PVR Combinations, Satellite Set Top Box, DBS/PVR Combination VCR VCR, DBS/PVR Combination, PVR, DVD/PVR Combination DVD DVD Player, DVD Recorder, Home Theater in a Box, Receiver AUDIO Amplifier, Home Theater in a Box, Receiver Remote Control - JVC LT-42X899 | Instructions - Page 57
Programming Your Remote Programming Codes STB mode Cable Set Top Box 1535 1535 0869 0856, 1856 DBS/PVR Combination DirecTV Dish Network System Dishpro Echostar Expressvu Hughes Network Systems JVC Motorola Philips Proscan RCA Samsung Sony Star Choice 1377, 0392, 0639, 1142, 1076, 0099, 1392, - JVC LT-42X899 | Instructions - Page 58
Programming Your Remote VCR mode VCR ABS Admiral Adventura Aiko Aiwa Akai Alienware America Headquarter Hewlett Packard HI-Q Hitachi Howard Computers HP Hughes Network Systems Humax Hush iBUYPOWER Jensen JVC KEC Kenwood KLH Kodak LG Linksys Lloyd's Logik LXI Magnasonic Magnavox Magnin Marantz 0047, - JVC LT-42X899 | Instructions - Page 59
Programming Your Remote VCR mode VCR Philips Pilot Pioneer Polk Audio Portland , 0000, 0209, 0034, 0479, 1139, 1479 1972 DBS/PVR Combination Echostar Hughes Network Systems JVC Philips Samsung 1945 0739 1945 0739 0739 PVR ABS Alienware CyberPower Dell DirecTV Dish Network System Echostar - JVC LT-42X899 | Instructions - Page 60
Programming Your Remote DVD mode Accurian Advent Aiwa Akai Alco Allegro Apex Digital DVD , 1158 0631 0522 0490, 1470 1158 0630, 0675 1033, 1431 0675 0741 Home Theater in Box Aiwa Audiovox JVC KLH Koss Oritron Polk Audio RCA Rio Sonic Blue Teac Venturer 0641 0790 1770, 1771, 1772, 1773 0790 0651 - JVC LT-42X899 | Instructions - Page 61
Programming Your Remote Audio mode Amplifier Amstrad Bose Curtis Mathes Durabrand GE Harman/Kardon JVC Left Coast Lenoxx Linn Criterion Daewoo Delphi Denon Garrard Gateway Go Video Harman/Kardon Initial Insignia Integra JBL JVC Kenwood KLH 0531 1405, 0121, 1243, 1388, 1641 1512 1390 1563, 1615 - JVC LT-42X899 | Instructions - Page 62
Troubleshooting Refer to the table below to check the condition. If you think that there is a problem, contact the JVC Service Center where you purchased the television. PROBLEMS There is no power CHECK • See if the power cord became unplugged. • Check for a blown fuse or circuit breaker or a - JVC LT-42X899 | Instructions - Page 63
Troubleshooting PROBLEMS or touch the screen. You hear occasional • It is normal for the TV to make crackling sounds when first turned on or off. Unless crackling sounds room or the temperature of the inside of the television changes. If there is no problem with the screen or sound, then there is - JVC LT-42X899 | Instructions - Page 64
Output Digital Audio Dimensions (inch/mm) W X H X D Weight (lbs / kg) LT-42X899 LT-47X899 LCD Flat Television NTSC, BTSC System TV set's on-screen cable channel numbers) is not recommended for your TV set. AC 120V, 60 Hz 229W 299W 42 inch / 106.7 cm measured diagonally, 16:9 ratio 47 inch - JVC LT-42X899 | Instructions - Page 65
a brief description of the problem(s). Please call 1-800-252-5722 to locate the nearest JVC authorized service center. Service locations can also be obtained from our website http://www.jvc.com. If your product qualifies for in-home service, the service representative will require clear access - JVC LT-42X899 | Instructions - Page 66
ASSISTANCE ON HOW TO OPERATE? NEED TO LOCATE A JVC SERVICE CENTER? LIKE TO PURCHASE ACCESSORIES? IS HERE TO HELP! TOLL FREE: 1(800)252-5722 http://www.jvc.com Remember to retain your Bill of Sale for Warranty Service. Do not attempt to service the product yourself Caution To prevent electrical shock - JVC LT-42X899 | Instructions - Page 67
Notes 67 - JVC LT-42X899 | Instructions - Page 68
JVC Loves the Earth Digital Television Transition Notice: This device contains a digital television tuner, so it should receive digital over the air TV programming, with a suitable antenna, after the end of full-power analog TV broadcasting in the United States on February 17, 2009. Some older
-
 1
1 -
 2
2 -
 3
3 -
 4
4 -
 5
5 -
 6
6 -
 7
7 -
8
-
9
-
10
-
11
-
12
-
13
-
14
-
15
-
16
-
17
-
18
-
19
-
20
-
21
-
22
-
23
-
24
-
25
-
26
-
27
-
28
-
29
-
30
-
31
-
32
-
33
-
34
-
35
-
36
-
37
-
38
-
39
-
40
-
41
-
42
-
43
-
44
-
45
-
46
-
47
-
48
-
49
-
50
-
51
-
52
-
53
-
54
-
55
-
56
-
57
-
58
-
59
-
60
-
61
-
62
-
63
-
64
-
65
-
66
-
67
-
68
 |
 |

LCT2403-001A-A
0508TSH-II-IM
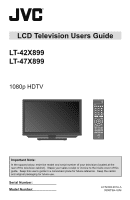
LCD Television Users Guide
1080p HDTV
Important Note:
In the spaces below, enter the model and serial number of your television (located at the
rear of the television cabinet).
Staple your sales receipt or invoice to the inside cover of this
guide.
Keep this user’s guide in a convenient place for future reference.
Keep the carton
and original packaging for future use.
Model Number:
Serial Number:
POWER
MODE
TV
STB
VCR
DVD AUDIO
INPUT
1
2
3
4
5
6
7
8
9
0
TUNE
TV
RETURN +
LIGHT
MUTING
– CH +
– VOL +
RM-C1430
TV
DVR
STATUS
VIDEO
GUIDE
TV/VCR
SUB T.
SUB CH
C.C.
DISPLAY
SOUND
OK
M
E
N
U
F
A
V
O
R
I
T
E
A
S
P
E
C
T
B
A
C
K
V1
V2
V3
V4
V5
SWAP
TWIN
SLEEP
ML/MTS
SELECT
LT-42X899
LT-47X899