Kenmore 4102 Use and Care Guide
Kenmore 4102 - Elite 30 in. Slide-In Electric Range Manual
 |
View all Kenmore 4102 manuals
Add to My Manuals
Save this manual to your list of manuals |
Kenmore 4102 manual content summary:
- Kenmore 4102 | Use and Care Guide - Page 1
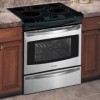
EL IT Electric ange Slide-in models E ® Estufa el6ctrica Modelos deslizables Models, Modelos 790.4102_ = Color number, nOmero de color Sears Roebuck and Co., Hoffman Estates, IL 60179 U.S.A. PIN 318203846 Rev. A (0806) - Kenmore 4102 | Use and Care Guide - Page 2
of Contents Slide-in RangeWarranty 2 IMPORTANT SAFETY INSTRUCTIONS 3=5 Product Record 5 Protection Agreements 6 Range Features 7 Setting 45=46 Notes 47 Sears Service 48 Kenmore Elite Warranty When installed, operated and maintained according to all instructions supplied with the product - Kenmore 4102 | Use and Care Guide - Page 3
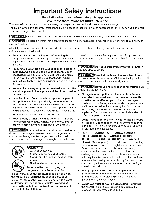
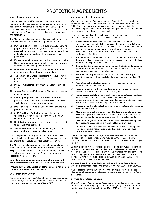
climbing on the merits. Install only per installation instructions provided in range to reach items could be seriously injured. the literature package for this range. • In case of an emergency, know how to disconnect the Never use your appliance for warming up electrical power to the appliance - Kenmore 4102 | Use and Care Guide - Page 4
or aluminum foil may result in a risk of electric shock or fire or short circuit. Glazed cooking utensils are suitable for rangetop service without breaking due to the INSTRUCTIONS FOR USING YOUR OVEN • Use care when opening oven door or warmer drawer (if equipped)--Stand to the side of the range - Kenmore 4102 | Use and Care Guide - Page 5
bulb. IMPORTANT INSTRUCTIONS FOR CLEANING YOUR RANGE • Clean the range regularly to keep instructions for cleaning. SELF-CLEANING OVENS • in the self=cleaning cycle, only clean the parts listed in this Use and Care Guide instructions This Use & Care Manual contains general operating instructions - Kenmore 4102 | Use and Care Guide - Page 6
Kenmore® support from a Sears representative on all products. Think of us as a ,4alking owner's manuab. [] Power surge protection against electrical Sears, sobre cualquiera de nuestros productos. Piense en nosotros como en un - Kenmore 4102 | Use and Care Guide - Page 7
features Warm & Ready Drawer Control & Center Rear Element Control Your Electric Range Features At a Glance Left Front Element Indicator Light & Digital Display Left Rear Element Control & Digital Display Electronic Oven Control with Clock and Kitchen Timer Control & - Kenmore 4102 | Use and Care Guide - Page 8
bottom is not flat (Refer to page 13 for using correct cookware instructions with the cooktop). Figure 2 Note: (White glass cooktops only) Due to salt and pepper shakers, spoon holders or plastic wrappings on top of the range when it is in use. These items could melt or ignite. Potholders - Kenmore 4102 | Use and Care Guide - Page 9
pads is designed to replace conventional control knobs. The available ESEC Window Display Settings The ESEC control will display heat levels ranging from Hi (Figure 1) to Lo (Figure 6) and OFF (Figure 7). The settings between 9.0 (Figure 2) and 3.0 (Figure 3) decrease or increase in increments of - Kenmore 4102 | Use and Care Guide - Page 10
before it has cooled sufficiently, Do not place plastic items such as salt and pepper shakers, spoon holders or plastic wrappings on top of the range when it is in use. These items could melt or ignite. Potholders, towels or wooden spoons could catch fire if placed too close to the - Kenmore 4102 | Use and Care Guide - Page 11
cooled sufficiently. Do not place aluminum foil or plastic items such as salt and pepper shakers, spoon holders or plastic wrappings on top of the range when it is in use. These items could melt or ignite. Potholders, towels or wooden spoons could catch fire if placed too close to the - Kenmore 4102 | Use and Care Guide - Page 12
activate the Cooktop Lockout feature which will lock all surface elements from being accidentally turned ON. This feature will only lock the cooktop. iNSTRUCTiONS To turn the Cooktop Lockout Feature ON: 1. BE SURE ALL surface element controls are set to the OFF position. 2. Press and hold _ until - Kenmore 4102 | Use and Care Guide - Page 13
it may scratch the glass. iii;:¸S':ili ...ii.i...... Before Setting Oven Controls _This range has afan that willturn "ON" and "OFF" by itself to keepthe electronics . Lift up front of rack and slide out. To replace, fit the rack onto the guides on the oven walls. Tilt the front of the rack upward - Kenmore 4102 | Use and Care Guide - Page 14
Before Setting Oven Controls (cont'd) Arranging Oven Racks ALWAYS ARRANGE OVEN RACKS WHEN THE OVEN IS COOL (PRIOR TO OPERATING THE OVEN). Always use oven mitts when the oven is hot. RECOMMENDED RACK POSITIONS FOR BROILING, BAKING & ROASTING Food Rack position @ Broiling meats, chicken or - Kenmore 4102 | Use and Care Guide - Page 15
use of your oven, become familiar with the various features and functions of the oven as described below. Detailed instructions for each feature and function follow later in this Use & Care Guide. AIR GUARD-- Use to activate the Air Guard feature, SLOW COOK-Use to select the Slow Cook FLEX CLEAN - Kenmore 4102 | Use and Care Guide - Page 16
clock has been preset at the factory for the 12 hour operation. When the range is first plugged in, or when the power supply to the range has been interrupted, the timer in the display will flash (See Fig. 1). INSTRUCTIONS To set the clock (example below for 1:30) 1. Press @. "CLO" will appear in - Kenmore 4102 | Use and Care Guide - Page 17
control is left on for more than 11 hours and 59 minutes. The oven can be programmed to override this feature for Continuous Baking. iNSTRUCTiONS To set the control for Continuous Saving features Bake or 12 Hour Energy PRESS DISPLAY 1. Press and hold _ for 7 seconds (Figure1). After 7 seconds - Kenmore 4102 | Use and Care Guide - Page 18
for silent operation and later returned to operating with all the normal sounds and beeps. INSTRUCTIONS PRESS DISPLAY To change control from normal sound operation to silent control operation 1. To tell if your range is set for normal or silent operation press and hold will appear and "DELAY - Kenmore 4102 | Use and Care Guide - Page 19
Fahrenheit or Celsius. The oven has been preset at the factory to display in Fahrenheit. iNSTRUCTiONS PRESS DISPLAY To change display from Fahrenheit to Celsius or Celsius to Fahrenheit 1. To is active. AirGuard will turn on and cannot be manually turned off during the Self-Cleaning cycle. 19 - Kenmore 4102 | Use and Care Guide - Page 20
Preheating is not necessary when roasting or cooking casseroles• The oven can be programmed to preheat at any temperature between 170° F to 550° F. iNSTRUCTiONS PR ESS DISPLAY To set the Preheat temperature for 375°F 1. Arrange the interior oven racks• 2. Press @. "350" and "BAKE" will appear in - Kenmore 4102 | Use and Care Guide - Page 21
. The oven can be programmed to bake at any temperature from 170 ° F to 550 ° F (the sample shown below Js for 350 ° F). INSTRUCTIONS PR ESS DISPLAY To set the Bake Temperature to 375°F 1. Arrange interior oven racks and place food in oven. 2. Press i'B"_'ke, "350" will appear and " - Kenmore 4102 | Use and Care Guide - Page 22
section. Baking Problems and Solutions Chart Baking Problems Causes Corrections • Pan not centered in oven. Cakes not level. Range not level. Foods not done when cooking time is If the water level is uneven, refer to the installation instructions for leveling the appliance. Be sure to allow 2" - Kenmore 4102 | Use and Care Guide - Page 23
and 4. Benefits of Convection Bake: --Multiple rack baking. --Some foods cook faster, saving time and energy. --No special pans or bakeware needed. INSTRUCTIONS To set the oven for Convection Bake and temperature to 375°F 1. Arrange interior oven racks and place food in oven. 2. Press, Bak_' "CONV - Kenmore 4102 | Use and Care Guide - Page 24
quickly strip the cold air away from the meats replacing it with warm air (making a crisp outside - type of searing) sealing in juices for better tasting meats. INSTRUCTIONS PRESS DISPLAY To Set the oven to Convection Roast at 375°F 1. Arrange oven racks, 2. Press _}; "350" will be displayed - Kenmore 4102 | Use and Care Guide - Page 25
10). Below is a list of preparation and cooking tips you should review for best possible results using Slow Cook: Completely thaw all frozen feature. Add any cream or cheese sauces during the last hour of cooking. iNSTRUCTiONS To Program the Oven to begin baking with the Slow Cook feature 1. Place - Kenmore 4102 | Use and Care Guide - Page 26
Bake feature. The automatic timer of the Timed Bake feature will turn the oven OFF after cooking for the desired amount of time you selected. INSTRUCTIONS PR ESS DISPLAY To program the oven to begin baking immediately and to shut off automatically (example: BAKE at 350°F for 30 minutes) 1. Be - Kenmore 4102 | Use and Care Guide - Page 27
Delayed Timed Bake or Delayed Timed Convection Bake 12-24 hours in advance set the control for the 24 hour time of day display mode. INSTRUCTIONS PR ESS DISPLAY To program the oven for a delayed BAKE start time and to shut off automatically (example: baking at 350°F, starting at 5:30 and - Kenmore 4102 | Use and Care Guide - Page 28
to thoroughly heat the oven from top to bottom to give more evenly browned foods. Refer to (Figure 4) for foods to cook in each category. INSTRUCTIONS To set the Food Categories feature (example: for Cakes to cook at 375°F) 1. Arrange interior oven racks and place food in oven• 2. Press G" "CAKES - Kenmore 4102 | Use and Care Guide - Page 29
Setting Oven Controls Using and Setting Meat Probe Checking the internal temperature of your food is the most effective way of insuring that your food has been properly cooked. When cooking meat such as roasts, hams or poultry you can use the meat probe to check the internal temperature without any - Kenmore 4102 | Use and Care Guide - Page 30
cool. 2. Place the prepared food on the desired oven rack position and slide into the oven. 3. Plug the meat probe into the probe receptacle located poisoning organisms may survive." (Source: Safe Food Book, Your Kitchen Guide, USDA Rev. June 1985.) The lowest temperature recommended by the USDA - Kenmore 4102 | Use and Care Guide - Page 31
time. With this information the control can calculate the time when cooking will complete and can then start the Warm & Hold feature automatically. INSTRUCTIONS PRESS DISPLAY To set Warm & Hold 1. Arrange interior oven racks and place food in oven. 2. Press _. "HLd" will appear in the display - Kenmore 4102 | Use and Care Guide - Page 32
and water can cause a grease fire to spread and cause personal injury. INSTRUCTIONS PRESS DISPLAY To set the oven to broil at 500°F. 1. Place the broiler the Searing Grill. Place Searing Grill on top of Broiler Pan and insert for meats and steaks (See Figure 6). Electric Range Broiling - Kenmore 4102 | Use and Care Guide - Page 33
not, skip this step and continue to step 7. Refer to the Timed Bake (complete steps 5-7) / Delayed Start Bake (complete steps 6-10) section for complete instructions. Remember the oven will shut down after using Timed Bake or Delay Start Bake and therefore may only be used once during the Sabbath - Kenmore 4102 | Use and Care Guide - Page 34
a Warm & Hold added setting. This feature will not work with any other function including a Delayed Timed Bake, a Clean Cycle or a Broil setting. INSTRUCTIONS PRESS DISPLAY To Program the Oven to Begin and record a Recipe (example: 375°C) 1. Place the food in the oven. Baking Immediately for - Kenmore 4102 | Use and Care Guide - Page 35
Setting Warmer Drawer Controls Arranging Warmer (Warm & Ready TM) Drawer Rack Positions The rack can be used in 2 ways: • In the upright position to allow low profile food items to be placed both under and on top of the rack (for example, rolls or biscuits on top of the rack and a casserole dish - Kenmore 4102 | Use and Care Guide - Page 36
LO setting and the @ pad is touch again the Proof bread feature and indicator light will be set (see Figure 5 and bread dough preparation instructions on this page). To return to standard Warmer Drawer setting touch Qpad at least once. Note: For best results, preheat the Warmer Drawer before adding - Kenmore 4102 | Use and Care Guide - Page 37
DOOR NOT HAND OVEN DOOR GASKET Note: See additional cleaning information for the oven door in the General Care & Cleaning section. Note: If your range is equipped with a warmer drawer, the warmer drawer cannot be used during a self-clean cycle. Warmer drawer must be turned off before the clean - Kenmore 4102 | Use and Care Guide - Page 38
. Use caution and avoid possible burns when opening the door after the Self-Cleaning cycle has completed. The oven may still be VERY HOT. INSTRUCTIONS PR ESS DISPLAY To set the controls for a 3 hour Self-Cleaning cycle to start immediately and shut off automatically 1. Be sure the clock is - Kenmore 4102 | Use and Care Guide - Page 39
. The automatic timer will turn the oven on and off at the time you select in advance. Be sure to review TO START THE SELF-CLEAN CYCLE for recommended clean times. INSTRUCTIONS PR ESS DISPLAY To set the control for the Self-Cleaning Cycle to start at a delayed time and shut off - Kenmore 4102 | Use and Care Guide - Page 40
not change the Self-Clean cycle temperature or the Broiltemperature. iNSTRUCTiONS To adjust the oven temperature higher 1. Press \B_k_,)for adjustments are permanent and will stay forever in the unit memory unless you manually change it again. Even a power outage will not reset these changes. - Kenmore 4102 | Use and Care Guide - Page 41
Various Parts of Your Range Before cleaning any part of the range, be sure all controls are turned OFF and the range is cool. Remove the rack after every self-clean cycle or when the rack becomes difficult to slide. ...ii.i...... Porcelain Enamel Broiler Pan and Insert, Door Liner, Body Parts - Kenmore 4102 | Use and Care Guide - Page 42
ceramic surface (on the web visit www.sears.com for replacement cooktop cleaner, item number can mark or scratch the cooktop surface. Do not slide anything metal or glass across the cooktop. Do not . Only use cleaning products that have been specifically / designed for ceramic glass cooktop. / - Kenmore 4102 | Use and Care Guide - Page 43
this Use & Care Guide. Hinge lever J Hinge lever hook Hinc support _,.., Lock engaged supports. Keep pulling the bottom of the door toward you while rotating the top of the door toward the range to completely disengage the hinge levers (Figure 2). 4. To clean oven door, follow the instructions - Kenmore 4102 | Use and Care Guide - Page 44
Disconnect appliance from electric _power before cleEalneicntgricaalndSsheorcvkiciHngaztahred lever (See Figure 1). 4. Pull the drawer away from the range. To Replace Warmer (Warm & Ready TM) Drawer: 1. opened. The oven lights may also be manually operated by pressing the _ pad. The oven light bulb - Kenmore 4102 | Use and Care Guide - Page 45
is not complete. Contact your Sears Service Center, installing agent or qualified servicer. Surface element does not heat. Power outage. Check house lights to be sure. Call your local electric company for service. No power to the appliance. Check steps under "Entire range or oven does not operate - Kenmore 4102 | Use and Care Guide - Page 46
and contact Sears or other qualified service agency. Replace or tighten bulb. See "Changing Oven Light" in this Use and Care Guide for instructions. Many parts. It is normal, and the fan may continue to run after the range has been turned "OFF", but may also stop immediately and then turn "ON - Kenmore 4102 | Use and Care Guide - Page 47
NOTES / NOTAS • ...ii.i...... 47 - Kenmore 4102 | Use and Care Guide - Page 48
accessories and owner's manuals that you need to do-it-yourself. For Sears professional installation of home appliances Sears Parts & Repair Service Center 1-800-488-1222 (U.S.A.) 1-800-469-4663 (Canada) www.sears.com www.sears.ca To purchase a protection agreement on a product serviced by Sears
-
 1
1 -
 2
2 -
 3
3 -
 4
4 -
 5
5 -
 6
6 -
 7
7 -
8
-
9
-
10
-
11
-
12
-
13
-
14
-
15
-
16
-
17
-
18
-
19
-
20
-
21
-
22
-
23
-
24
-
25
-
26
-
27
-
28
-
29
-
30
-
31
-
32
-
33
-
34
-
35
-
36
-
37
-
38
-
39
-
40
-
41
-
42
-
43
-
44
-
45
-
46
-
47
-
48
 |
 |
E
L
I
T
E
Electric
ange
Slide-in models
®
Estufa
el6ctrica
Modelos deslizables
Models,
Modelos
790.4102_
=
Color
number,
nOmero de color
Sears
Roebuck
and
Co., Hoffman
Estates,
IL
60179
U.S.A.
PIN
318203846
Rev. A (0806)