Kenmore 6972 Installation Instructions
Kenmore 6972 - 700 7.5 cu. Ft. Capacity Electric Dryer Manual
 |
View all Kenmore 6972 manuals
Add to My Manuals
Save this manual to your list of manuals |
Kenmore 6972 manual content summary:
- Kenmore 6972 | Installation Instructions - Page 1
INSTRUCTIONS 2 Tools and Parts 2 Location Requirements 3 Electrical Requirements 4 Gas Supply Requirements 4 Venting Requirements 5 Plan Vent System 6 Install Vent System 8 Install Leveling Legs 8 Level Dryer 8 Make Gas Connection 9 Connect Vent 9 Complete Installation 9 SERVICE - Kenmore 6972 | Installation Instructions - Page 2
exceed 3 feet. INSTALLATION INSTRUCTIONS Check that you have everything necessary for correct installation. Proper installation is your responsibility. Parts supplied: Remove parts package from dryer drum. Check that all parts were included. 8" or 10" pipe wrench 8" or 10" adjustable wrench (for - Kenmore 6972 | Installation Instructions - Page 3
to support the dryer with a total weight (dryer and load) of 200 Ibs (90.7 kg). The combined weight of a companion appliance should also be considered. • A level floor with a maximum slope of 1" (2.5 cm) under entire dryer. (If slope is greater than 1" [2.5 cm], install Extended Dryer Feet Kit, Part - Kenmore 6972 | Installation Instructions - Page 4
to follow these instructions can result in death dryer. If this information does not agree with the type of gas available, contact your local Sears store or Sears Service Center. L.P. gas conversion: Conversion must be made by a qualified technician. No attempt shall be made to convert the appliance - Kenmore 6972 | Installation Instructions - Page 5
. Do not use a plastic vent. Do not use a metal foim vent. FaUure to follow these instructions can resumt in death or fire. WARNING; To reduce the risk of fire, this dryer MUST BE EXHAUSTED OUTDOORS. 4" (10.2 cm) heavy metal exhaust vent and clamps must be used. DURASAFE TM venting products are - Kenmore 6972 | Installation Instructions - Page 6
problems. Use a heavy metal vent. Do not use plastic or metal foil vent. Rigid metal vent is recommended to prevent crushing and kinking. Flexible metal vent must be fully extended and supported when the dryer Ioca_ dea{ero Failure to follow these instructions can resumt in death, fire, electricam - Kenmore 6972 | Installation Instructions - Page 7
dryer vent to wall vent mismatch): Part Number 26-49901 - Less than 5" (12.7 cm) mismatch Part Number 26-49908 - 5" (12.7 cm) to 18" (45.72 cm) mismatch Part m) Flexible metal 27 ft (8.2 m) 19 ft (5.8 m) 3 Rigid metal 35 ft (10.7 m) 29 ft (8.8 m) Flexible metal 25 ft (7.6 m) 17 ft (5.2 m) 4 - Kenmore 6972 | Installation Instructions - Page 8
. enmt usftitinsideexhaust hoodS. ecurveentoexhaushtoodwith4"(10.2cm)clamp. 5. Placeacartoncornepr ostundeer a Mobile Home Installation Kit. See "Tools and Parts" section for ordering information. Check the levelness of the dryer. Check levelness first side to side, then front - Kenmore 6972 | Installation Instructions - Page 9
the gas pipe. Check to be sure all parts are now installed. If there is an extra part, go back through the steps to see which remaining on the dryer. 8= Read your "Dryer User Instructions." g. Wipe the dryer drum interior thoroughly with a damp cloth to remove any dust. 10. Set the dryer on a full - Kenmore 6972 | Installation Instructions - Page 10
10 - Kenmore 6972 | Installation Instructions - Page 11
DE LA SECADORA Su seguridad y la seguridad de los demas es muy importante. Hemos incluido muchos mensajes importantes de seguridad en este manual yen su electrodomestico. Lea y obedezca siempre todos los mensajes de seguridad= Este sfmbolo le llama la atencion sobre peligros potenciales que pueden - Kenmore 6972 | Installation Instructions - Page 12
Io necesario para una instalaci6n correcta. La instalaci6n adecuada es responsabilidad suya. Llave para tubes de 8"610" Llave de tuercas ajustable de 8" 6 10" (para conexiones de gas) Destornillador de cuchilla plana Llave de tuercas ajustable que se abra a 1" (2,5 cm) o una Ilave de cubo de cabeza - Kenmore 6972 | Installation Instructions - Page 13
reducir la transferencia de ruido. • Para la instalaciTn en cl6set, con una puerta, se requieren aberturas de ventilaciTn minimas en la parte superior e inferior de la puerta. Se aceptan puertas tipo persianas con aberturas de ventilaciTn equivalentes. • Tambien se debe considerar espacio adicional - Kenmore 6972 | Installation Instructions - Page 14
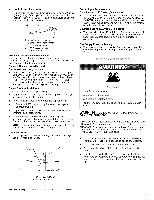
Peiigro de Choque Electrico Conecte aun contacto de pared de cone×ion a tierra de 3 terminales. No quite el termina_ de cone×ion a tierra° No use un adaptador. No use _n cable electrico de e×tensi6n. No seg_ir estas instrucciones puede ocasionar la rnuerte, incendio o choq_e electrico. Se necesita - Kenmore 6972 | Installation Instructions - Page 15
cierre: Debe instalarse una vMvula de cierre individual manual a una distancia de no mas de seis secadora • El tubo de gas que sale por la parte posterior de su secadora tiene una conexi6n de filete macho de entrada del quemador: Elevaciones de hasta los 10.000 pies (3.048 metros): • El dise_o de - Kenmore 6972 | Installation Instructions - Page 16
EXTERIOR. Se debe usar un ducto de escape de metal pesado de 4" (10,2 cm) y abrazaderas. Los productos de ventilaci6n DURASAFE TM son recomendables. Los modificarse hacia el lade derecho, el lade izquierdo o per la parte inferior. P6ngase en contacto con su distribuidor local para hacer convertir - Kenmore 6972 | Installation Instructions - Page 17
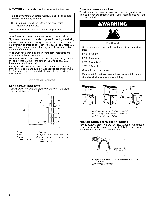
al 1-800-4-MY-HOME ® (1-800-469-4663}. • Instalaci6n en la parte superior: Pieza nQmero 26-49900 Instalaci6n de periscopio (Para usar si hay Los estilos recomendados de capotas de ventilaci6n se ilustran aquf. B (10,2 era) (10,2cm) A. Estilo de capota de ventilacidn tipo persiana B. Estilo de - Kenmore 6972 | Installation Instructions - Page 18
la ilustraci6n. 2. Sujete con firmeza el cuerpo de la secadora (no la parte superior o el panel de la consola). Coloque la secadora cuidadosamente sobre el el ducto de escape a la capota de ventilaci6n con una abrazadera de 4" (10,2 cm). 3. Extienda el ducto de escape a la ubicaci6n de la secadora. - Kenmore 6972 | Installation Instructions - Page 19
no abocinadas. Si se usa tuberia flexible de metal, asegQrese que no hay partes retorcidas. NOTA: Para las conexiones de gas L.R, debe usar un pegamento de la secadora meticulosamente con un pado hQmedo para quitar residuos de polvo. 10. Fije la secadora en un ciclo completo de calor (no el ciclo de - Kenmore 6972 | Installation Instructions - Page 20
the replacement parts, accessories and owner's manuals that you need to do-it-yourself. For Sears professional installation of home appliances and 2004 Sears, Roebuck and Co. TM SM • ® Registered Trademark / Trademark / Service Mark of Sears, Roebuck and Co. ® Marca Reg_. strada / TNMarca de
-
 1
1 -
 2
2 -
 3
3 -
 4
4 -
 5
5 -
 6
6 -
 7
7 -
8
-
9
-
10
-
11
-
12
-
13
-
14
-
15
-
16
-
17
-
18
-
19
-
20
 |
 |

27" (69
CM)
GAS DRYER INSTALLATION INSTRUCTIONS
INSTRUCCIONES DE INSTALACION PARA
LA
SECADORA A GAS DE
27"
(69 CM)
Table of Contents/Jndice
DRYER
SAFETY
................................................
1
INSTALLATION
INSTRUCTIONS
....................
2
Tools and Parts
..............................................
2
Location
Requirements
................................
3
Electrical
Requirements
.................................
4
Gas Supply
Requirements
.............................
4
Venting
Requirements
...................................
5
Plan Vent System
...........................................
6
Install Vent System
........................................
8
Install Leveling Legs
......................................
8
Level Dryer
.....................................................
8
Make Gas Connection
...................................
9
Connect
Vent
.................................................
9
Complete
Installation
.....................................
9
SERVICE
NUMBERS
.................
BACK COVER
SEGURIDAD
DE
LA
SECADORA
..................
11
INSTRUCCIONES
DE INSTALACION
...........
12
Herramientas
y piezas
.................................
12
Requisites
de ubicaci6n
.............................
12
Requisites
el6ctricos
...................................
14
Requisites
del suministro
de gas
................
14
Requisites
de ventilacion
............................
16
Planificaci6n
del sistema
de ventilaci6n
.....
16
Instalaci6n
del sistema de ventilacion
........
18
Instalaci6n
de las patas niveladoras
...........
18
Nivelacion
de la secadora
...........................
19
Conexion
del suministro
de gas
..................
19
Conexion
del ducto de escape
...................
19
Complete
la instalacion
...............................
19
NUMEROS
DE SERVICIO
CONTRAPORTADA
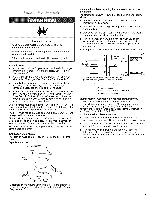
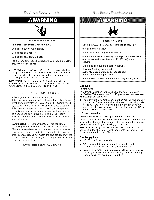
DRYER SAFETY
Your
safety
and
the safety
of others
are very
important.
We
have
provided
many
important
safety
messages
in this
manual
and
on your
appliance.
Always
read
and
obey
all safety
messages.
This is the safety alert symbol.
This symbol alerts you to potential
hazards that can kill or hurt you and others.
All safety messages
will follow the safety alert symbol and either the word "DANGER"
or
"WARNING."
These words mean:
You can be killed or seriously
injured if you don't immediately
follow
instructions.
You can be killed or seriously
injured
if you don't
follow
instructions.
All safety messages
will tell you what the potential
hazard is, tell you how to reduce the chance
of injury, and tell you what can
happen
if the instructions
are not followed.
iMPORTANT
SAFETY
_NSTRUCTIONS
When discarding or storing your old clothes dryer, remove the door.
SAVE THESE
iNSTRUCTiONS
8533587