Kenmore 7997 Use and Care Guide - Page 14
Corners
 |
View all Kenmore 7997 manuals
Add to My Manuals
Save this manual to your list of manuals |
Page 14 highlights
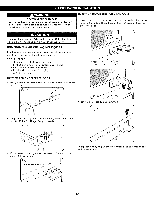
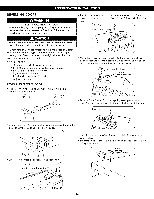
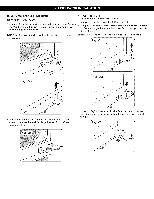
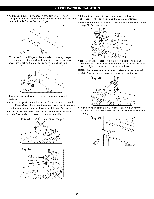
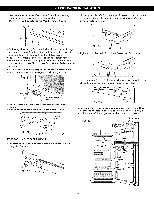
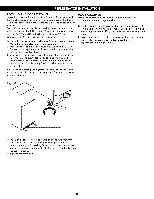
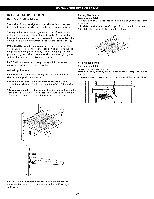
° Remove the outer lower Decorative Screw from housing at area between freezer and refrigerator doors. (You will need this hole for the Middle Hinge Bracket). Fig. 3b ° Place Upper Hinge's Pin in the top of freezer door and line up the Upper Hinge with holes in top of refrigerator. Use the 3 bolts to replace Hinge. © © ° Following illustration, flip the Middle Hinge Bracket (Flange will now be on top) and position on left side of refrigerator and re-attach with two bolts and a Phillips screw. ° Place refrigerator door down over pin on bottom hinge. ° Place washer between refrigerator door and middle hinge and re-attach Hinge Pin to Hinge Bracket with 1/4-in. socket wrench. NOTE: Bracket has been flipped, but Hinge Pin stays in the same orientation with its hexagona! end facing upward. ° Tighten bolts. Force-fit Top Hinge Cover over Top Hinge. Fig. 35 ° Replace cover from left side of refrigerator top onto the right of top to cover the holes. Cover is also force-fitted. Middle Hinge Bracket ° Place Decorative Screw into outer hole on right side of housing. ° Attach cover on the right side. Cover is force-fitted. ___ .... Screw Fig. 32 _i I J REATTACHING FREEZER DOOR ° Put freezer door down over the Hinge Pin on the Middle Hinge Pin Bracket. Fig. 36 After changing doors, make sure that the corners of the Door Gaskets are not folded over. To ensure a good seal, apply a small amount of silicon grease on the corners of gaskets.. Fig. 37 Corners J 15
-
 1
1 -
2
-
3
-
4
-
5
-
6
-
7
-
8
-
 9
9 -
 10
10 -
 11
11 -
 12
12 -
 13
13 -
 14
14 -
 15
15 -
 16
16 -
 17
17 -
 18
18 -
 19
19 -
20
-
21
-
22
-
23
-
24
-
25
-
26
-
27
-
28
-
29
-
30
-
31
-
32
 |
 |